
If you’re planning to get inked, you might be wondering how to shade your tattoo properly. Shading is an essential aspect of tattooing that can make or break the look of your design. A well-shaded tattoo will have depth, dimension, and visual interest, while a poorly shaded one may look flat or unfinished.
This article provides everything you need to know about how to shade a tattoo, from the basics of shading techniques to the tools and supplies you’ll need. Whether you’re a first-time tattoo recipient or a seasoned pro, this guide will provide valuable tips and advice for achieving the perfect shading effect.
What is Tattoo Shading?
Tattoo shading is the process of adding depth and dimension to a tattoo design by using different shades of ink. Tattoo artists use shading techniques to create highlights, shadows, and gradients that give a design a three-dimensional appearance. Shading can also be used to add texture and visual interest to a tattoo.
Types of Shading Techniques
There are several shading techniques that tattoo artists use to create different effects. These techniques include:
Solid Fill Shading
Solid fill shading is the most basic shading technique, where the tattoo artist fills in a section of the design with a solid color. Solid fill shading is often used to create a contrasting background for the main design or to add depth to a particular area of the tattoo.
Whip Shading
Whip shading is a more subtle shading technique that involves using a circular motion to blend different shades of ink together. This technique creates a smoother transition between lighter and darker areas of the tattoo.
Pointillism
Pointillism is a shading technique that involves using tiny dots of ink to create a gradient effect. This technique is often used to create a realistic look by mimicking the way light reflects off of skin.
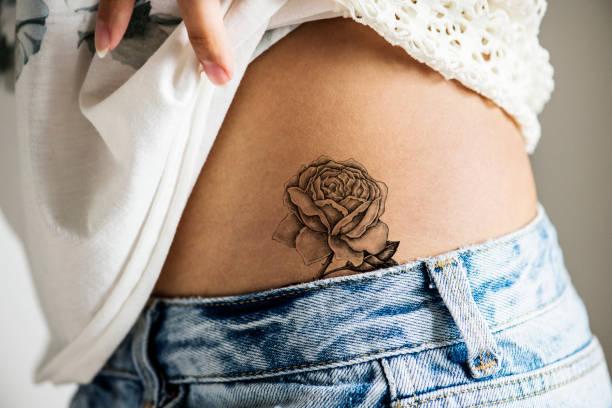
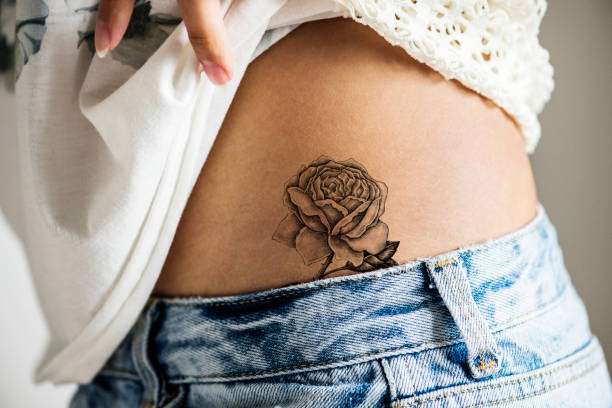
Black and Grey Shading
Black and grey shading is a popular shading technique that involves using different shades of black and grey ink to create a monochromatic tattoo design. This technique is often used for portrait tattoos or designs with a more minimalist aesthetic.
Tools and Supplies Needed for Tattoo Shading
- Tattoo Machine: A tattoo machine is essential for adding ink to the skin. There are several types of tattoo machines available, including rotary, coil, and pneumatic machines.
- Needles: Different types of needles are used for different parts of the tattooing process. For shading, a magnum or curved magnum needle is typically used.
- Ink: High-quality tattoo ink is essential for achieving the best results. Make sure to choose ink that is safe and approved by your tattoo artist.
- Gloves: Disposable gloves should be worn during the entire tattooing process to prevent cross-contamination.
- Paper Towels: Paper towels are used to clean the skin and wipe away excess ink during the tattooing process.
- Stencil Transfer Paper: Stencil transfer paper is used to transfer the tattoo design onto the skin before tattooing begins.
How to Shade a Tattoo

Prepare Your Work Area: Ensure that your tattoo workspace is clean, sterile, and well-organized. Use disposable barriers, gloves, and sterilize all equipment, including the tattoo machine and needles.
Select the Shading Needles: Choose the appropriate shading needles for your tattoo design. Magnum needles are commonly used for shading due to their ability to cover larger areas.
Set Up the Tattoo Machine: Load the tattoo machine with the selected shading needles. Adjust the machine settings, including needle depth and speed, to achieve the desired shading effect. Test the machine on a practice surface to ensure it’s working correctly.
Design and Stencil: Apply a stencil to the skin if you’re working from a pre-drawn design. The stencil provides a guideline for shading. If you’re freehanding, use a skin marker to lightly outline the shading areas.
Choose the Tattoo Ink: Select the tattoo ink colors you need for shading. Typically, black and various shades of gray are used for shading. Dilute the ink as needed to achieve different shades of gray.
Begin Shading: Start shading by applying the tattoo machine to the skin’s surface in a slow, controlled, and methodical manner. Begin with lighter areas and gradually work toward darker sections, maintaining consistent pressure.
Adjust Needle Angles: To create smooth transitions and gradients, adjust the needle angle as you work. Tilting the needle slightly can help you achieve different levels of shading intensity and depth.
Blend and Feather: Use a gentle, feathering motion to blend the shading into the surrounding areas. This technique creates a seamless transition between the shaded and unshaded parts of the tattoo.
Maintain Ink Supply: Regularly dip the shading needles into the ink to ensure a steady flow of ink during the shading process. This prevents uneven shading and ensures a consistent result.
Repeat and Fine-Tune: Depending on the complexity and size of the tattoo, you may need to repeat the shading process multiple times to achieve the desired depth and contrast. Pay close attention to detail, and make any necessary adjustments to achieve the desired shading effect.
Advices for Shading Your Tattoo
- Choose an experienced tattoo artist who specializes in shading techniques.
- Prioritize aftercare to ensure that your tattoo heals properly and retains its shading over time.
- Trust your tattoo artist’s expertise when it comes to choosing the right colors and shading techniques for your design.
- Be patient and take breaks if needed during the tattooing process to avoid discomfort or fatigue.
FAQs
- Is tattoo shading painful? Tattoo shading can be uncomfortable, but the level of pain varies depending on the individual’s pain tolerance and the location of the tattoo.
- How long does it take to shade a tattoo? The time it takes to shade a tattoo depends on the size and complexity of the design. A simple shading job may only take a few minutes, while a more intricate design could take several hours or multiple sessions.
- Can I change the shading on my tattoo after it’s already been done? While it is possible to touch up or re-shade a tattoo that has already been done, it’s important to wait until the tattoo is fully healed before making any changes. Consult with your tattoo artist about any desired changes to ensure the best results.
- Will my tattoo fade over time with shading? All tattoos fade over time, but proper aftercare can help preserve the shading and color of your tattoo for longer. Avoid excessive sun exposure and follow your tattoo artist’s aftercare instructions carefully.
- What should I do if I’m unhappy with the shading on my tattoo? If you’re unhappy with the shading on your tattoo, talk to your tattoo artist about possible touch-ups or corrections. Keep in mind that some slight unevenness or imperfections in shading can be normal and add character to the design.
- Can I shade my own tattoo at home? Attempting to shade a tattoo at home without proper training and equipment is not recommended. Shading a tattoo requires skill and experience to avoid damaging the skin or creating an unsatisfactory result.
Final Takeaway
Shading is an essential aspect of tattooing that helps create depth and dimension in a design. Whether you prefer solid fill shading, whip shading, pointillism, or black and grey shading, choosing an experienced tattoo artist who specializes in shading techniques is key to achieving the best results.
By following proper aftercare instructions and being patient during the tattooing process, you can help ensure that your tattoo retains its shading and looks great for years to come.

