Looking for a fresh new hairstyle? Look no further! Lemonade braids are an ideal choice if you want a head-turning look. Check out these gorgeous goddess-like braids and see if you feel inspired to embrace this trend. Don’t wait any longer—scroll down to explore the 26 stunning braid hairstyles we’ve curated in the article below!
LEMONADE BRAID UPDO AND HALF-UPDO
Allowing your braider to experiment with your braiding pattern can create thick braids with eye-catching gaps, adding to the overall aesthetic. Braids that flow in different directions can easily transition into a wrapped bun, resulting in a stunning Lemonade bun look. You don’t need long hair for this style—just a bun donut and coordinating extensions will work perfectly!
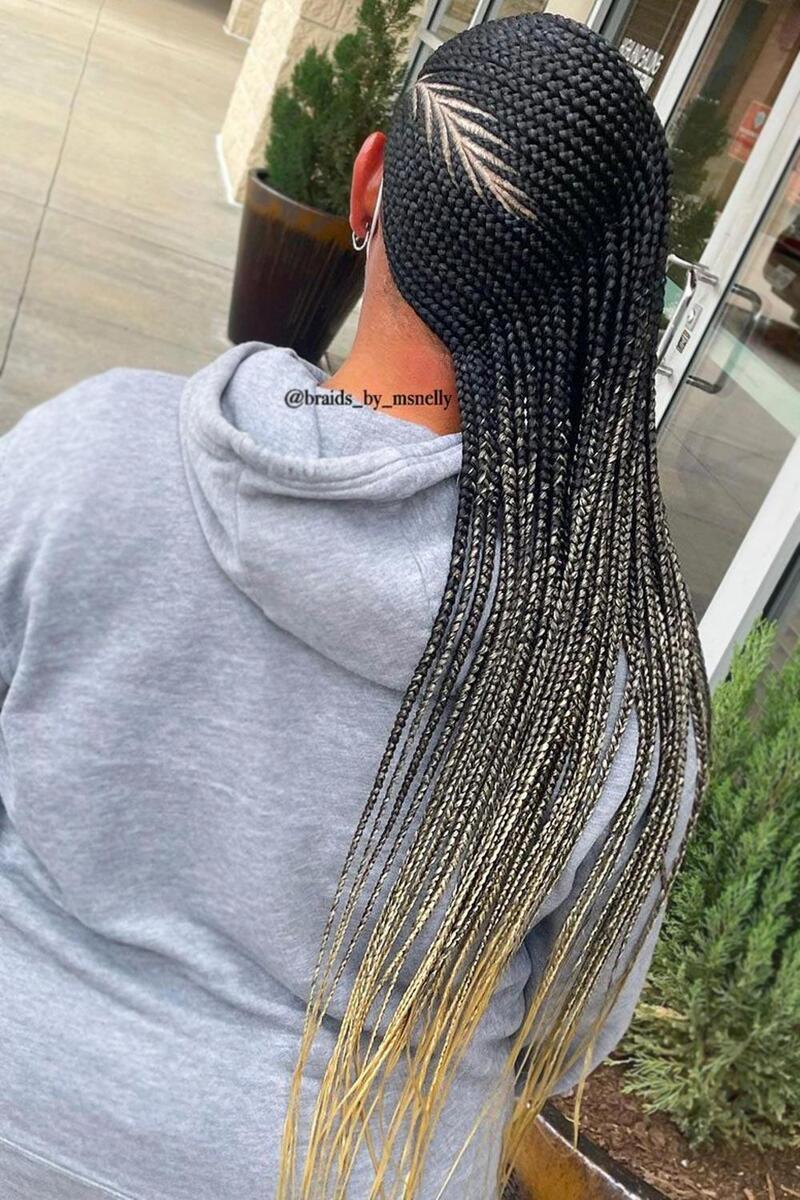
JUMBO LEMONADE BRAIDS INTO PONYTAIL
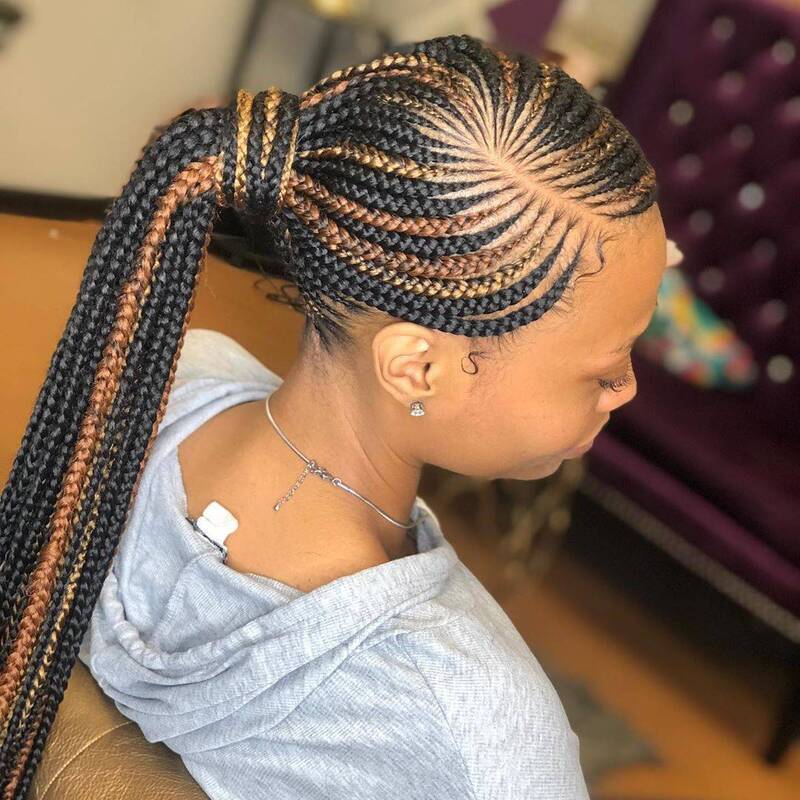
Blending styles results in a truly unique look, whether it’s in makeup or hairstyles. This adventurous girl honors her heritage and natural texture by mixing trends for a one-of-a-kind appearance. Blonde extensions elevate her jumbo braids, while Fulani side braids add an ethnic flair, resulting in impressively thick strands.
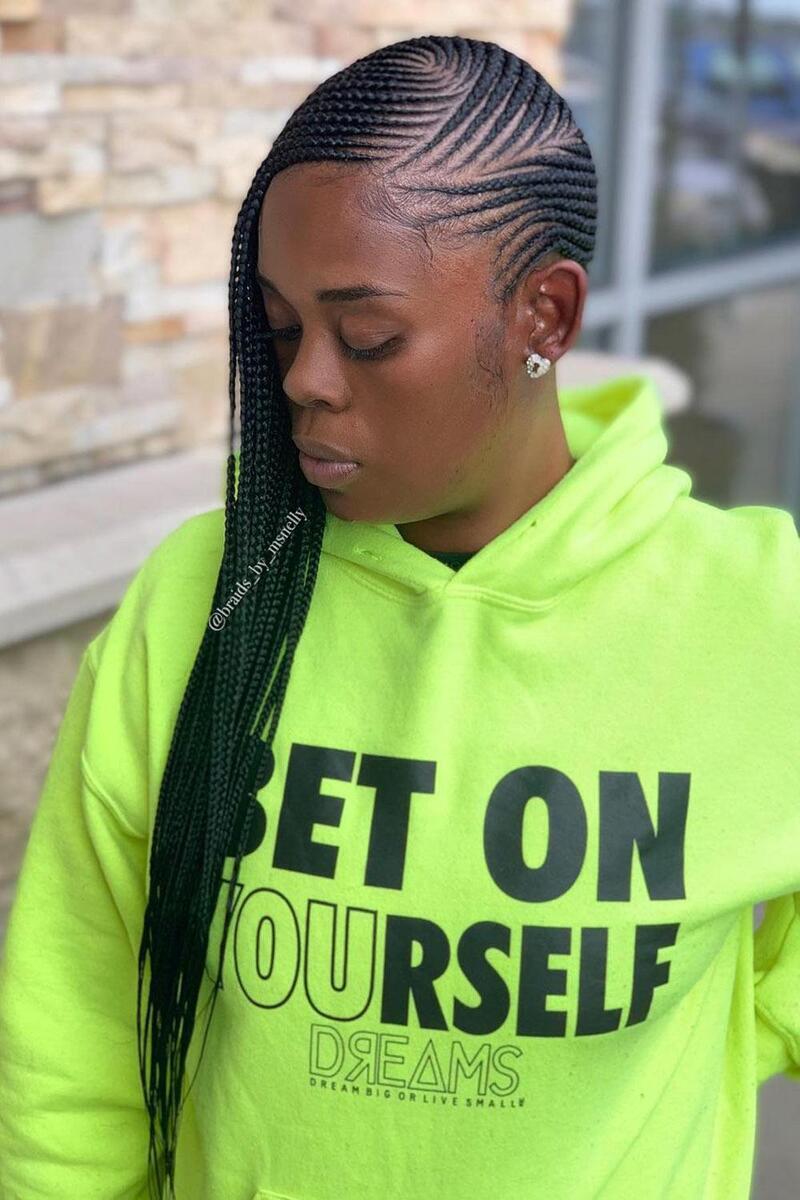
PONYTAIL LEMONADE BRAIDS
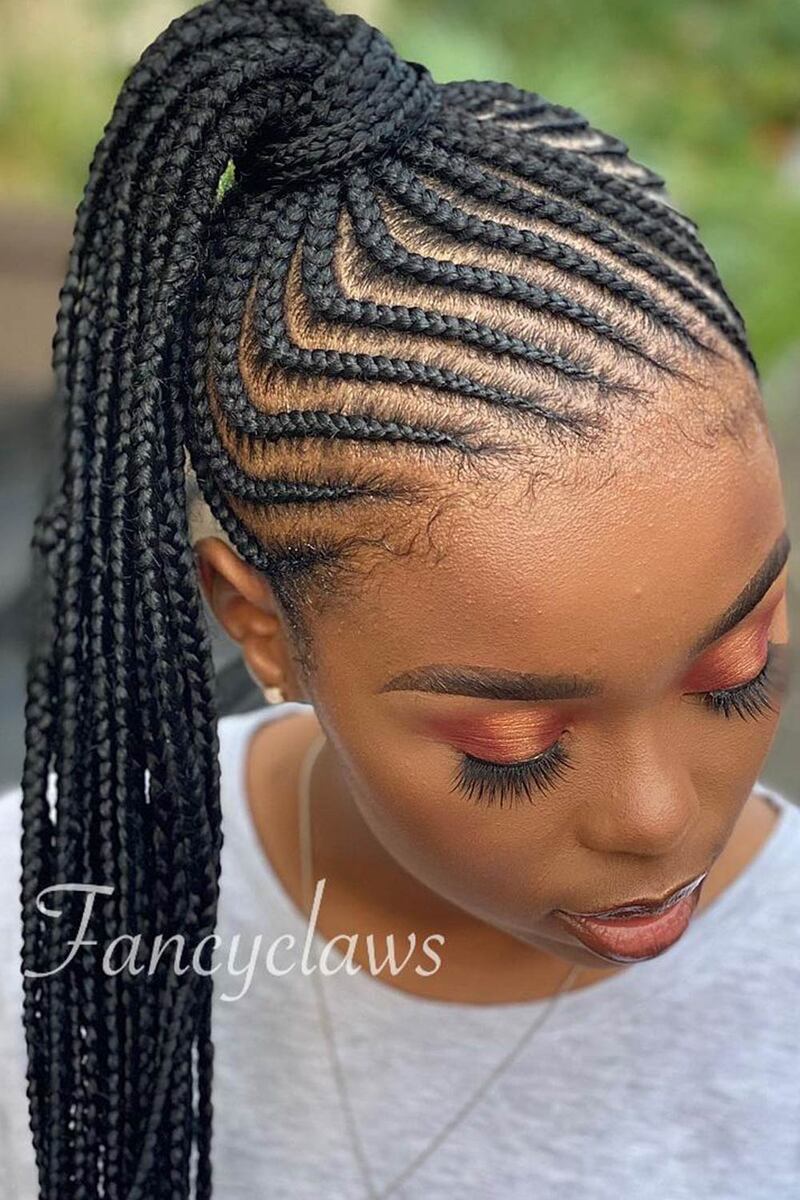
This textured ponytail paired with Fulani side braids is absolutely captivating! It beautifully combines cultural elements with a vibrant personality and provides protective benefits. The unique thick braids create volume and flair when styled high, while the concealed elastic adds an ingenious detail.
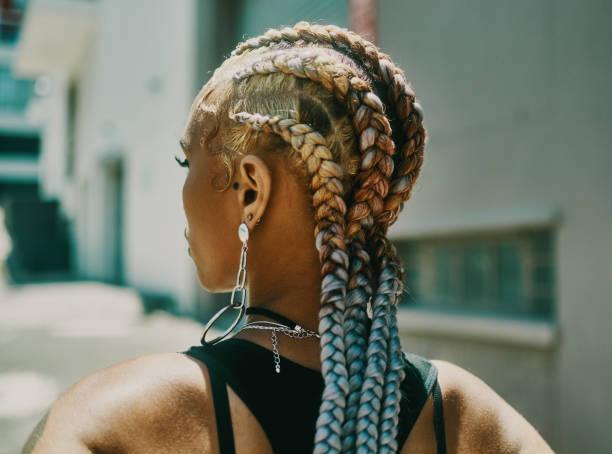
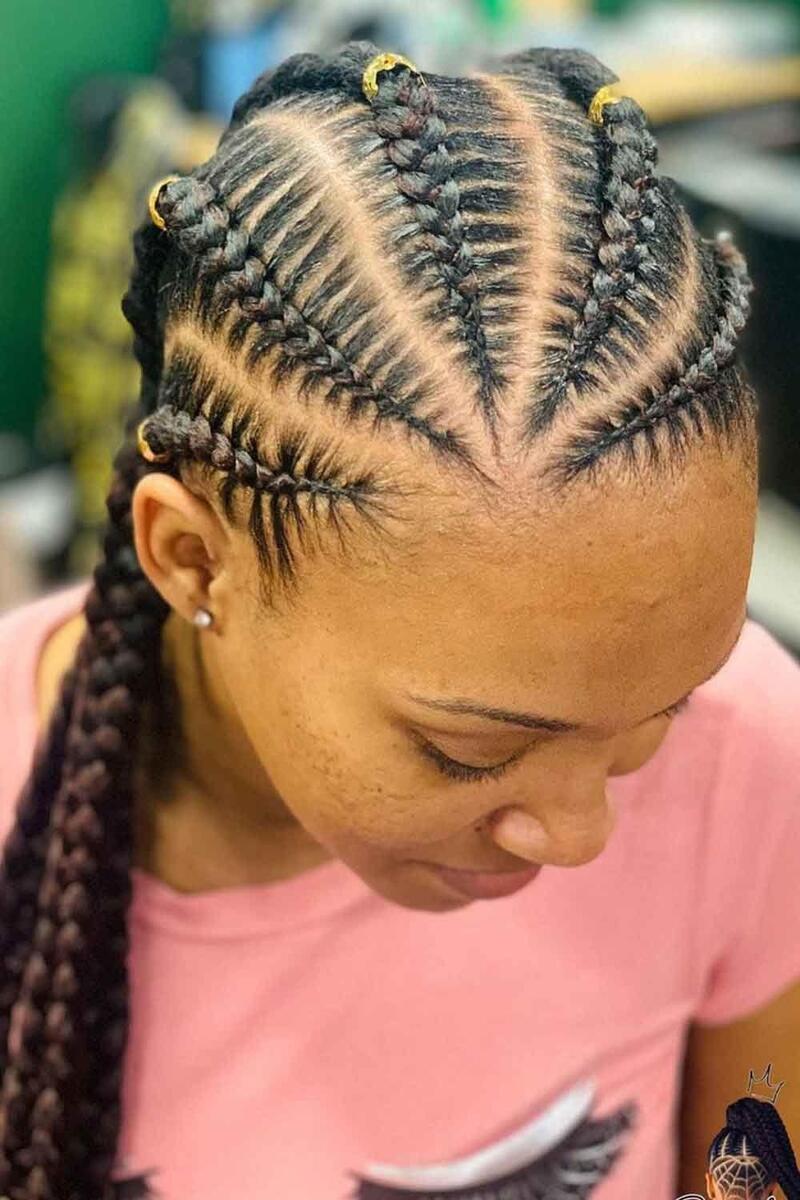
LEMONADE BRAIDS WITH ACCESSORIES
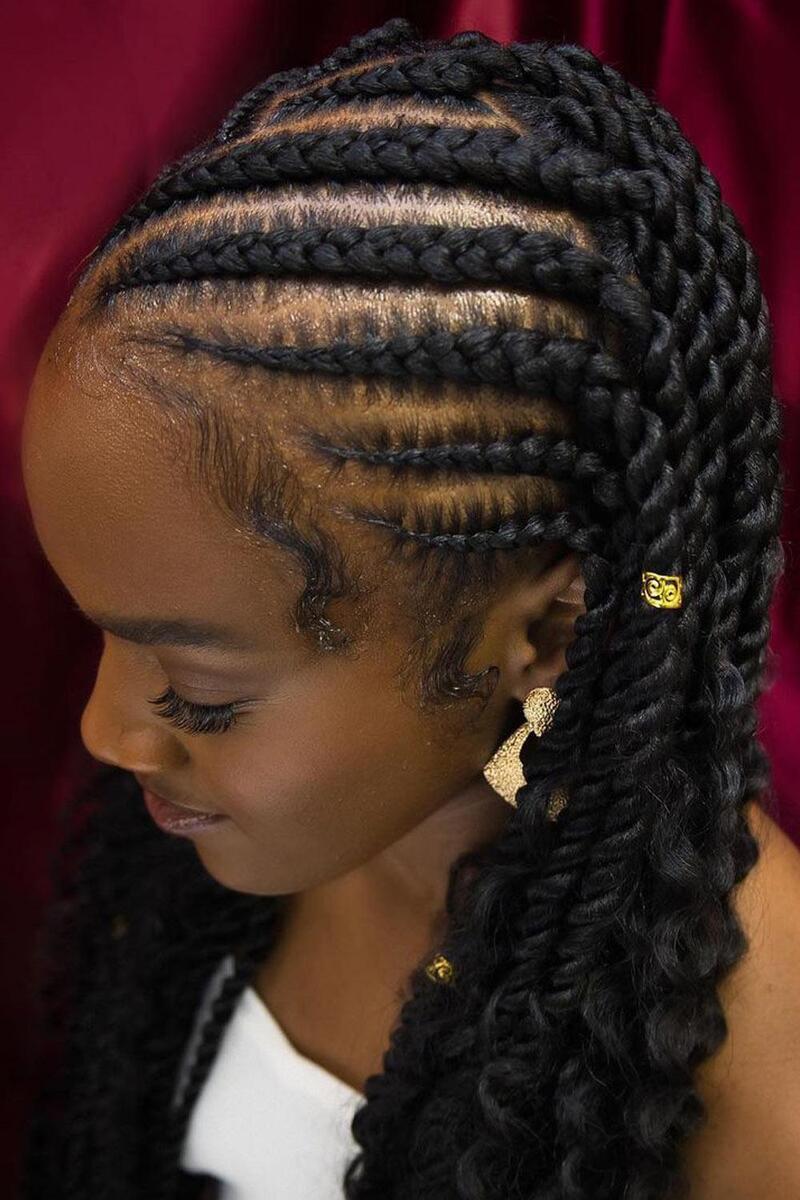
Effortlessly elevate your hairstyle with accessories such as hair ties, beads, or clips for a charming and playful look. When incorporating beads, opt for lightweight options and avoid tight braiding to minimize scalp tension and discomfort, particularly with synthetic locks. Cornrows, made famous by Queen Bey, have deep roots in African ethnic cultures.
LEMONADE BRAIDS WITH CUFFS
Looking to add some flair to your black hairstyle braids? Consider incorporating cuffs! They provide that extra touch of elegance to your Beyoncé-inspired braids, acting like jewelry for your hair!
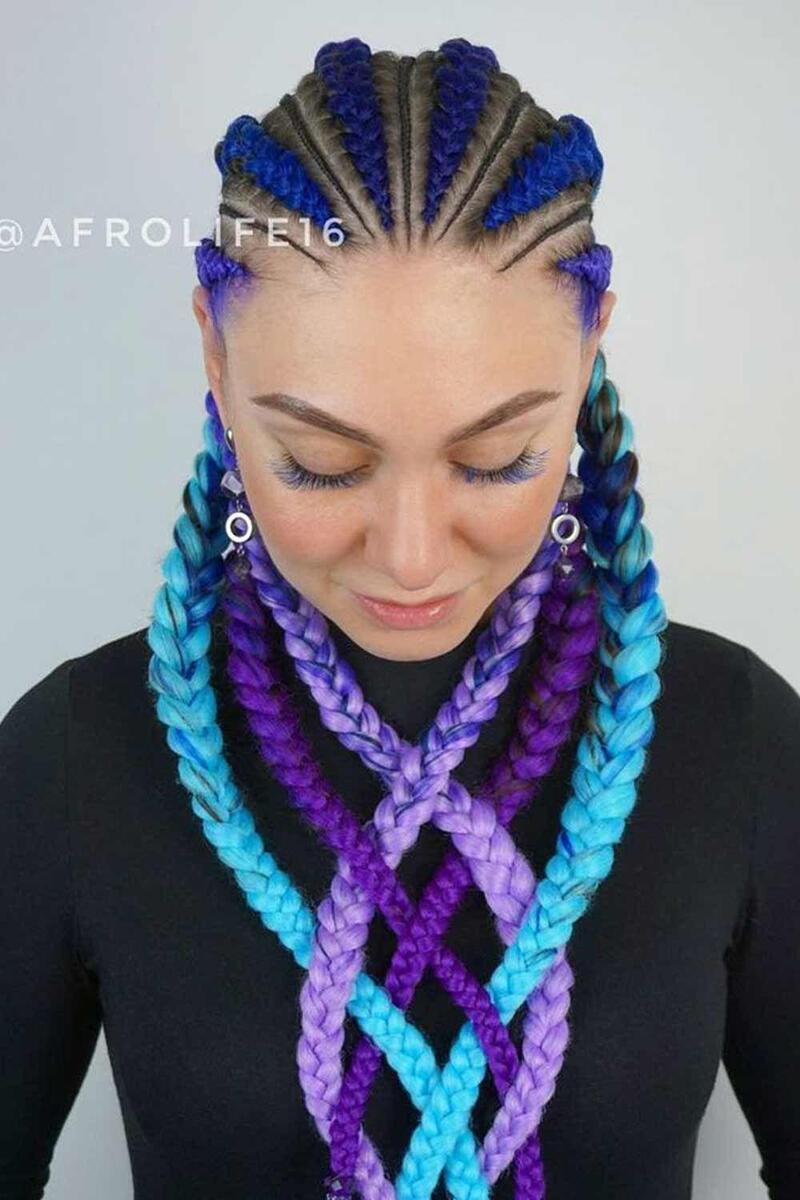
LEMONADE BRAIDS WITH COLOR ACCENTS
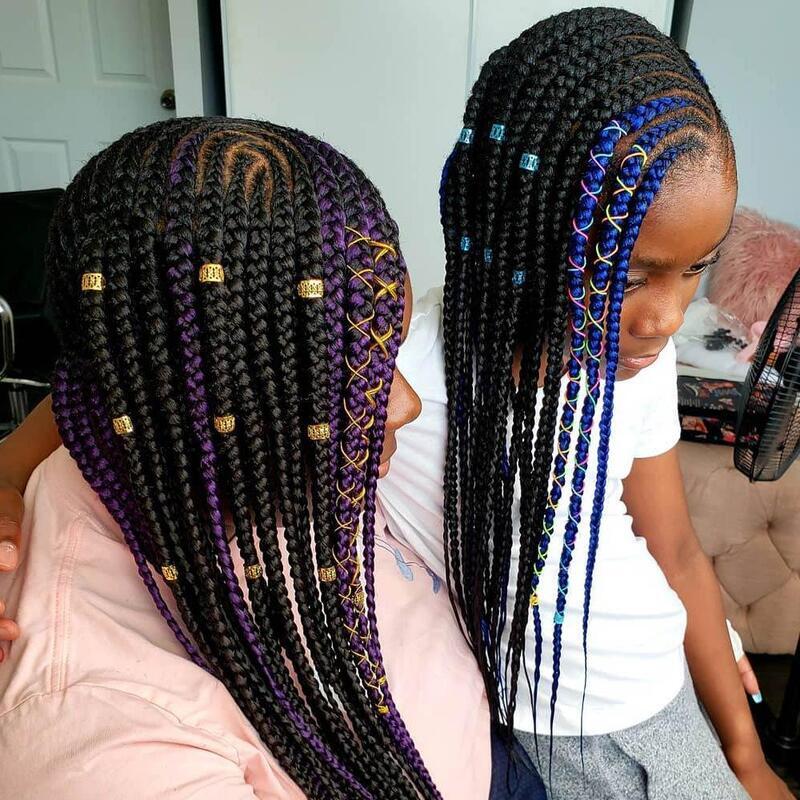
Lemonade braids are famous for making a bold statement in natural hairstyles. Their unique appearance serves as a perfect canvas for creativity. By adding extensions, you can introduce colorful strands for highlights, ombre, balayage, or even a full-color effect, giving you the freedom to customize your look. Whether you choose to place colors at the crown, tips, or within specific braids, the choice is entirely yours!
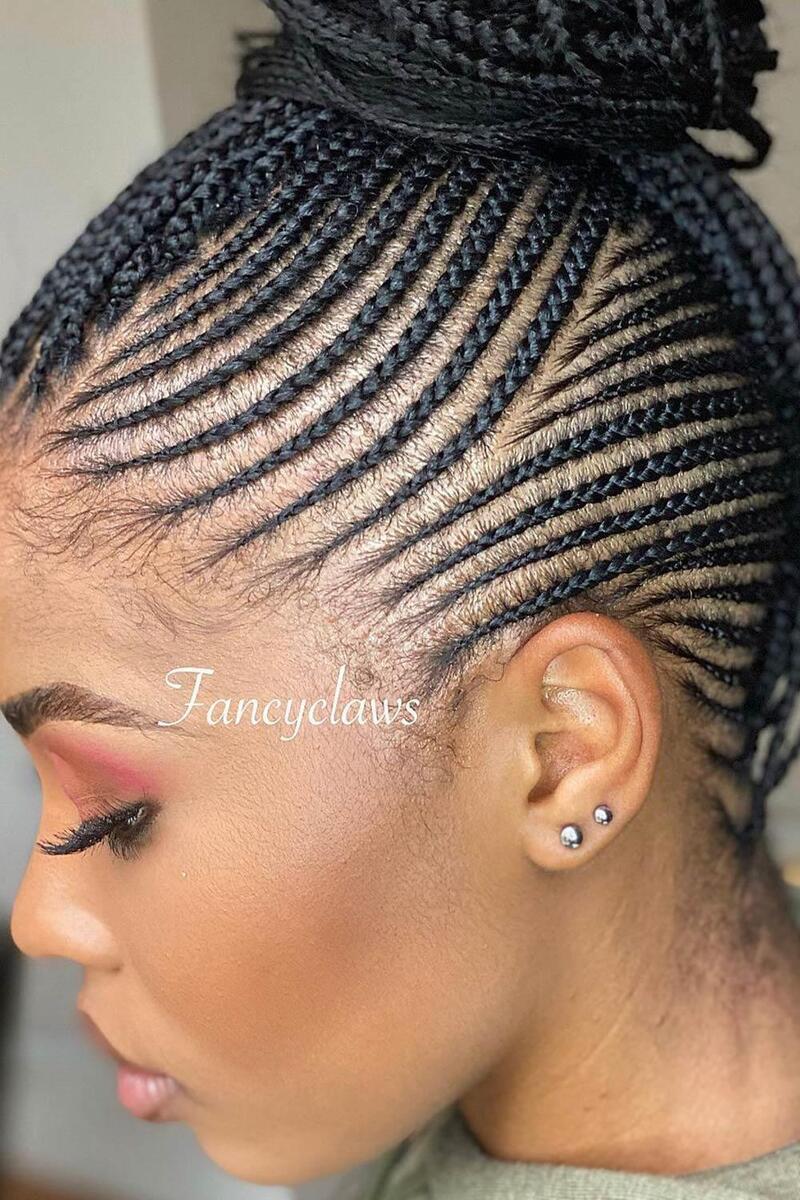
LEMONADE OMBRE
Stitch braids are essential for anyone who appreciates immaculate styles. The sleek appearance, enhanced by light-colored extensions starting from the roots, adds a distinctive touch and elevates the precision of the braids.
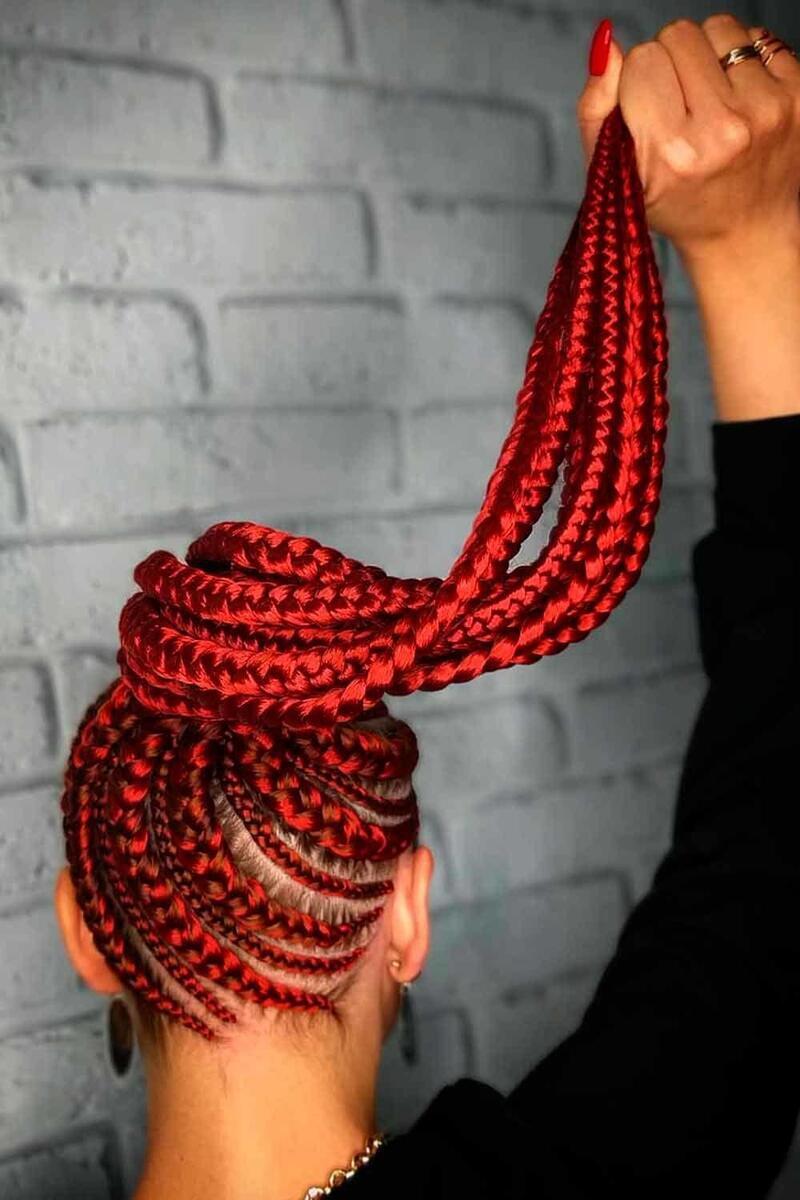
CHERRY-RED ON LEMONADE BRAIDS
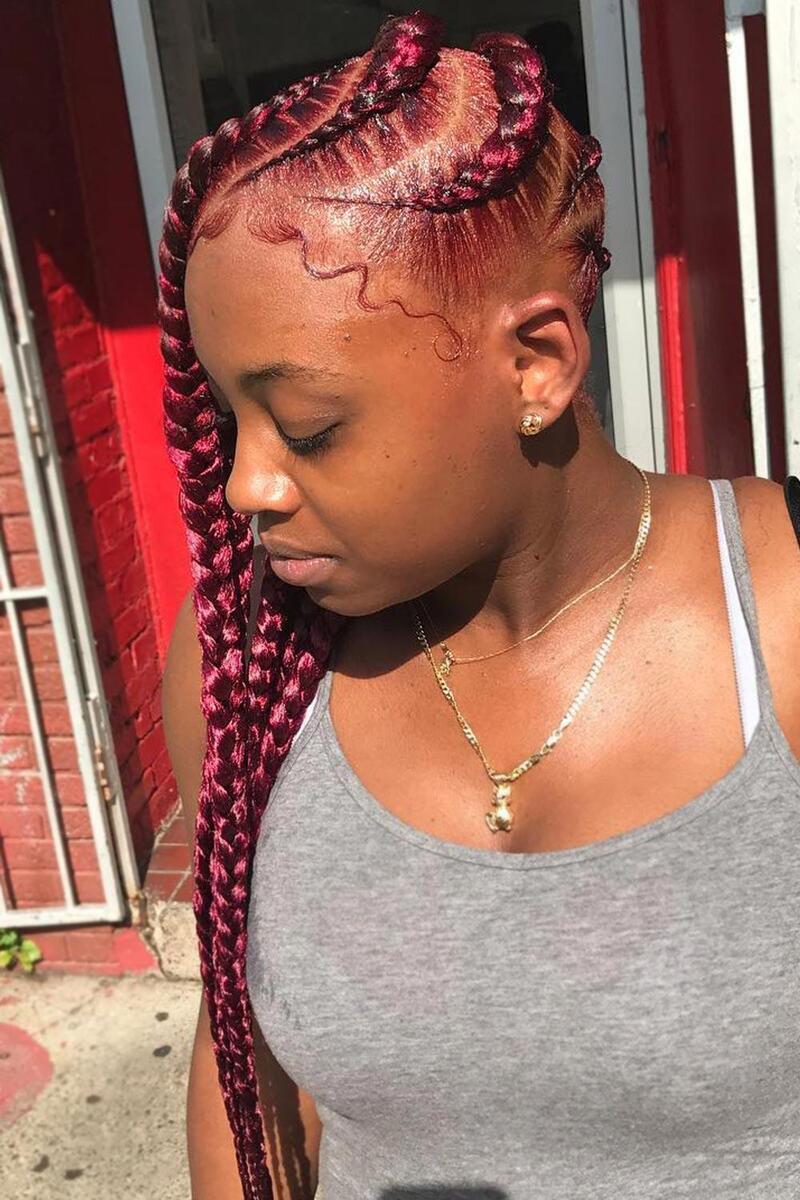
These cherry-red Lemonade braids are ideal for anyone looking to infuse some drama into their scalp braids. The vibrant hues beautifully highlight the braid pattern, and this deep red is irresistibly sweet. Whether you choose small Lemonade braids or a thicker braided style, the color is what makes this look truly stand out.
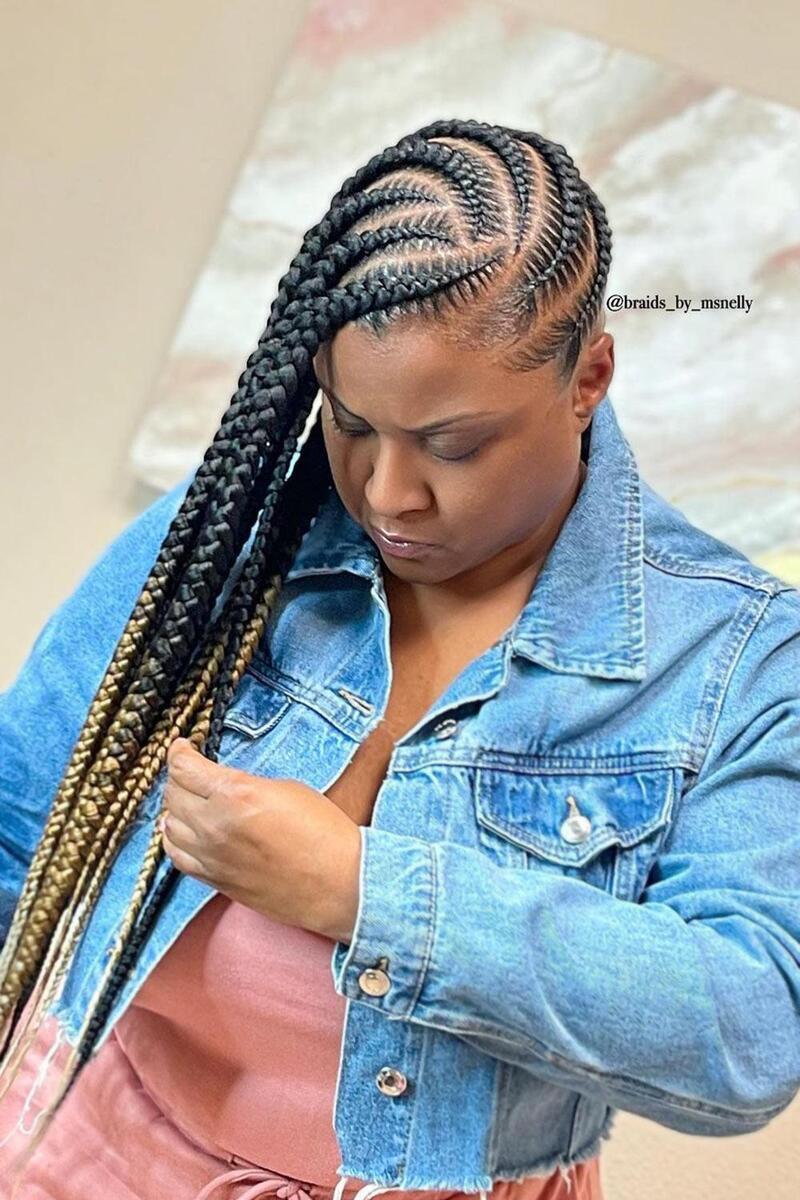
BRIGHT SIDE BRAIDS WITH BLONDE HAIR
Highlight your side braids with blonde hair! By leaving a bit of root outgrowth, your stunning braids will gain dimension and visual interest. The larger the braid, the bolder the blonde!
TINY COBALT BRAIDS
Embrace color with Lemonade braids! Elevate the cornrow braid trend with a striking cosmic cobalt blue. Make a bold statement and truly stand out!
BURGUNDY LEMONADE BRAIDS STYLES
Lemonade braids defy limitations, allowing you to experiment as much as you desire. Whether it’s the shape, density, pattern, or color of your braids, the possibilities are endless. Remember that sultry reddish-burgundy shade Rihanna once rocked? Now, just say these three words to achieve perfection: burgundy lemonade braids.
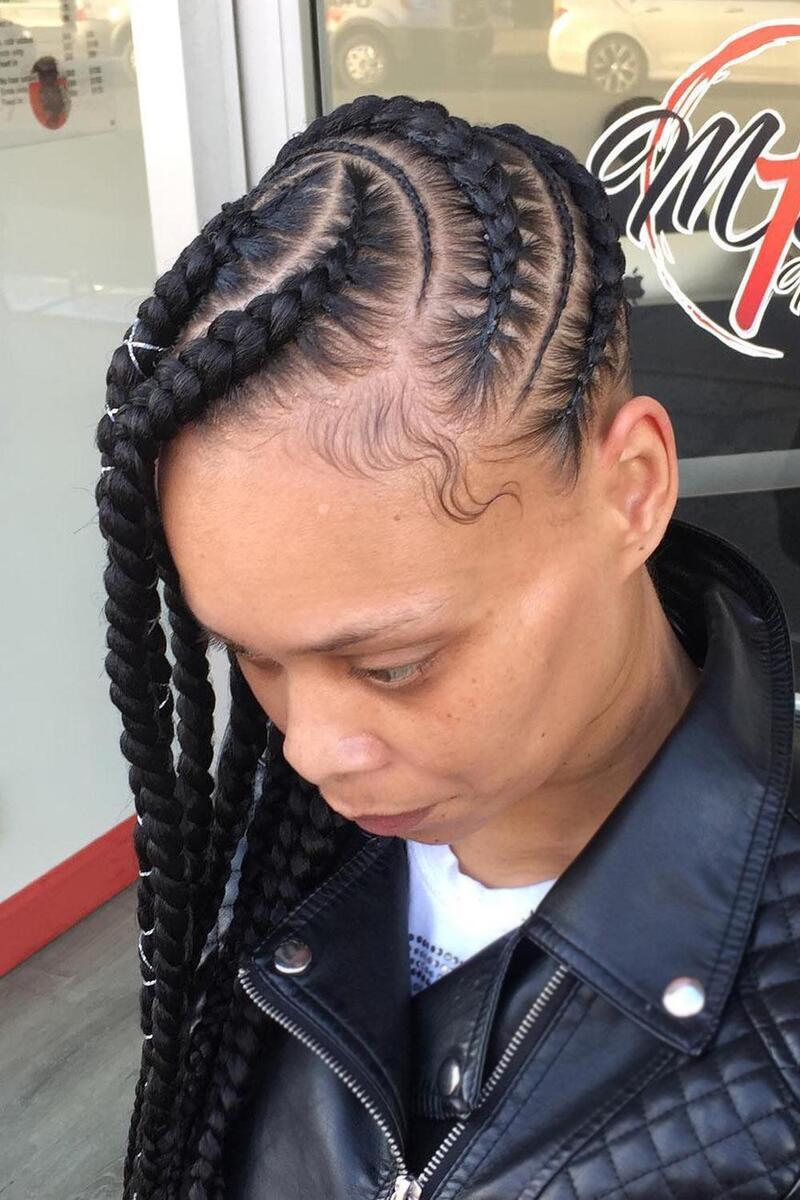
FULANI-INSPIRED STYLE

Another reason to love Lemonade braids is their versatility. Each individual can customize their look, such as incorporating Fulani braids for an ethnic flair. These braids feature a central cornrow with cascading cornrows on the sides. Ask your braider to add a few braids in the opposite direction for a unique twist on the style.
ZIG-ZAG LEMONADE BRAIDS
These artful braids are definitely worth a second glance! A unique zig-zag braid pattern is totally achievable, right? Why not embrace the fun of a large Lemonade braids style that’s just as enjoyable to look at as it is to touch? This braided look is both sporty and chic.
REVERSE FOUR BRAIDS
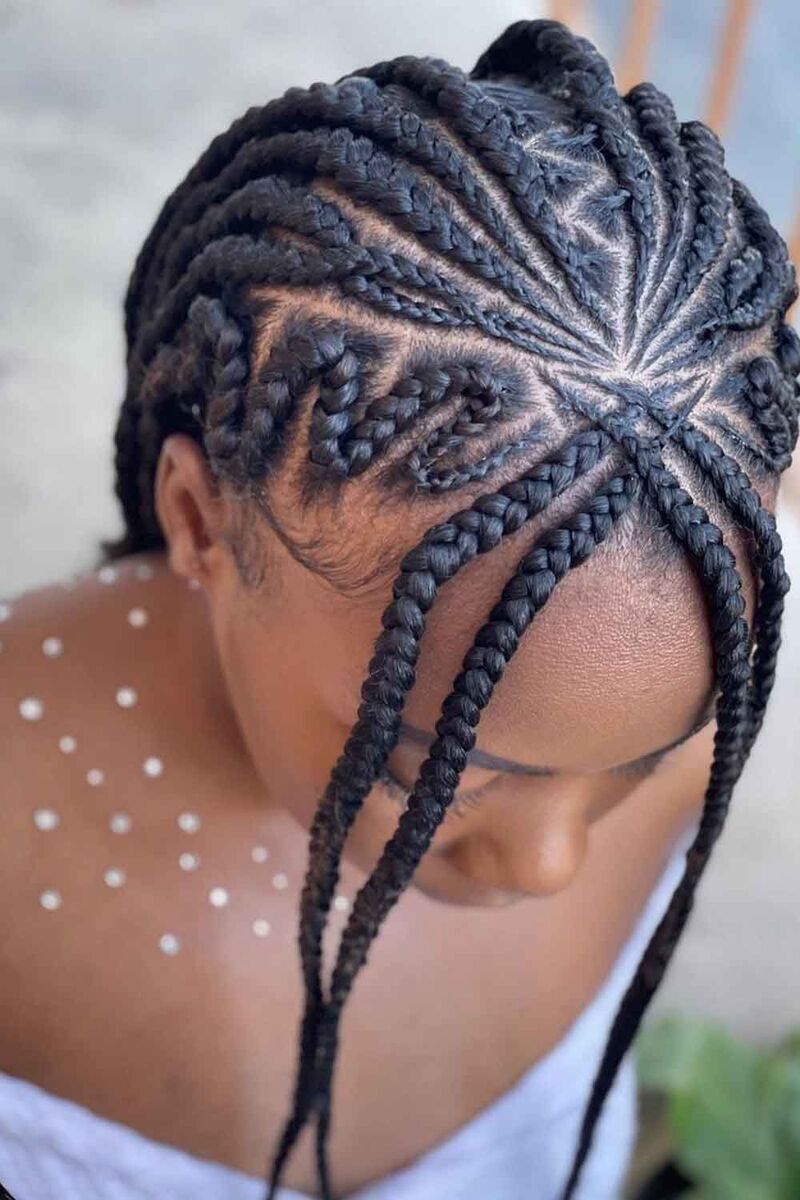
Fortunately for all the natural-haired queens, Lemonade braids invite experimentation. They serve as a timeless canvas for your imagination. For instance, you can see how the classic pattern transforms with side braids that stand out in the crowd.
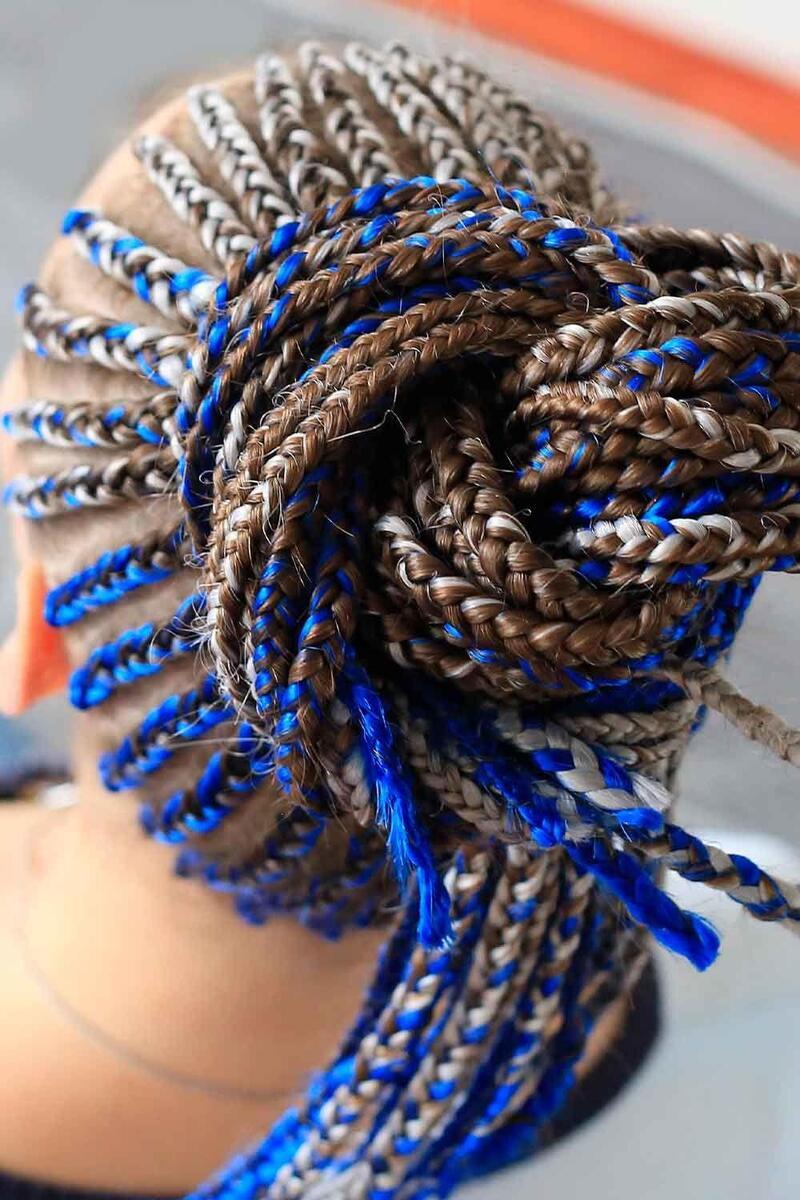
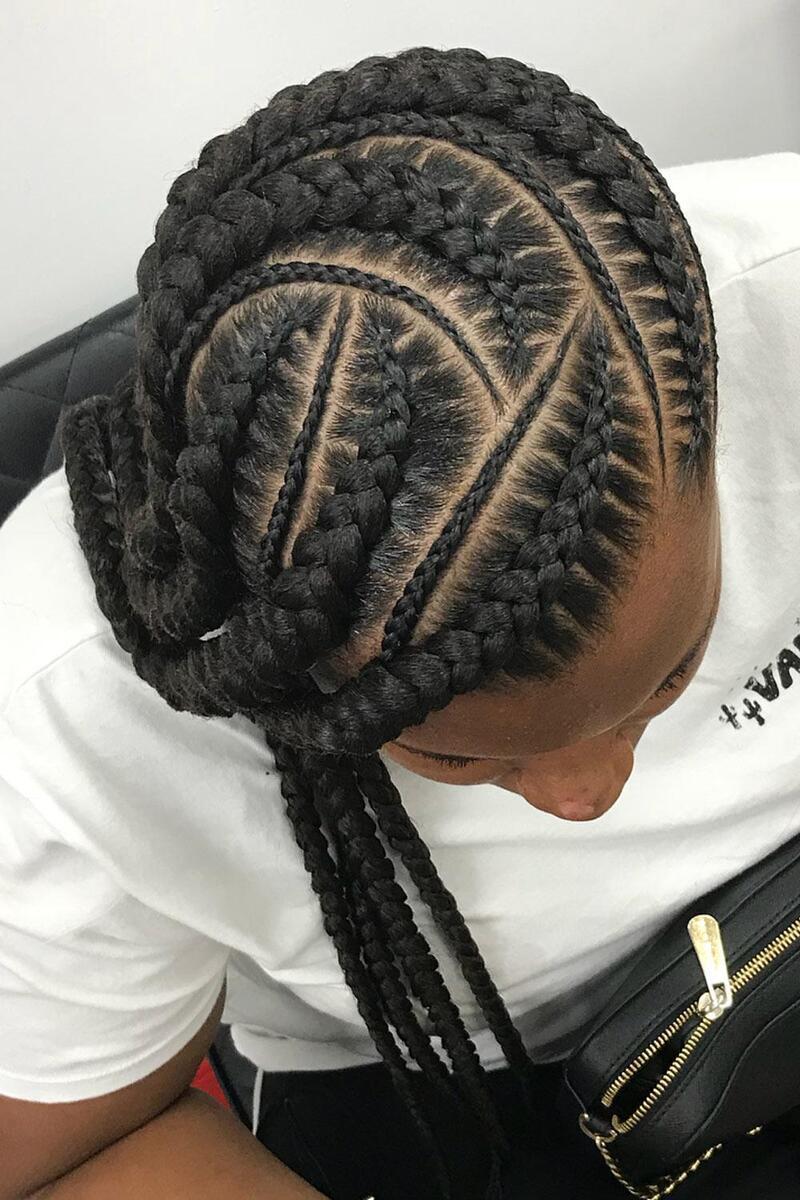
WHEEL-PATTERNED JUMBO LEMONADE BRAIDS
These jumbo Lemonade braids are undeniably unstoppable! You’ll feel like a goddess rocking these bold braids, which are certainly not for the faint of heart. Add adornments or style the edges in a wavy shape for a fierce take on cornrows. Have your stylist wrap and wrap them in a wheel pattern for a look that’s dizzyingly beautiful!
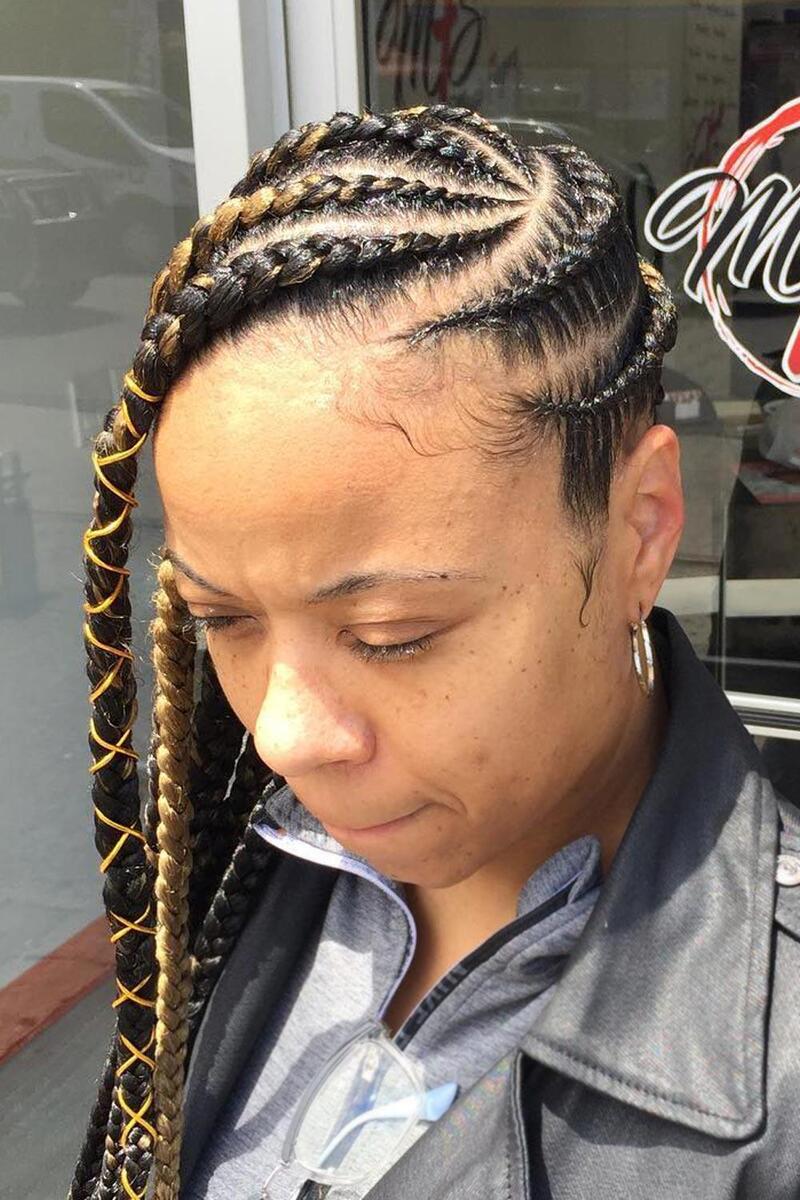
STITCH LEMONADE BRAIDS WITH HAIR TIES
If colorful hair ties aren’t your thing, what else can add a funky vibe to your braided masterpiece? Stitch braids are known for their precision, sharpness, and well-defined shape, and adding a splash of color can make the clean look feel even more organic.
LONG LEMONADE BRAIDS
These braids are long, thick, and beautifully defined. If you want to create a bold braided hairstyle, be sure to replicate this look. The thicker the braids, the more voluminous your overall appearance. If you have a round face and want to create some balance, big and full braids are exactly what you need!
JUMBO LEMONADES
While retaining the essence of classic Lemonade braids, Jumbo braids feature thicker and larger strands. Like other variations, this style offers flexibility for personalization. Want to add a fresh touch to your locks? Introducing a pop of color can be truly transformative.
JUMBO AND MICRO WHEEL-PATTERNED BRAIDS

This is yet another dramatic and stylish way to tame those kinks and curls into tight, curvy wheel-patterned braids. If you want your hairstyle to exude modernity, this pattern will be your ticket to the spotlight. Just be sure to remind your braider not to make them too tight!
BIG JUMBO-LEMONADE BRAIDS

Not only are these amazing braids large in size, but they also make a striking visual impact! With such a head-turning hairstyle, there’s no need for bright makeup or revealing outfits; these Lemonade braids are sure to draw all the attention.
THICK AND THIN BRAIDS COMBO
Not sure whether to rock big Lemonade braids or narrow ones? The solution is simple: try them both! This combination of thick and thin braids provides a unique twist on the classic style. They wrap around your head in an intricate wheel pattern that frames your face while keeping things cool.
MICRO LEMONADE BRAIDS
If you prefer to keep things simple yet significant, a detailed look with micro braids will be your go-to choice. While this type of Lemonade braid takes more time than classic cornrows or box braids, it offers a stunning accent with its tiny, tight braids and exceptional styling flexibility. You can wear micro Lemonade braids as they are, or transform some into beautiful braided details like a crown braid or floral braid for special occasions.
THIN LEMONADE BRAIDS

How about an idea that takes a different approach? Dozens of tiny braids create a refined look, as if your hair has been embroidered by the gods of fashion. If you want to turn heads with an irresistible hair texture, don’t miss out on this stunning style.
CLASSIC LONG LEMONADE BRAIDS
When your hair is super long, it’s essential to choose the right density and shape for your braids. Ultimately, your hair should complement you, not overpower your scalp. Nowadays, women enjoy experimenting with various braiding patterns, opting for zig-zag, wave-like, and ethnic-inspired designs.
PULLED BACK

Before you rock this look, you may need to sacrifice certain hairstyles, like high ponytails and other updos. If you want the hair braided closely to your scalp for that sleek, back-swept appearance, the braids will lie tightly at the roots and only loosen at the nape. However, you can still flaunt various low ponytails and updos, especially when accessorized with scarves.
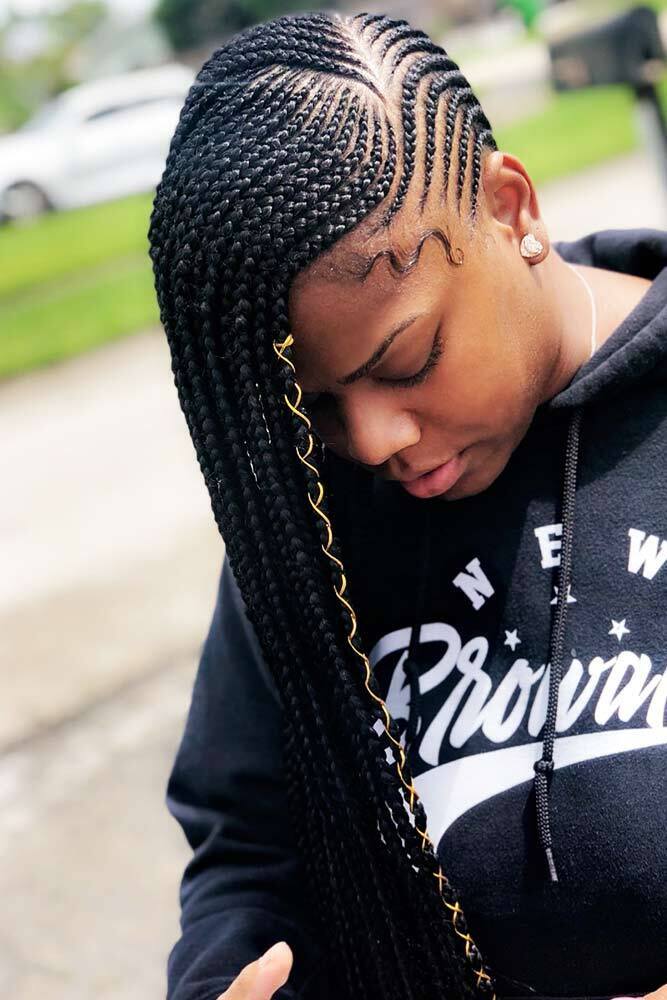
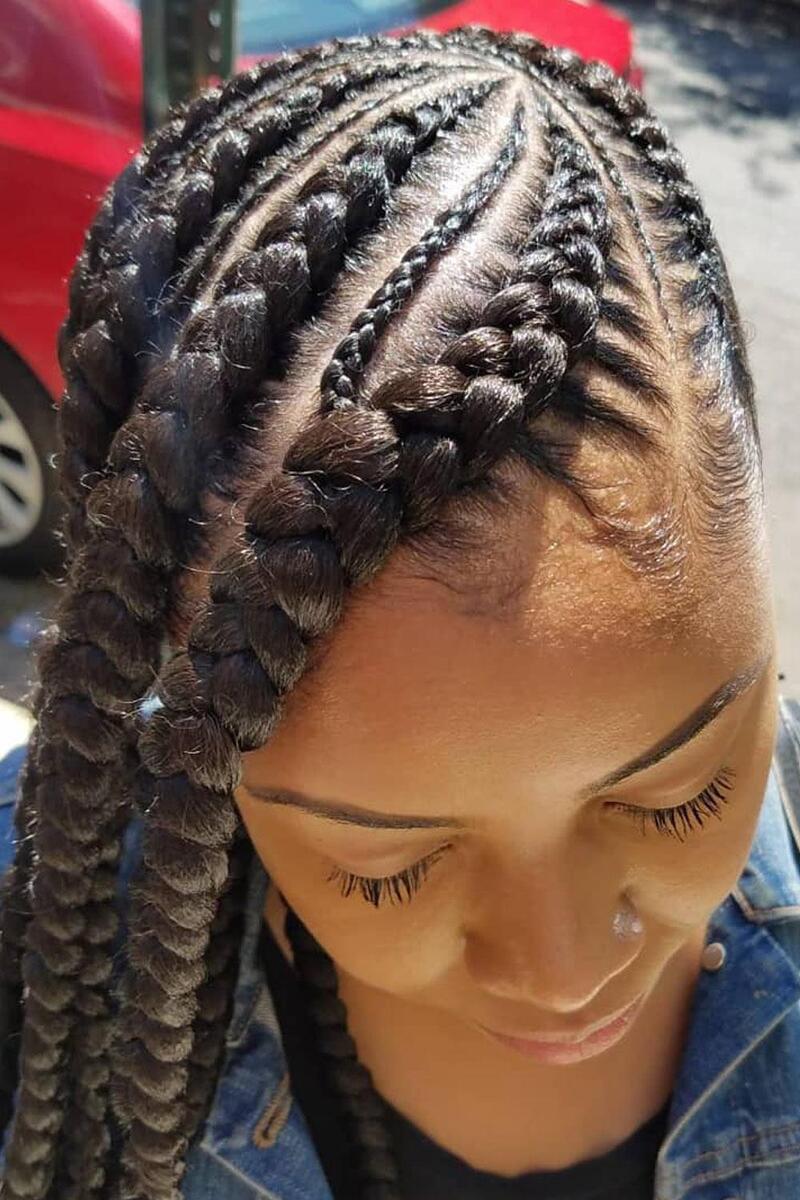
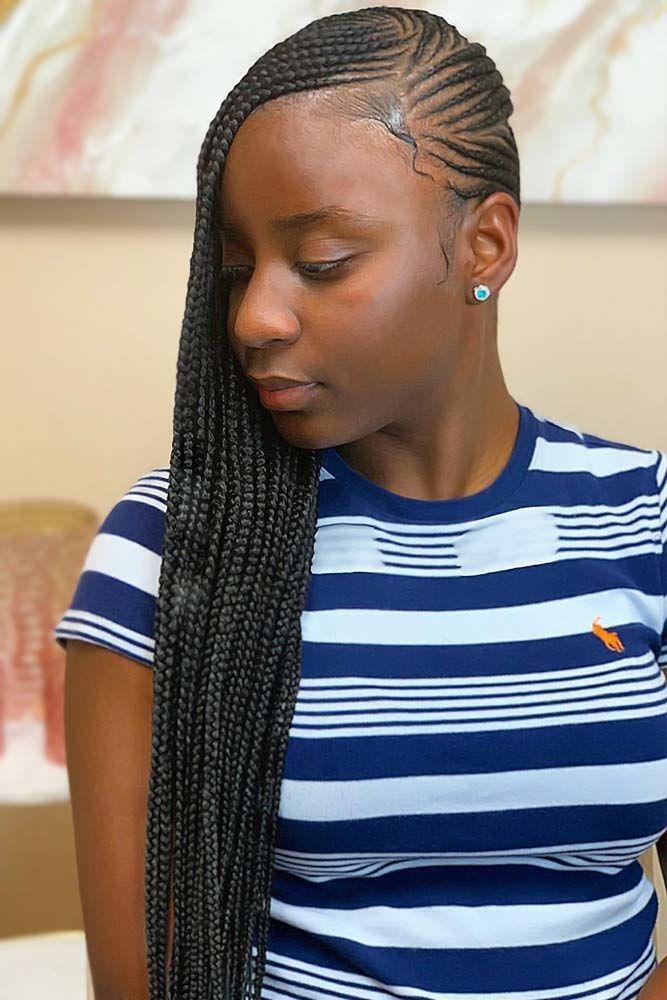
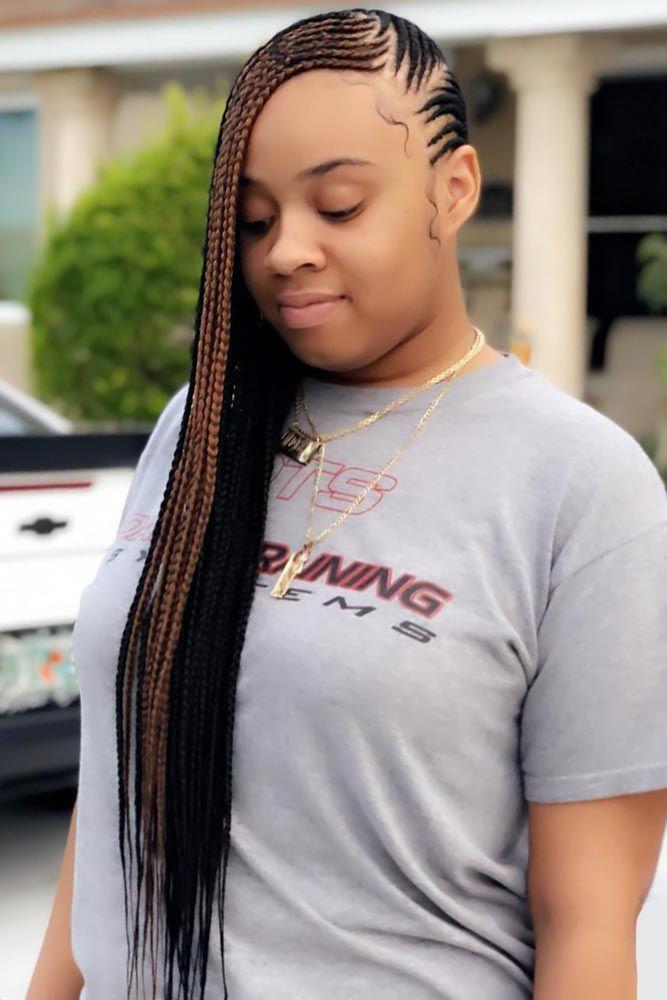
SIMPLE AND STRAIGHTFORWARD LEMONADE BRAIDS
These classic Lemonade braids styled to the side are the perfect example of traditional cornrow braids. Long and tightly woven, they hug your head while protecting your hair from damage as you sleep. Want to capture Beyoncé’s Lemonade vision? Side-swept Lemonade braids are like a tall glass of refreshing coolness.
CONCLUSION
Lemonade braids offer a refreshing and stylish twist on traditional braiding techniques. With their versatility and endless possibilities, these braids can be tailored to suit any occasion or personal style. Whether you’re looking for a casual everyday hairstyle or a glamorous updo for a special event, lemonade braids are sure to turn heads and elevate your look. So why not experiment with this trendy and fun hairstyle and discover the many ways it can enhance your beauty?