

Having a bronzed glow can make you look and feel healthy, but sunbathing isn’t the safest way to achieve it. Self-tanners are a great alternative, and there are many fantastic options available at drugstores. These self-tanners are affordable, easy to use, and can give you a natural-looking tan that develops over time. Keep reading!
OUR TOP PICKS
JERGENS NATURAL GLOW INSTANT SUN SUNLESS TANNING MOUSSE

If you’re looking for a quick and easy fake tan, Jergens Natural Glow Instant Sun Sunless Tanning Mousse is a great option. This drugstore favorite comes in two shades, light bronze and deep bronze, to suit different skin tones. The lightweight mousse applies smoothly and dries in just 60 seconds, so you won’t have to wait around for it to absorb. It also boasts a tropical, fruity scent that’s more pleasant than the self-tanner smell some products have. Plus, the formula develops gradually over a few hours, allowing you to control the intensity of your tan. For a deeper bronze, you can even reapply the next day.
TAN-LUXE THE FUTURE AIR BRUSH 360
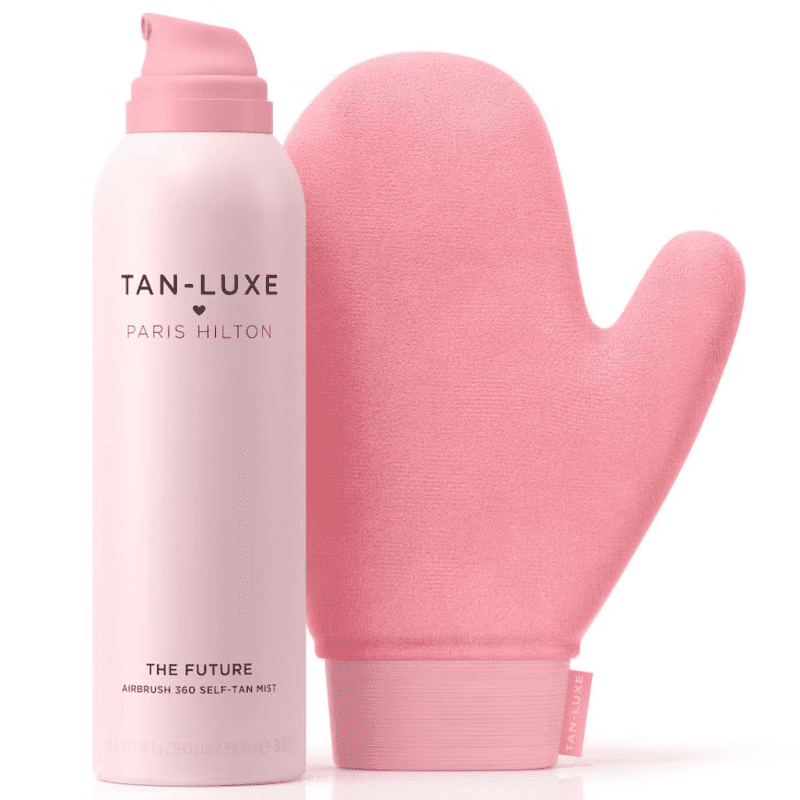
Aiming for a luxurious, streak-free tan at home? Tan-Luxe’s The Future Air Brush 360 Self-Tan Mist might be your perfect match. This limited-edition product, co-created with Paris Hilton, is designed to deliver a professional spray tan experience in a convenient mist form. The innovative 360 airless mister lets you apply the product at any angle, ensuring even coverage without splotches. The clear, lightweight formula develops into a natural-looking tan thanks to Tan-Luxe’s Triple Tan+ Technology. This technology allows the tanning agents to penetrate deeper for a faster-developing tan that lasts longer. Plus, the formula adapts to your individual skin tone to prevent an orange tint, leaving you with a customized, sun-kissed glow. To complete the luxurious experience, the self-tan mist comes with a Luxe Mitt for a smooth, streak-free application.
L’ORÉAL PARIS SUBLIME BRONZE SELF-TANNING WATER MOUSSE
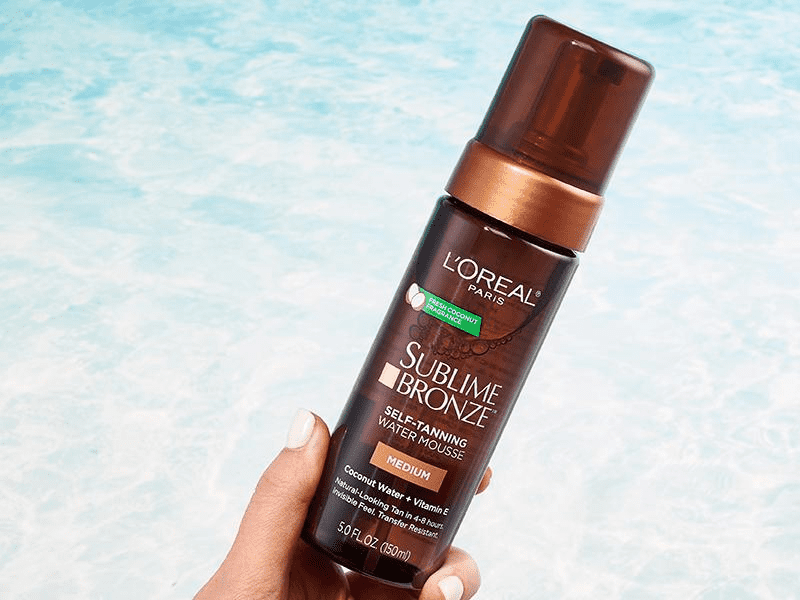
If you’re looking for a hydrating self-tanner that develops gradually for a natural-looking tan, L’Oréal Paris Sublime Bronze Self-Tanning Water Mousse is a great option. This lightweight mousse absorbs quickly into skin for a comfortable, invisible feel. Enriched with coconut water and Vitamin E, the formula hydrates as it tans, leaving your skin feeling soft and smooth. Unlike some self-tanners that can have a strong odor, L’Oréal Paris Sublime Bronze has a pleasant scent. The clear, water-based formula develops into a natural-looking tan over 4-8 hours, allowing you to control the intensity by reapplying if desired. Plus, the product is streak-free and transfer-resistant, so you won’t have to worry about it staining your clothes.
L’ORÉAL PARIS SUBLIME BRONZE HYDRATING SELF-TANNING MILK
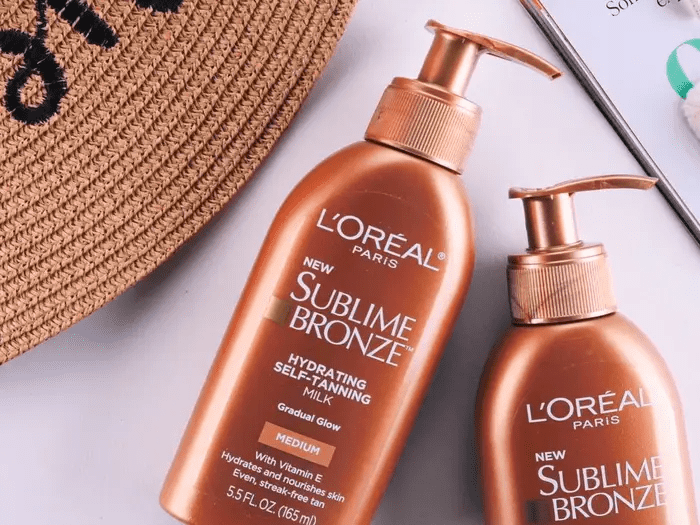
Want a gradual, natural-looking tan with a boost of hydration? L’Oréal Paris Sublime Bronze Hydrating Self-Tanning Milk might be your perfect match. This lotion-like formula is designed to deliver a streak-free, bronzed glow while also nourishing your skin. Enriched with Vitamin E, it helps soften and smooth skin as the self-tanner develops. Unlike some self-tanners that can be drying, this hydrating milk leaves your skin feeling comfortable. You can use it alone as a gradual tanner three times a week, or apply it in between applications of other self-tanning products from the Sublime Bronze line to maintain your tan. This versatility makes it a great option for those who want a customizable and hydrating self-tanning experience.
CLARINS SELF TANNING INSTANT GEL
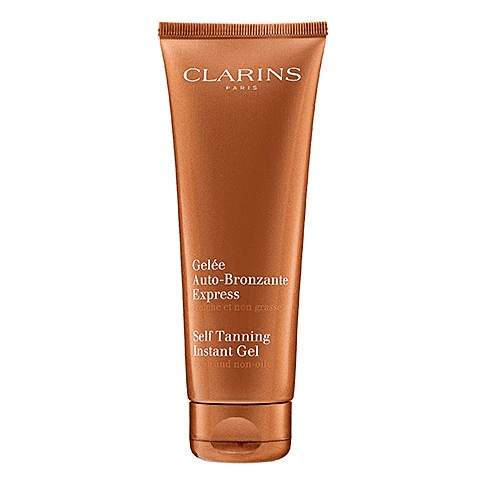
If you’re looking for an immediate bronzed glow that washes off easily, Clarins Self Tanning Instant Gel is a great choice. This lightweight gel delivers a natural-looking tan that develops instantly, perfect for those times you want a touch of summer color without the commitment of a self-tanner that develops over time. The formula is also hydrating thanks to glycerin, so you won’t have to worry about it drying out your skin. Plus, it absorbs quickly and dries fast, allowing you to get dressed right away. While it washes off in the shower, the Clarins Self Tanning Instant Gel can even act as a guide for self-tanning products that take longer to develop, helping you achieve even coverage.
SOL BY JERGENS NO WAIT TROPICAL TAN TINTED MOUSSE
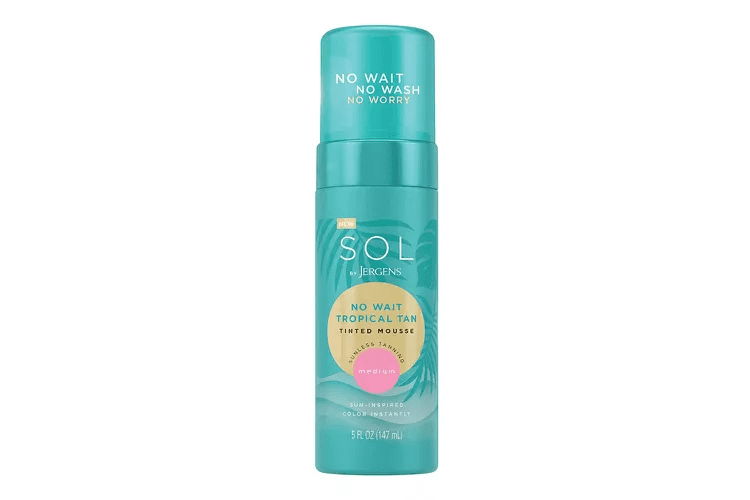
The Sol by Jergens No Wait Tropical Tan Tinted Mousse is an innovative self-tanning product designed to provide a quick and natural-looking tan. This tinted mousse formula allows for an effortless application, ensuring even coverage and a streak-free finish. Infused with a tropical fragrance, it offers a pleasant scent, enhancing the tanning experience. The no-wait feature means that the tan develops quickly, allowing you to see results within hours without the need for prolonged drying time. Enriched with hydrating ingredients, this mousse not only delivers a beautiful sun-kissed glow but also keeps your skin moisturized and smooth. Perfect for those seeking a fast and convenient self-tanning solution, the Sol by Jergens No Wait Tropical Tan Tinted Mousse is a must-have in your beauty routine.
COCO & EVE SUNNY HONEY BALI BRONZING FOAM
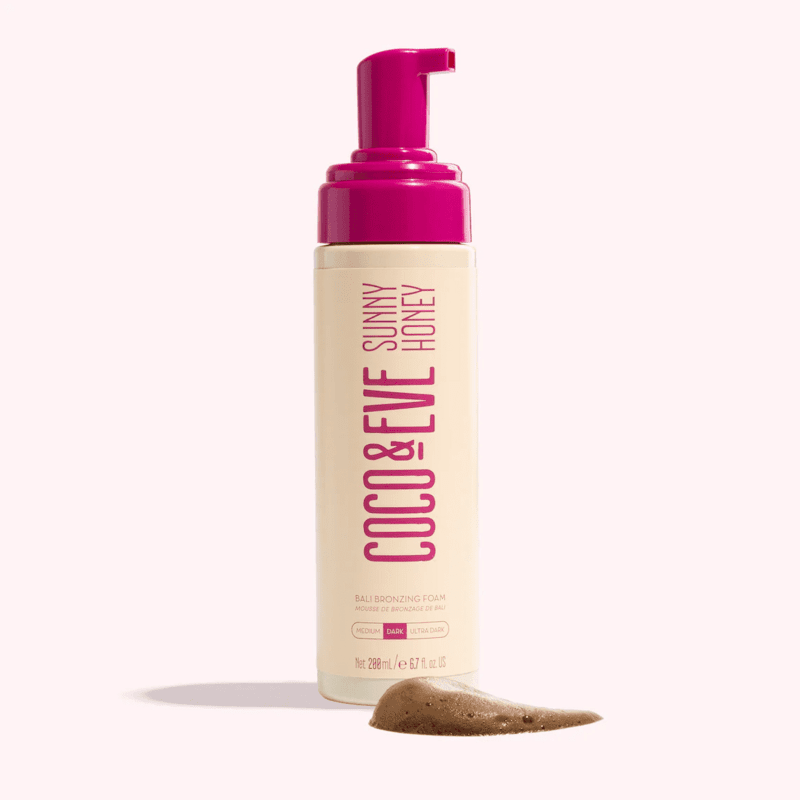
The Coco & Eve Sunny Honey Bali Bronzing Foam is a premium self-tanner that promises a natural, sun-kissed glow without the harmful effects of UV rays. This luxurious bronzing foam is enriched with natural ingredients such as coconut, mandarin oil, and amino acids, which help to hydrate and nourish the skin while developing a flawless tan. Its lightweight, non-sticky formula ensures an even application, drying quickly to prevent any transfer onto clothing or sheets. Additionally, the tropical scent of mango and guava makes the tanning process a delightfully fragrant experience. Perfect for all skin types, the Coco & Eve Sunny Honey Bali Bronzing Foam delivers a streak-free, long-lasting tan that fades evenly, leaving your skin glowing and radiant.
BONDI SANDS AERO 1 HOUR EXPRESS SELF-TANNING FOAM
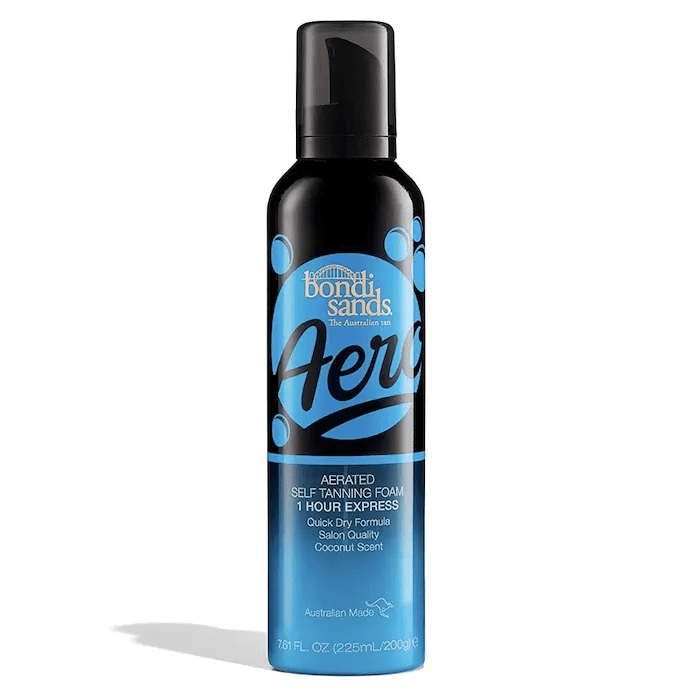
The Bondi Sands Aero 1 Hour Express Self-Tanning Foam is a revolutionary self-tanner designed for those who want a quick and effective tanning solution. This advanced formula allows you to achieve a natural, bronzed glow in just one hour, making it perfect for last-minute plans or busy schedules. The lightweight, aerated foam glides effortlessly onto the skin, ensuring an even, streak-free application with minimal effort. Enriched with hydrating ingredients like aloe vera and vitamin E, this self-tanner not only provides a beautiful tan but also nourishes and moisturizes your skin. The tropical coconut scent adds a touch of luxury to the tanning experience, leaving you feeling refreshed and sun-kissed. Ideal for all skin types, the Bondi Sands Aero 1 Hour Express Self-Tanning Foam delivers a long-lasting, radiant tan that develops quickly and fades evenly, making it a must-have for anyone seeking a fast and flawless self-tanning solution.
LUX UNFILTERED N°12 BRONZING FACE DROPS
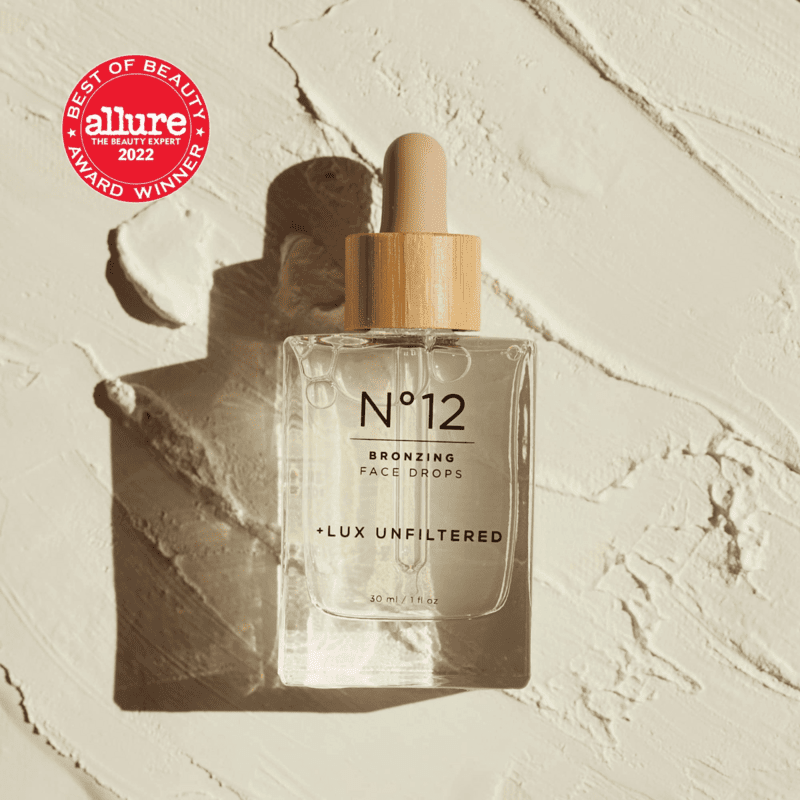
The Lux Unfiltered N°12 Bronzing Face Drops are a luxurious addition to any skincare routine, designed to provide a natural, sun-kissed glow to your complexion. These bronzing drops are formulated with high-quality ingredients such as hyaluronic acid and aloe vera, which help to hydrate and soothe the skin while delivering a customizable tan. Simply mix a few drops into your favorite moisturizer or serum to achieve your desired level of bronziness without the need for sun exposure. The lightweight, non-greasy formula ensures a smooth and even application, leaving no streaks or patches. Perfect for all skin types, the Lux Unfiltered N°12 Bronzing Face Drops offer a subtle, buildable tan that enhances your natural beauty while keeping your skin nourished and radiant. With a delicate, pleasant fragrance, these drops make the tanning process a delightful experience, giving you a healthy, glowing complexion all year round.
ST. TROPEZ SELF TAN CLASSIC BRONZING MOUSSE
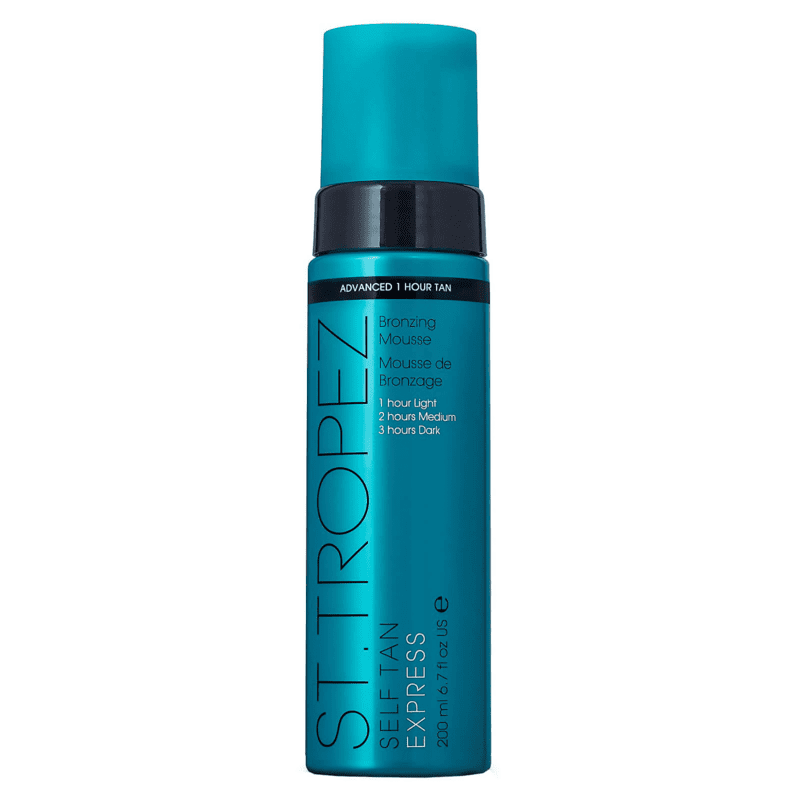
The St. Tropez Self Tan Classic Bronzing Mousse is a cult-favorite self-tanner that delivers a natural-looking, sun-kissed glow. This lightweight mousse is easy to apply, thanks to its quick-drying, non-sticky formula that glides effortlessly onto the skin for an even, streak-free finish. Enriched with hydrating ingredients like aloe vera, it helps to keep the skin soft and moisturized while developing a beautiful tan. The mousse is tinted, allowing you to see where you have applied it, ensuring a flawless application every time. Suitable for all skin types, the St. Tropez Self Tan Classic Bronzing Mousse offers a customizable tan that can be built up for a deeper color or applied in a single layer for a subtle glow. With a pleasant, subtle fragrance, this self-tanner provides a luxurious tanning experience without the typical self-tan smell. Ideal for achieving a radiant, long-lasting tan, the St. Tropez Self Tan Classic Bronzing Mousse is a must-have for anyone looking to achieve a professional-quality tan at home.
BANANA BOAT SUMMER COLOR SELF-TANNING MIST
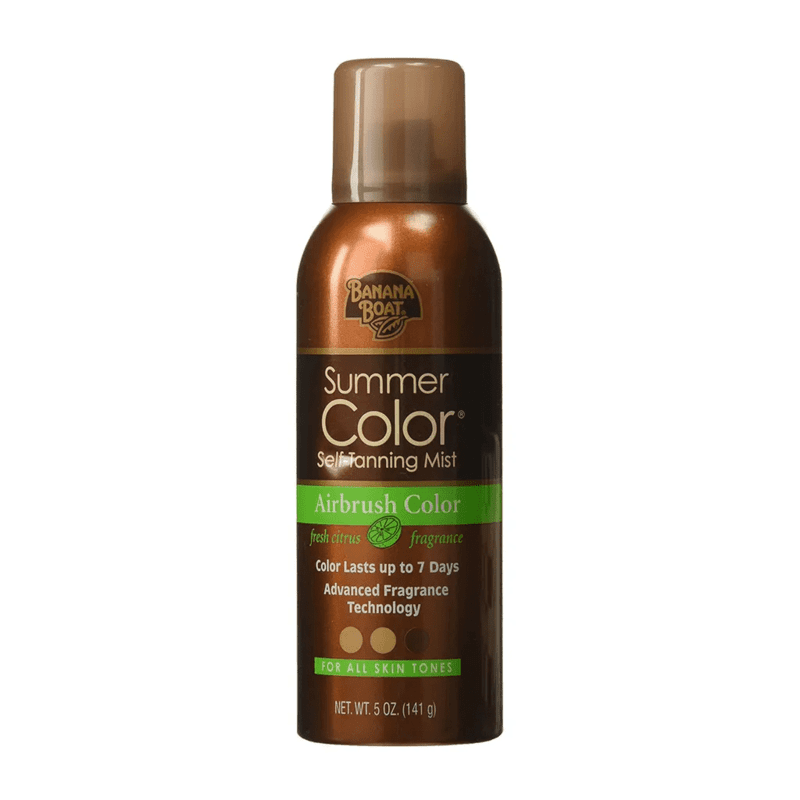
The Banana Boat Summer Color Self-Tanning Mist is a convenient and effective way to achieve a natural-looking tan without exposure to the sun. This easy-to-use mist allows for a quick and even application, ensuring a streak-free finish that develops into a beautiful, golden glow. The formulation is designed to dry quickly, so you can get dressed and go about your day without waiting for the product to absorb. Enriched with nourishing ingredients, it helps to keep your skin hydrated and smooth while providing a long-lasting tan that fades evenly. The 360-degree spray nozzle allows you to reach even those hard-to-reach areas, ensuring an all-over tan that looks professional. Suitable for all skin types, the Banana Boat Summer Color Self-Tanning Mist provides a customizable tan that can be built up to your desired shade. With a light, pleasant fragrance, this self-tanner offers a delightful tanning experience, making it an essential addition to your summer skincare routine.
SALLY HANSEN AIRBRUSH LEGS LEG MAKEUP
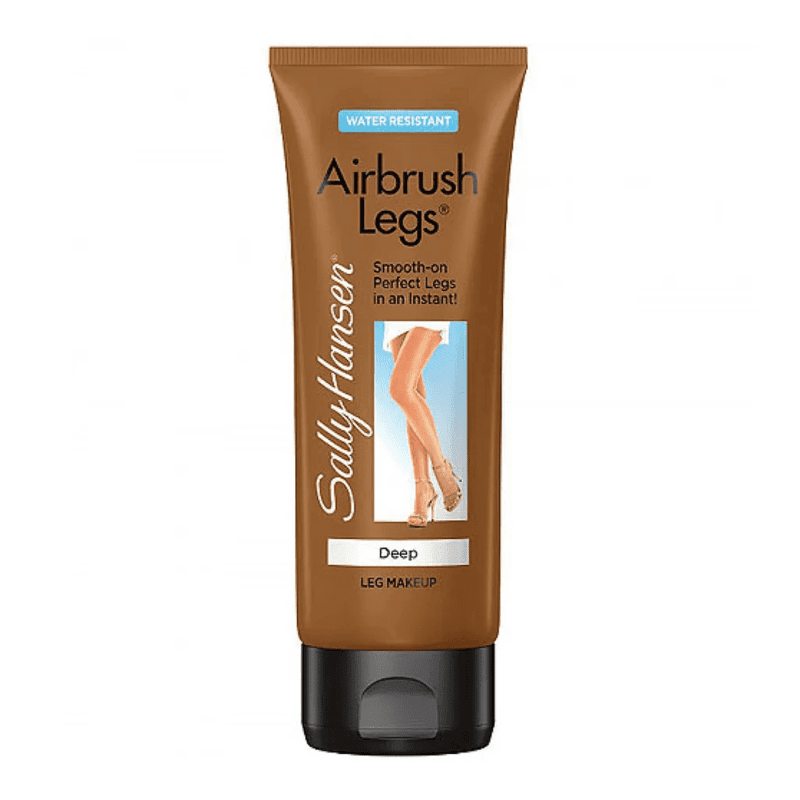
The Sally Hansen Airbrush Legs Leg Makeup is a game-changer for achieving flawless, smooth legs instantly. This innovative leg makeup comes in an easy-to-use spray formula that provides an airbrushed, even finish, covering imperfections like veins, scars, and blemishes. Enriched with palmaria extract, it not only offers a beautiful, natural-looking tan but also enhances the skin’s texture, making it look firmer and healthier. The lightweight, water-resistant formula ensures that your legs stay perfect all day, even through sweat and humidity. Drying quickly upon application, it allows you to dress immediately without worrying about smudges or stains. Suitable for all skin tones, the Sally Hansen Airbrush Legs Leg Makeup delivers a streak-free, long-lasting finish, making it a must-have for anyone looking to achieve photo-ready legs effortlessly.
VITA LIBERATA FABULOUS GRADUAL TANNING LOTION
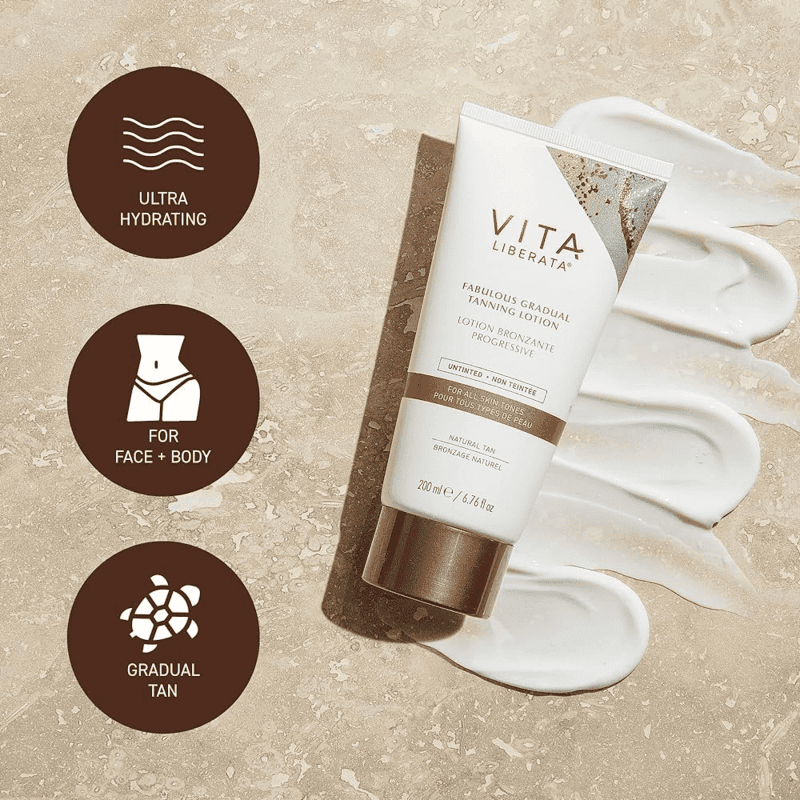
The Vita Liberata Fabulous Gradual Tanning Lotion is an ideal choice for those seeking a subtle, buildable tan that develops over time. This luxurious lotion combines the benefits of a moisturizer with a gradual tanner, allowing you to achieve a natural-looking glow with each application. Formulated with organic ingredients such as aloe vera and marula oil, it not only tans but also deeply hydrates and nourishes the skin, leaving it feeling soft and smooth. The lightweight, non-greasy texture ensures easy and even application, without any streaks or patches. Suitable for all skin types, the Vita Liberata Fabulous Gradual Tanning Lotion is perfect for maintaining a year-round sun-kissed complexion, with the freedom to control the depth of your tan. Free from harsh chemicals and artificial fragrances, it provides a gentle and pleasant tanning experience, making it a staple in any skincare routine.
NEUTROGENA BUILD-A-TAN GRADUAL SUNLESS TANNING LOTION
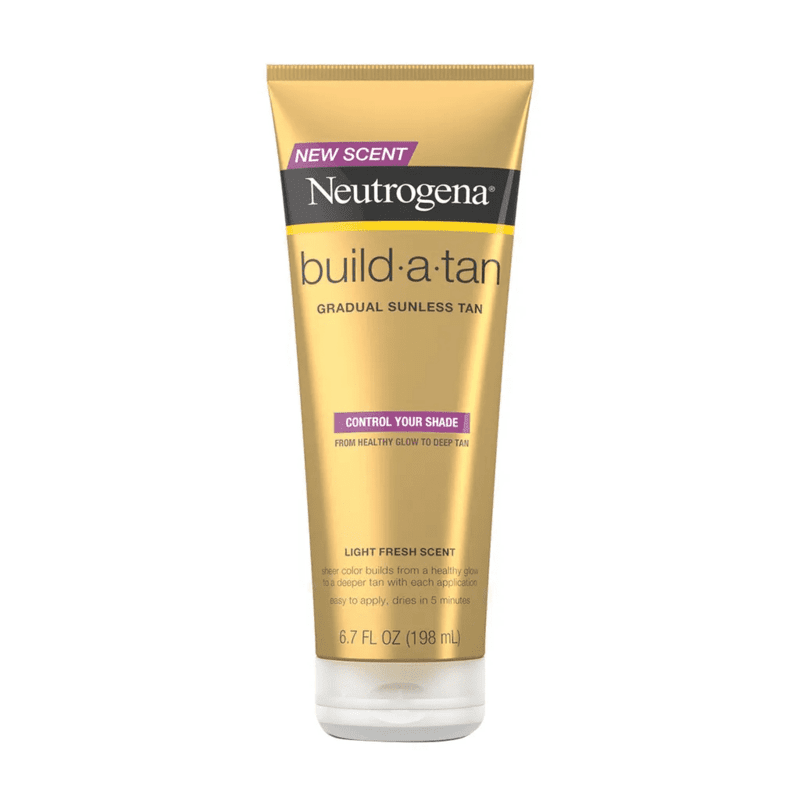
The Neutrogena Build-A-Tan Gradual Sunless Tanning Lotion is a versatile and user-friendly option for achieving a customizable tan. This gradual tanning lotion allows you to control the depth of your tan by adjusting the frequency of application, ensuring a natural-looking glow that suits your preferences. Infused with skin-nourishing ingredients, it moisturizes while it tans, leaving your skin soft and hydrated. The lightweight, non-greasy formula glides on smoothly, providing an even, streak-free finish without the typical self-tanner odor. Suitable for all skin types, the Neutrogena Build-A-Tan Gradual Sunless Tanning Lotion is perfect for those new to self-tanning or anyone looking to maintain a subtle, sun-kissed look year-round. Easy to apply and quick-drying, it fits seamlessly into any skincare routine, making it a convenient choice for a gradual, radiant tan.
BONDI SANDS TECHNOCOLOR EMERALD 1 HOUR EXPRESS SELF TANNING FOAM
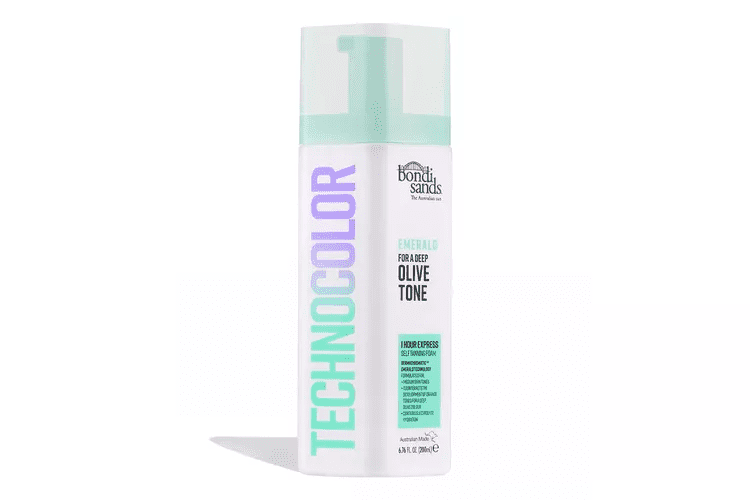
The Bondi Sands Technocolor Emerald 1 Hour Express Self Tanning Foam is an innovative product designed to deliver a deep, rich tan in just one hour. This express self-tanning foam is perfect for those who want a quick and effective tanning solution. Infused with a unique emerald base, it neutralizes orange tones and ensures a natural-looking, olive tan. The lightweight foam applies effortlessly, providing an even, streak-free finish that develops quickly.
Formulated with skin-loving ingredients like aloe vera and vitamin E, it hydrates and nourishes the skin while delivering a flawless tan. The quick-drying formula allows you to get dressed shortly after application, making it convenient for those with a busy schedule. Suitable for all skin types, the Bondi Sands Technocolor Emerald Self Tanning Foam offers a customizable tan that can be left on for up to three hours for a deeper color.
With its pleasant tropical scent, this self-tanner transforms your tanning routine into a delightful experience. Ideal for achieving a professional-quality tan at home, the Bondi Sands Technocolor Emerald 1 Hour Express Self Tanning Foam is a must-have for anyone looking for a fast and beautiful tan.
SALTYFACE THE BASIC SELF TANNER
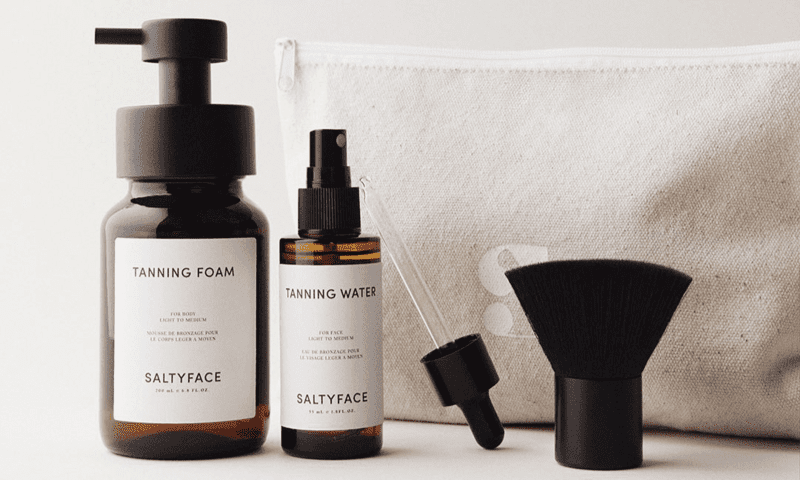
The Saltyface The Basic Self Tanner is a straightforward and effective solution for achieving a natural, sun-kissed glow. Designed with simplicity in mind, this self-tanner provides a gradual, buildable tan that allows you to control the intensity of your color with each application. The formula is enriched with moisturizing ingredients that ensure your skin stays hydrated and smooth, preventing dryness and patchiness often associated with self-tanning products.
The lightweight, non-greasy texture makes for easy and even application, ensuring a streak-free finish every time. Suitable for all skin types, The Basic Self Tanner is perfect for both beginners and experienced tanners looking for a reliable, no-fuss product. It also features a pleasant, subtle scent that makes the tanning process enjoyable.
With its gentle formulation, the Saltyface The Basic Self Tanner is ideal for maintaining a year-round tan that looks natural and radiant. Easy to incorporate into your regular skincare routine, this self-tanner is a dependable choice for achieving a beautiful, sun-kissed complexion without the harmful effects of UV exposure.
WHAT TO LOOK FOR IN A SELF-TANNER
Choosing the right self-tanner can ensure a beautiful, natural-looking glow without sun damage. Here are some key factors to consider when picking your perfect drugstore self-tanner:
Skin Tone and Type: Self-tanners come in a variety of shades to suit different skin tones. For fair skin, opt for a light or medium shade with 1-3% DHA (dihydroxyacetone, the tanning agent). Olive skin tones can handle a bit more DHA, around 5%, while darker skin tones may need a formula with over 5% DHA to achieve a noticeable tan. Consider your skin type as well. Dry skin benefits from hydrating formulas like lotions or mousses, while oily skin might prefer a gel or water-based formula for a matte finish. Sensitive skin should look for fragrance-free formulas to minimize irritation.
Gradual vs. Instant Tan: Do you want a tan that develops over time, or something that provides instant color? Gradual tanners allow you to control the intensity of the tan by reapplying. These typically take 4-8 hours to develop. Instant tanners provide a temporary color that washes off in the shower, perfect for an immediate touch of summer glow.
Application and Convenience: Consider the format and ease of application. Mousses and lotions are popular choices for their blendability, while gels can be easier to apply to specific areas. If you’re a self-tanning newbie, a tinted formula can help you see where you’re applying the product to avoid streaks. Opt for quick-drying options if waiting around isn’t your thing.
Fragrance and Ingredients: Some self-tanners have a distinct odor. Look for fragrance-free options if you have sensitive skin or simply dislike the smell. If you’re concerned about ingredients, choose a product with natural ingredients and hydrating properties like Vitamin E or shea butter.
HOW DO SELF-TANNERS WORK?
Unlike sun tans, which involve your skin producing melanin in response to UV rays, self-tanners work through a chemical reaction. The key ingredient in most self-tanners is dihydroxyacetone (DHA), a colorless sugar. Here’s the breakdown:
DHA Reacts with Dead Skin Cells: When you apply self-tanner, the DHA comes into contact with the dead skin cells on the outermost layer of your skin (the stratum corneum).
Color Change: DHA reacts with the amino acids, the building blocks of protein, in these dead skin cells. This reaction causes a chemical change, resulting in a brownish color on the surface of your skin. This browning process is similar to the way a cut apple turns brown when exposed to air.
Gradual Development: The color change doesn’t happen instantly. It takes a few hours for the reaction between DHA and the amino acids to reach its full effect. This is why most self-tanners develop gradually over 4-8 hours.
Fading Tan: Since the DHA reacts with the top layer of dead skin cells, the tan fades as these cells naturally shed over time. This is typically within 3-10 days, depending on your skin cell turnover rate. Exfoliation can also accelerate the fading process by removing the tanned dead skin cells more quickly.
It’s important to note that self-tanning only affects the outermost layer of dead skin cells. It doesn’t involve melanin production or UV rays, making it a safer alternative to sun tanning.
HOW DO YOU APPLY SELF-TANNER?
Here’s a guide to achieving a flawless, streak-free tan with self-tanner:
- Exfoliation is Key: Begin by exfoliating your skin 24-48 hours before applying self-tanner. This removes dead skin cells, creating a smooth, even surface for the self-tanner to adhere to. Pay extra attention to areas prone to dryness and buildup, like elbows, knees, ankles, and feet.
- Moisturize Dry Areas: Self-tanner can cling to dry patches, resulting in streaks. To prevent this, apply a fragrance-free moisturizer to dry areas like elbows, knees, ankles, hands, and feet before self-tanning.
- Apply with a Mitt: For a streak-free application, use a tanning mitt. Apply a small amount of self-tanner to the mitt and use circular motions to blend it evenly over your skin. Use light pressure on areas where self-tanner tends to accumulate, like elbows, knees, and ankles.
- Don’t Forget the Back: Getting to those hard-to-reach areas like your back can be tricky. Apply self-tanner to a mitt and ask a friend to help you apply it to your back for even coverage. Alternatively, use a self-tanning back applicator tool.
- Wash Your Hands: Self-tanner can stain your palms. Wash your hands thoroughly with soap and water immediately after applying the self-tanner.
- Let it Dry Completely: Allow the self-tanner to dry completely before getting dressed. This will help prevent streaks and transfer onto your clothes.
- Develop the Tan: Most self-tanners take 4-8 hours to develop fully. Avoid showering or sweating during this time.
- Maintain Your Tan: To maintain your self-tan, moisturize your skin daily. Exfoliate lightly 2-3 times a week to remove fading self-tanner and prevent buildup. You can also reapply self-tanner as needed.
CONCLUSION
With so many fantastic drugstore self-tanners on the market, you’re sure to find the perfect option to achieve a beautiful, natural-looking tan without damaging your skin. Consider your skin tone, desired effect, and application preferences when making your choice. By following these tips and tricks, you can enjoy a sun-kissed glow all year long!


