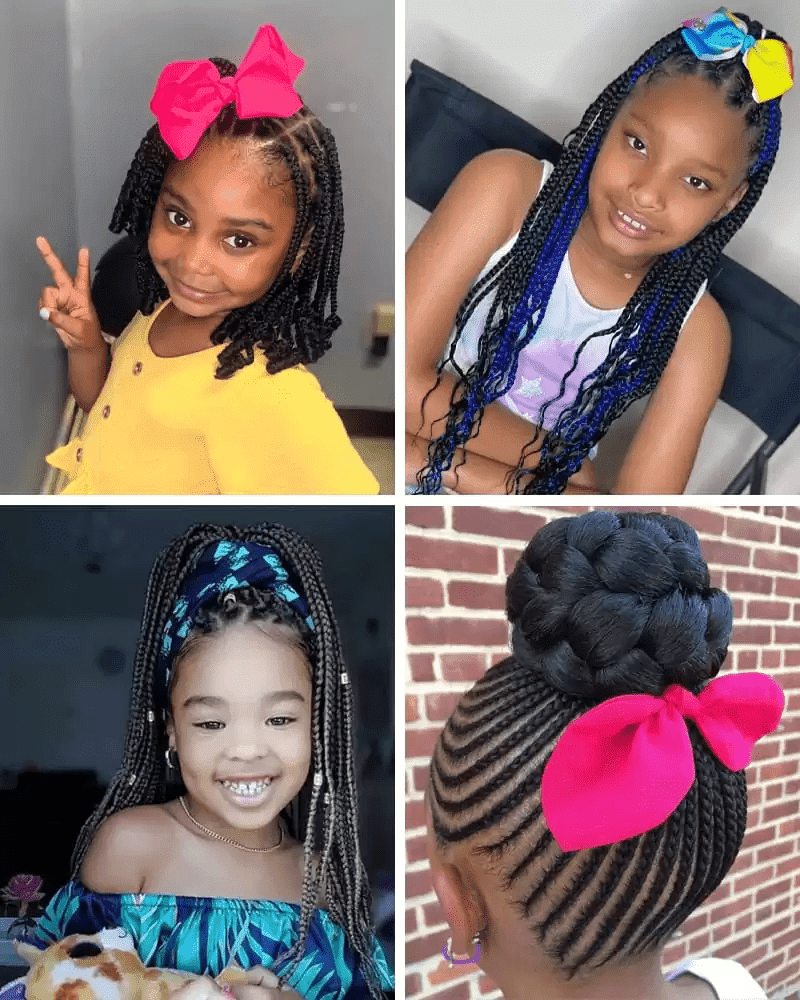
Are you looking for stylish and practical hairstyles for your little one? Box braids are a fantastic choice! They’re not only adorable but also protective, perfect for kids who love to play. From cute and casual looks for the playground to glamorous styles for special occasions, this guide has something for every young fashionista. Get ready to explore a world of braided brilliance!
WHAT ARE KIDS’ BOX BRAIDS?
Box braids are a fun and adorable hairstyle that can make any child feel like a star! Picture small sections of hair divided into squares, each forming a playful braid that can hang loose or twist up.
Not only do they look charming, but box braids also offer practical benefits. They help protect your child’s hair from tangles and damage during playtime and adventures.
Parents often seek a hairstyle that’s both low-maintenance and durable, and box braids are the perfect solution for this.
Plus, you can enhance box braids with beads, bows, and colorful extensions to match your child’s vibrant personality. Box braids are more than just a hairstyle; they combine cuteness, protection, and self-expression beautifully!
Top Knot With Box Braids For Kids
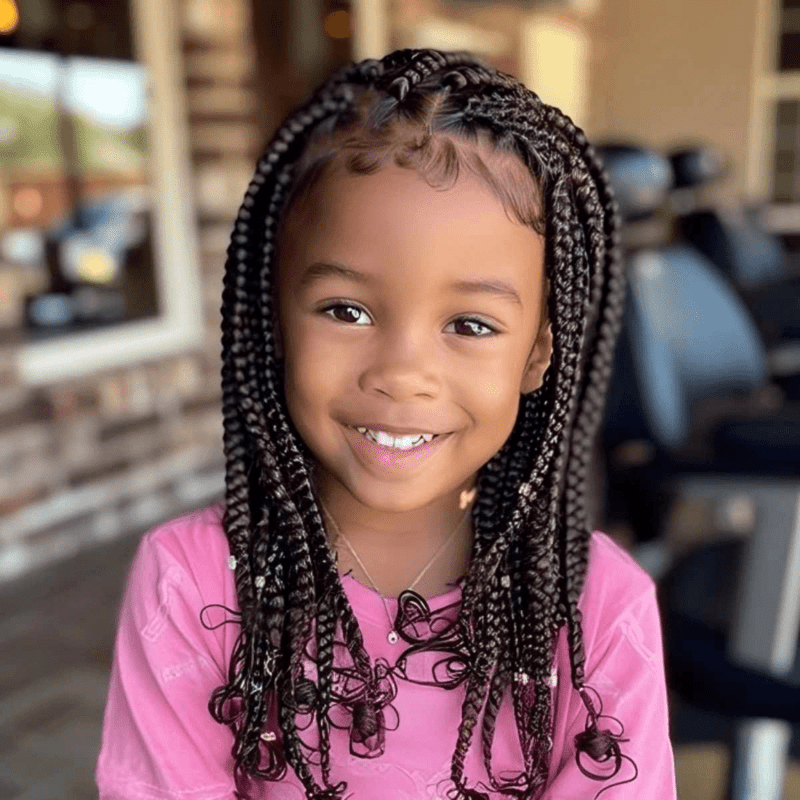
Peekaboo Box Braids with Beads
ESSENTIAL PREPARATION FOR KIDS’ BOX BRAIDS
Often, parents rely on stylists to create hairstyles for their children, but if you’re comfortable doing it yourself, that’s great! Before you start braiding, make sure to follow these essential preparation steps:
- Begin by using a detangling brush to gently work through your child’s natural hair. Be careful to avoid causing any damage to the roots or scalp.
- Wash the hair with a kid-friendly shampoo and water to remove dead skin cells, sweat, and any product buildup.
- Apply a kid-friendly conditioner to soften the hair, making it easier to manage and style.
- Use a blow dryer to stretch out the hair and prepare it for braiding.
- Finish by applying an anti-itch spray to the scalp to keep it comfortable during and after the braiding process.
Thick Jumbo Single braids
Goddess Braids for Kids
Next, you’ll need to select some braiding hair. If you’re working with a stylist, they will likely provide this for you. However, if you’re braiding your child’s hair yourself, you’ll need to purchase the braiding hair separately.
When doing the braids yourself, start by sectioning the natural hair, attaching the hair extensions, and then begin braiding.
Once you’ve finished braiding, consider retouching, trimming any flyaways, and dipping the ends into hot water for a neat finish. If you’re not confident in your braiding skills, it’s best to have a professional stylist handle the box braids to ensure a polished result.
HOW TO STYLE YOUR KIDS’ BOX BRAIDS
Box braids are a versatile and protective hairstyle with numerous variations that kids can enjoy just like adults.
In this section, we’ll explore some of the most popular box braid styles for children, including options like braids with beads, braided buns, and jumbo braids.
To enhance the look, consider adding ribbons, hair bows, and rubber bands as accessories. You can also choose from various lengths and colors, such as hip-length or shoulder-length, and shades like red and purple. Let’s find the perfect box braids style for your child!
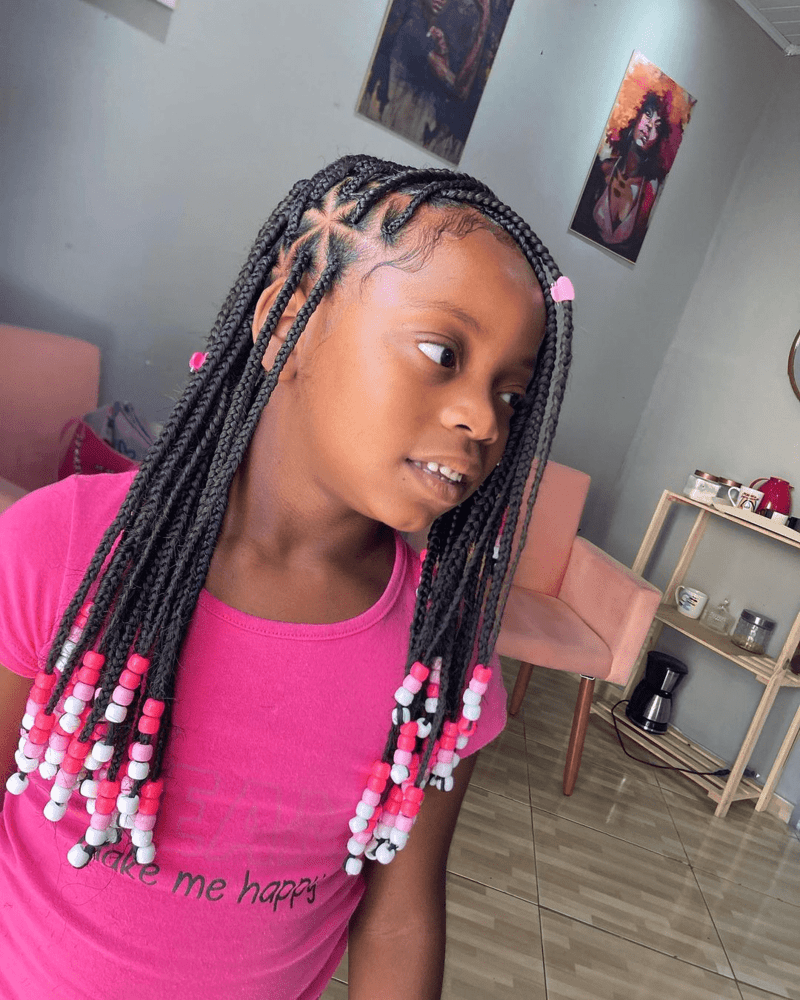
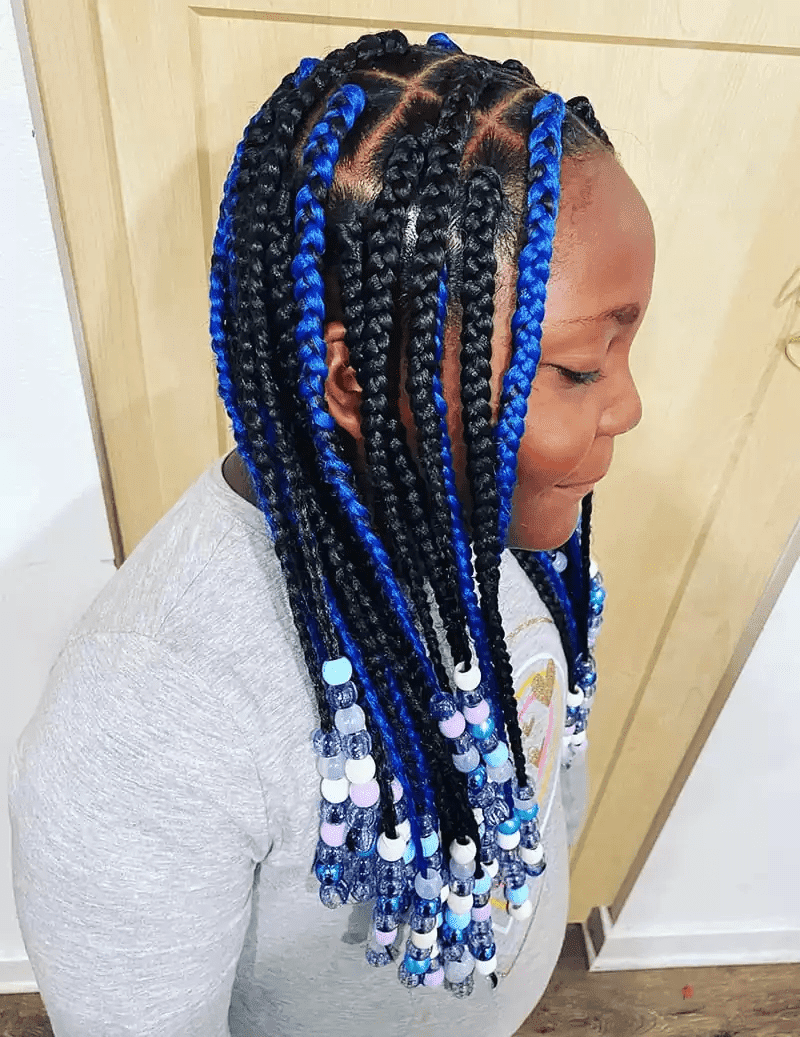
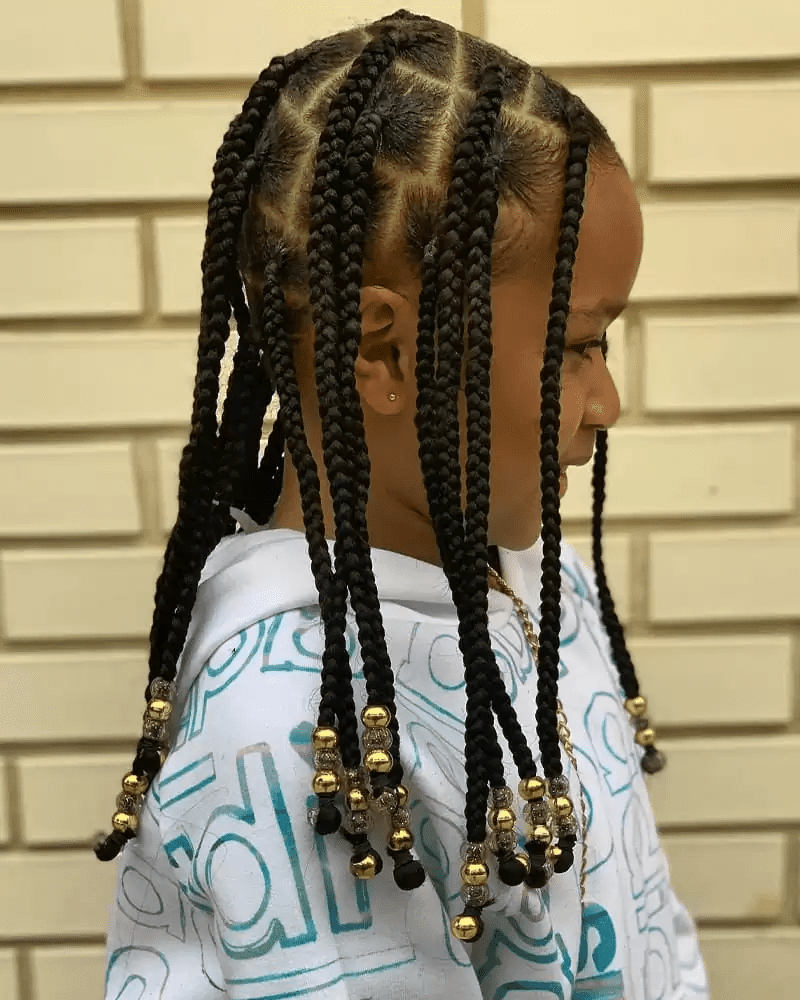
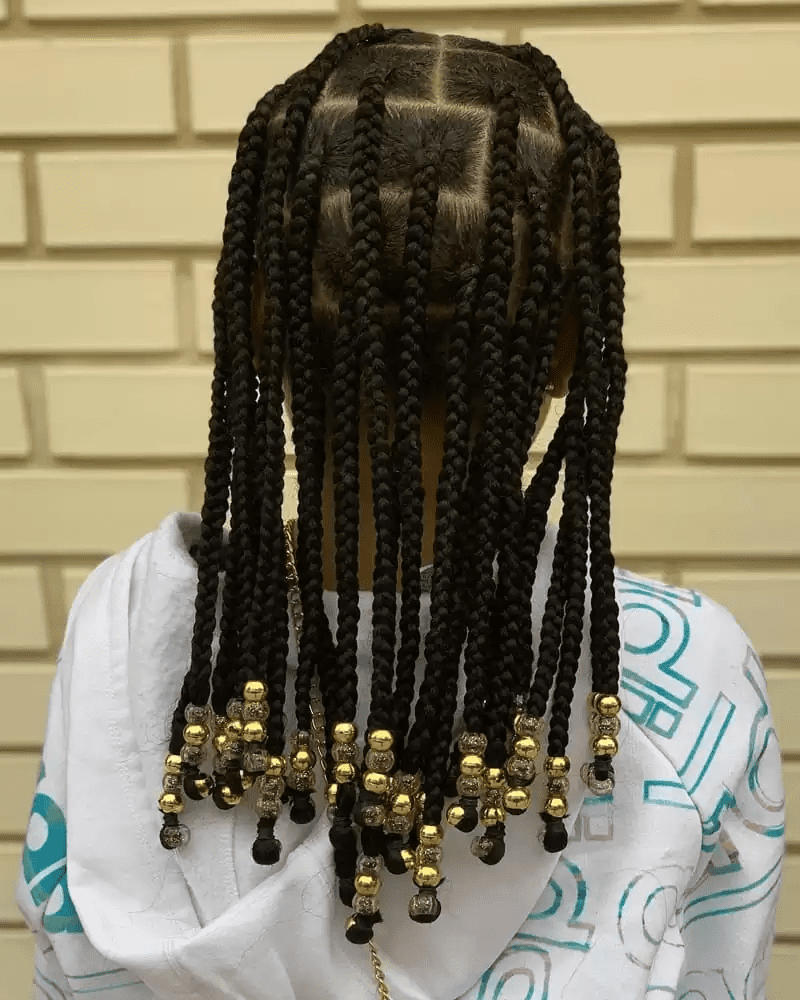
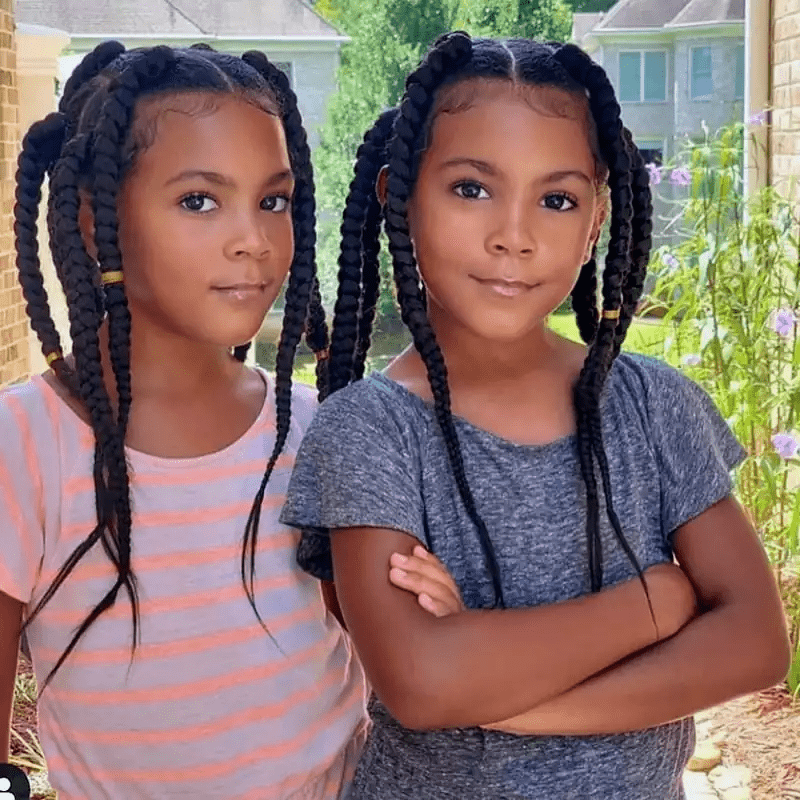
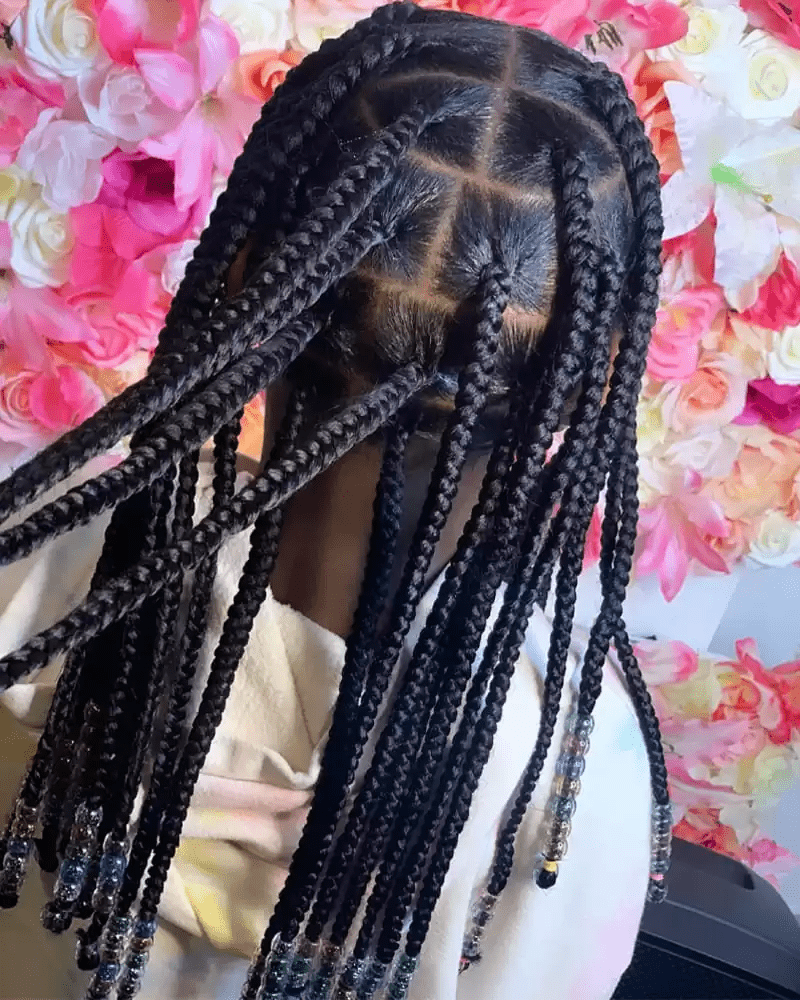
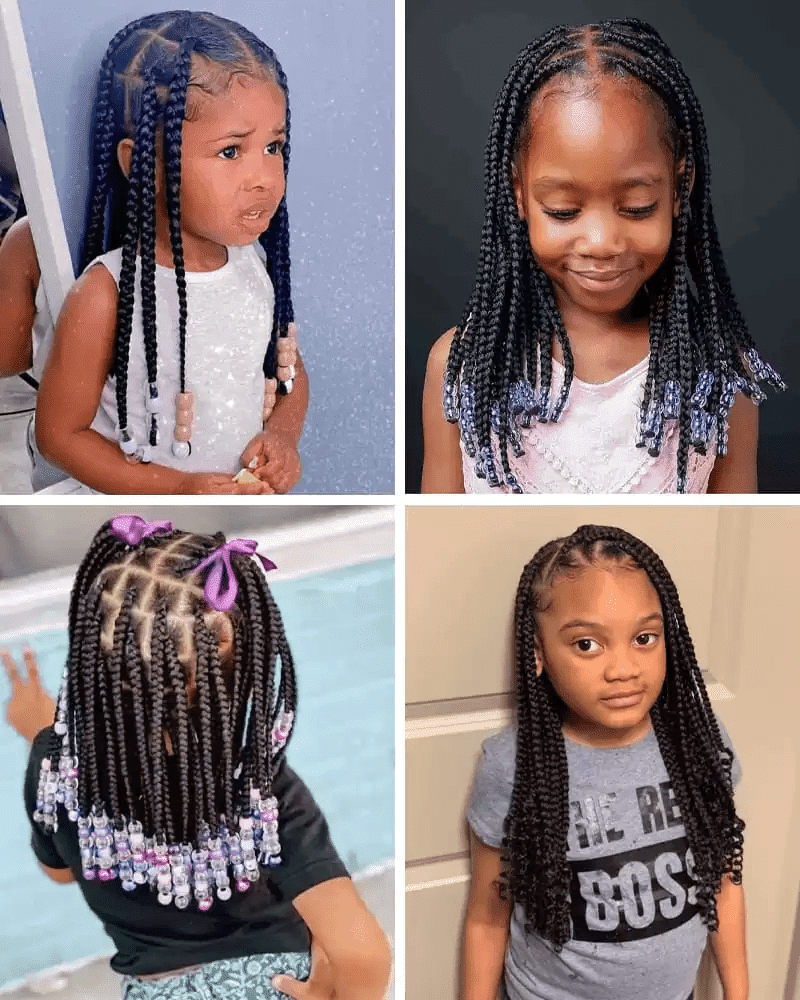
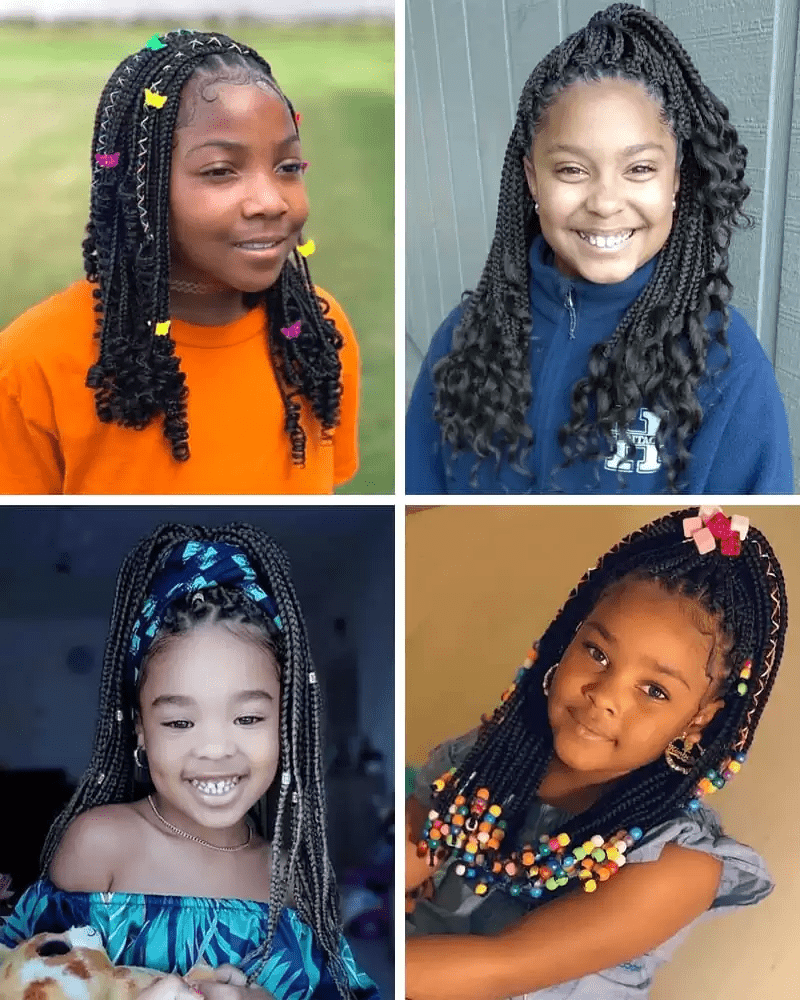
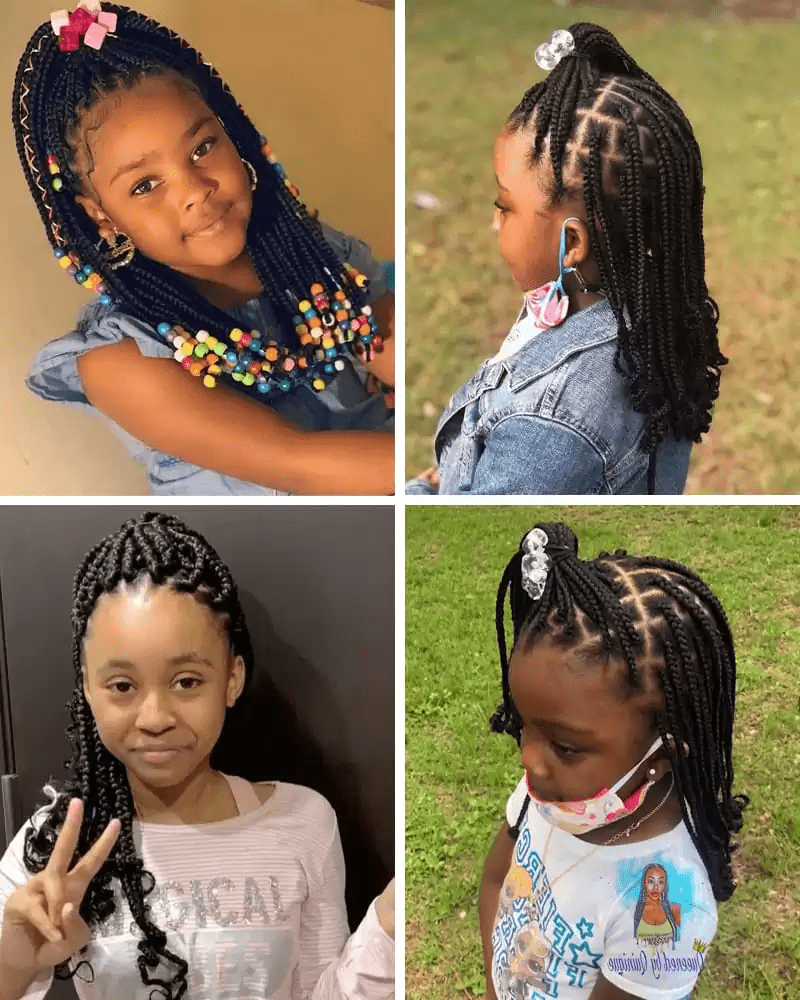
KIDS’ BOX BRAIDS WITH GLASS BEADS
Beads are some of the most beautiful hair accessories, and they look even more stunning and adorable when paired with kids’ braids.
When it comes to choosing beads for your child’s hairstyle, the options are endless, and many are truly gorgeous. We recommend these enchanting glass beads for your little one—they’re shiny, glittery, and full of color.
Not only do they add elegance to the hairstyle, but they also reflect your child’s personality. These beads are perfect for braids and pair wonderfully with ribbons, hair bows, and knots.
One of the best parts of box braids with glass beads is the boost of confidence it gives your child, as seen in the picture below. If you’re considering a braided hairstyle for your girl, this is definitely a style to keep in mind.

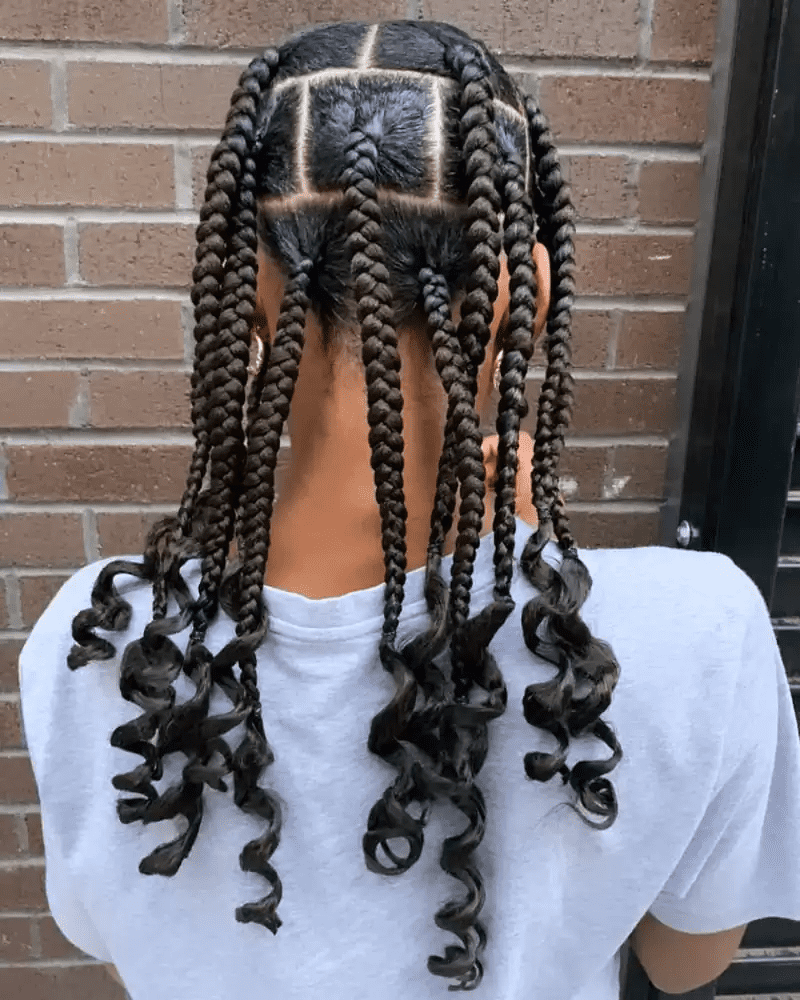

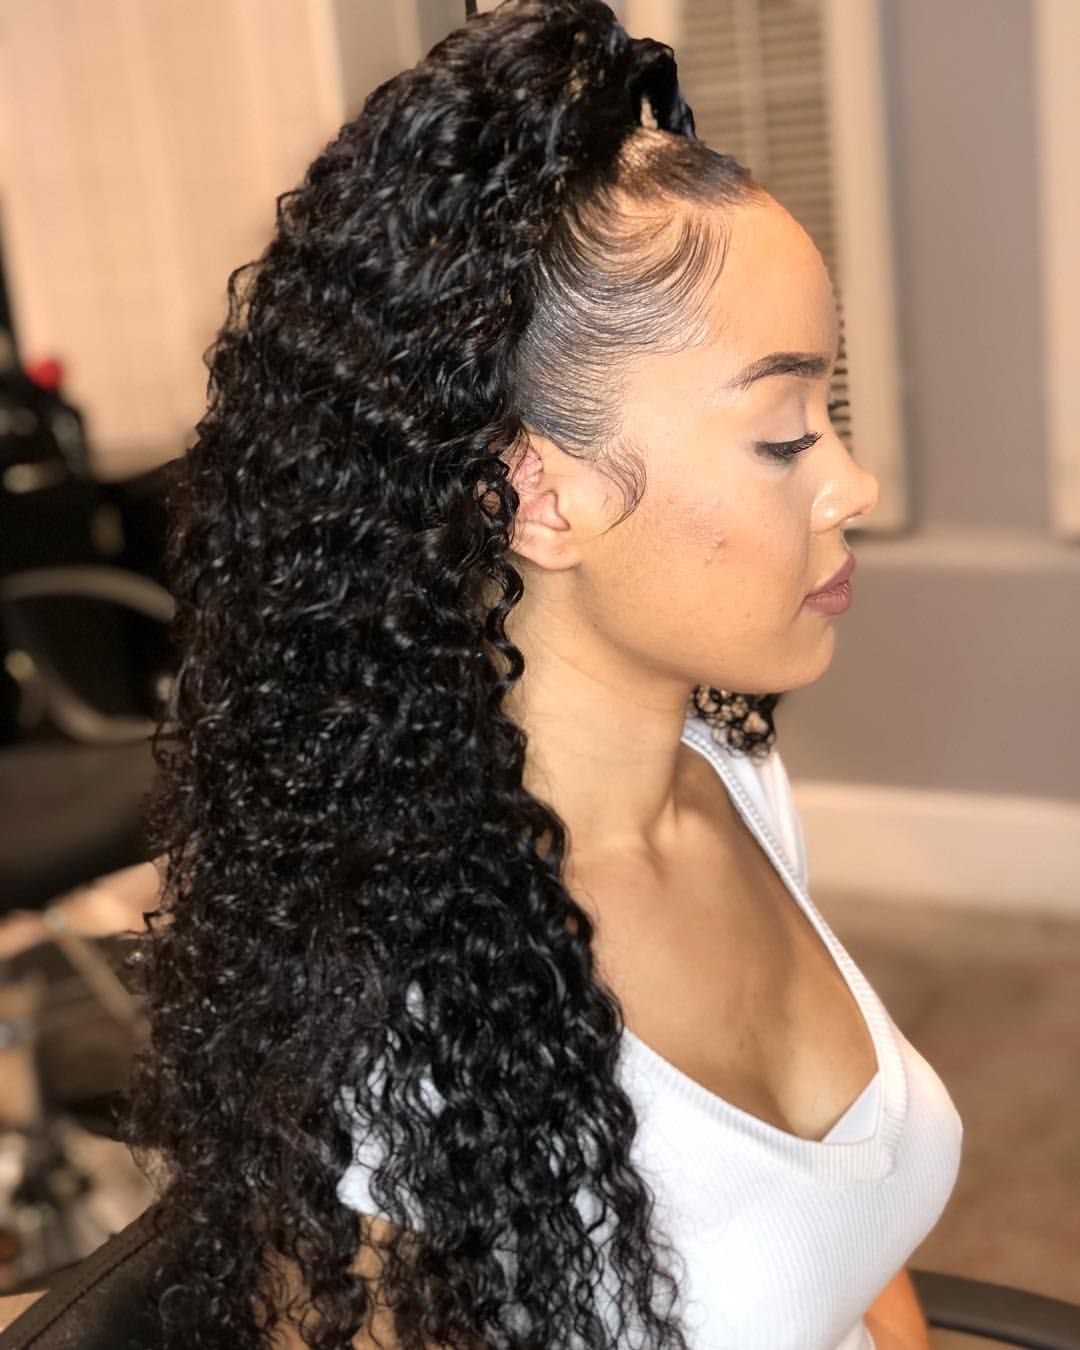
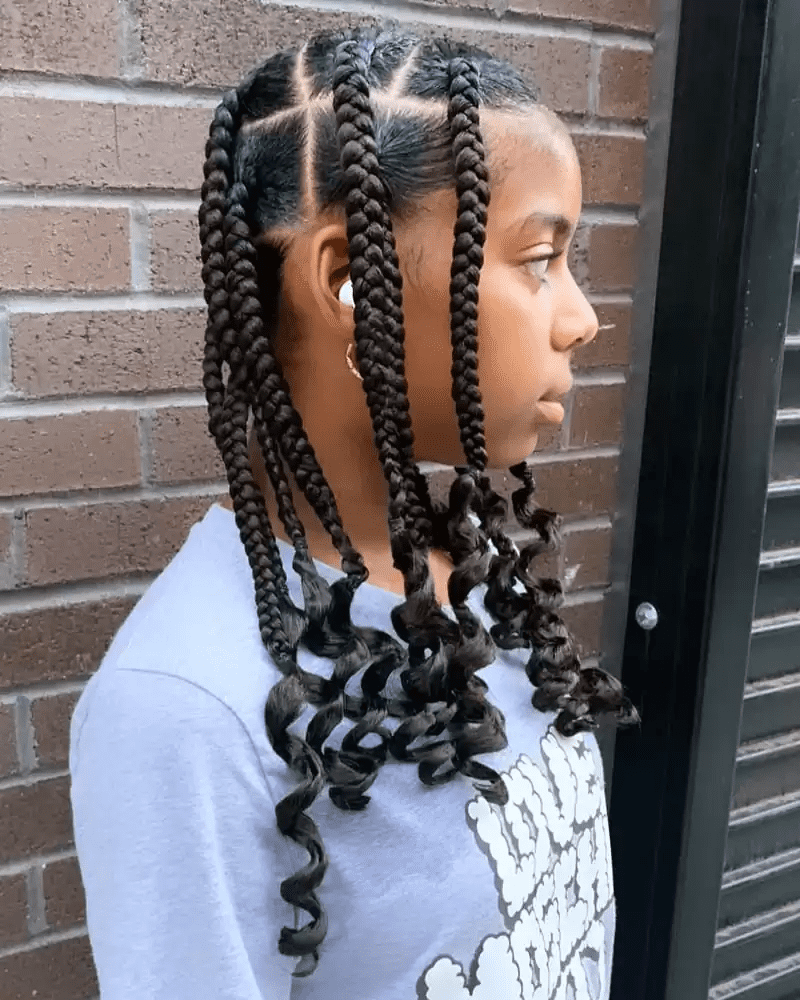
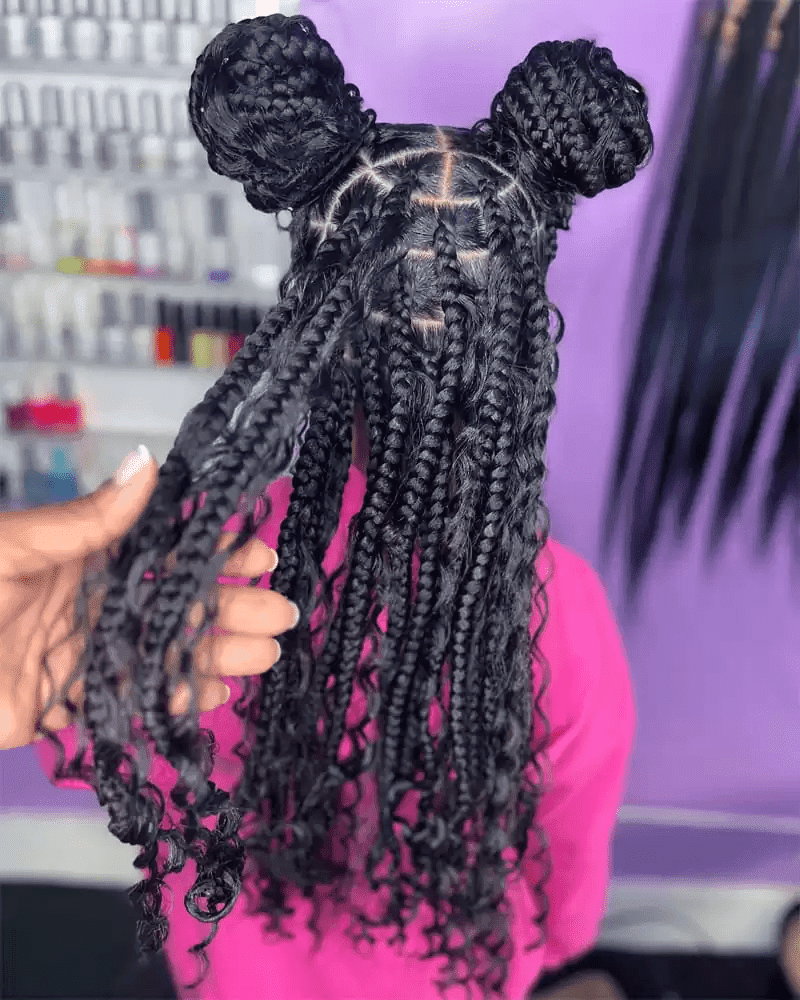
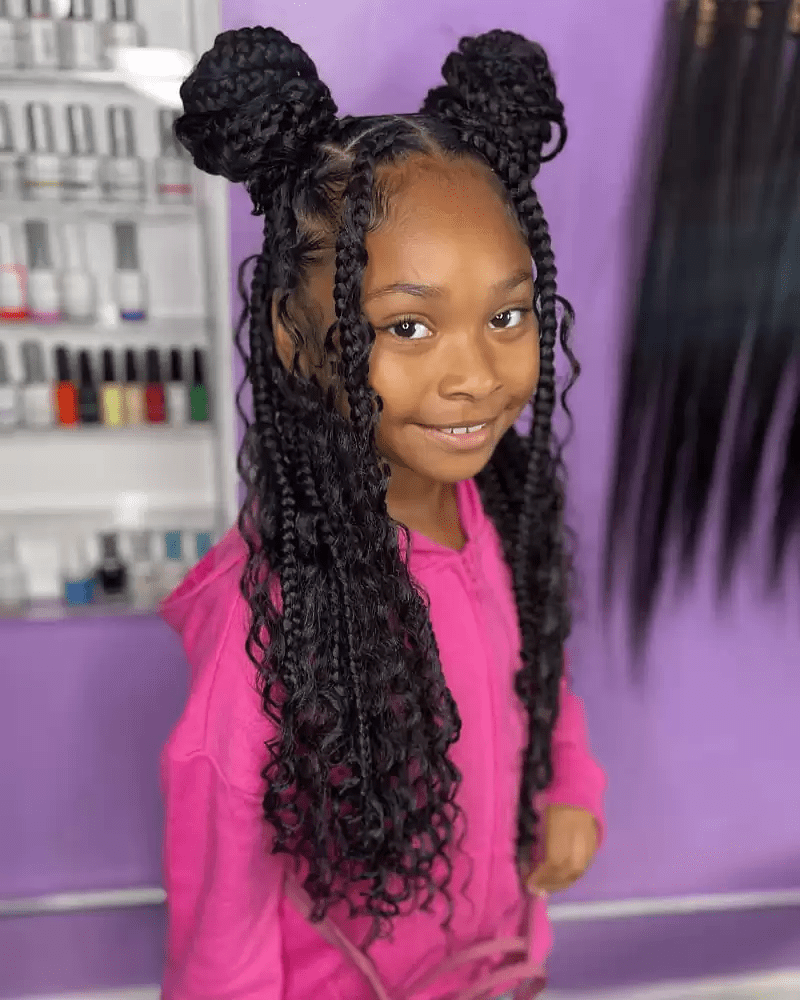
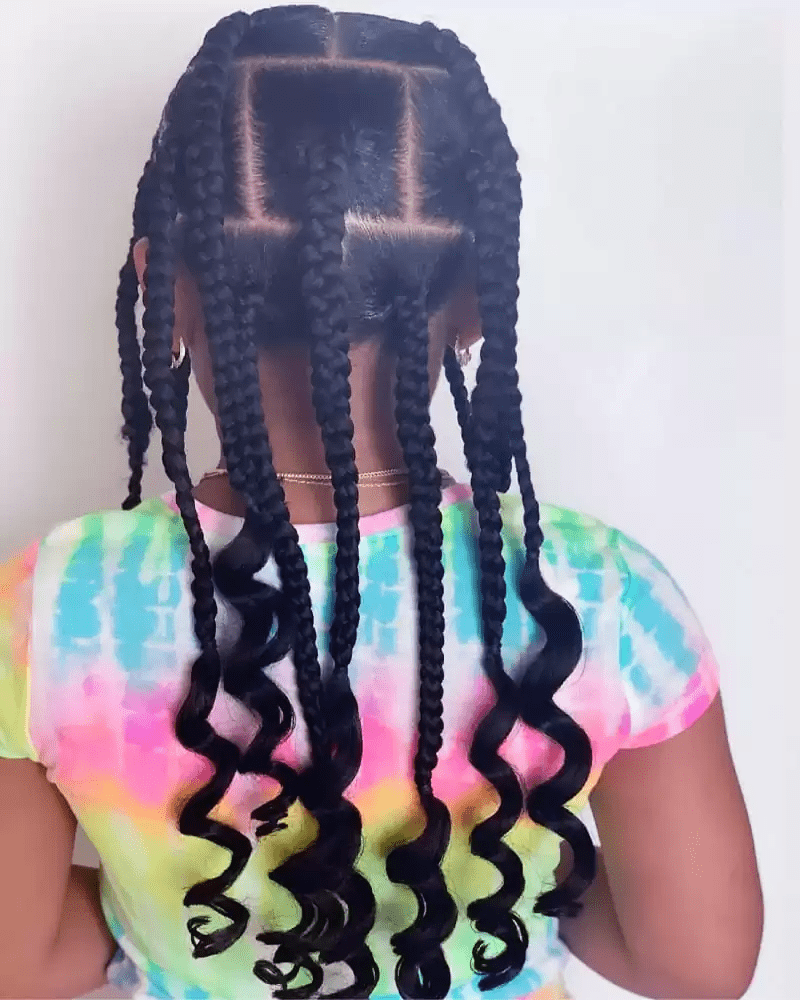
GODDESS BOX BRAIDS FOR KIDS
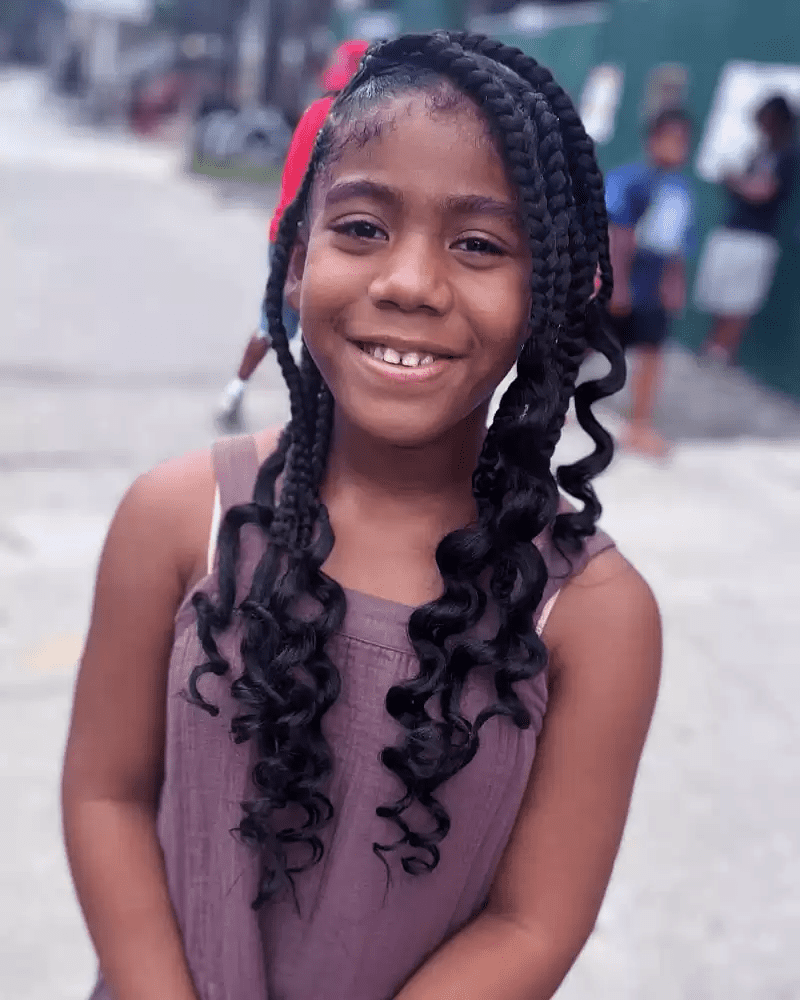
These braided hairstyles combine box braids with curls, creating a beautiful and unique look. To achieve this style, you’ll need two types of hair: one for the braids and another for the curly ends.
Experts often recommend Kanekalon hair for the braiding texture, as it’s ideal for creating neat and durable braids. For the curly ends, you can use wavy human or synthetic hair, depending on your preference. If you opt for human hair, keep in mind it will be more expensive than synthetic options.
Regardless of the hair type you choose, don’t miss out on the possibilities these braided hairstyles offer. You can experiment with highlighted colors, half ponytails, golden beads, and much more. The images below showcase some stunning examples of Goddess box braids for kids, which are sure to be a hit with both parents and kids alike.
BOX BRAIDS BUN HAIRSTYLES FOR AFRICAN-AMERICAN KIDS
JUMBO BOX BRAIDS FOR KIDS
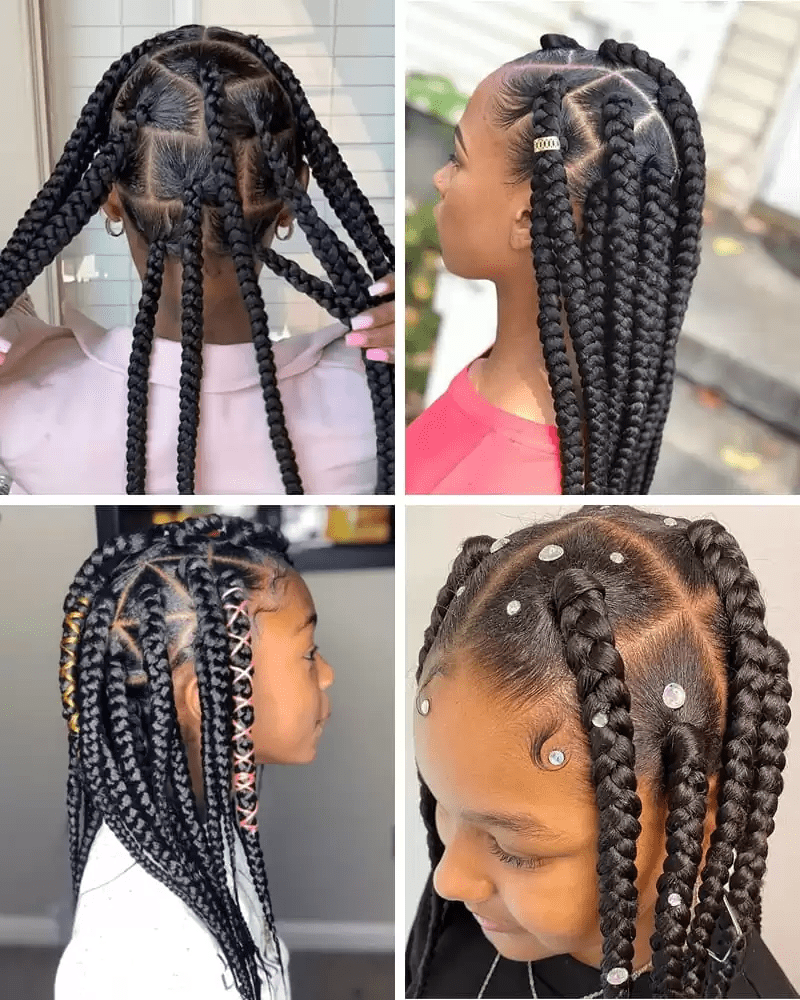
Jumbo box braids, one of the finest African-rooted protective hairstyles, are a thicker and larger variant of traditional box braids. As you can see in the pictures below, these styles are incredibly versatile and work well with various accessories.
Jumbo box braids can be styled with both square and triangular/diamond-shaped parts, making them a great option if your kids love long, thick plaits. The cost for this hairstyle typically ranges from $140 to $220+ and can last for 4 to 8 weeks.
However, we recommend not leaving these braids in for more than 5 weeks, as prolonged wear can lead to natural hair damage and potential scalp infections.
DOUBLE KNOTTED BRAIDS FOR KIDS
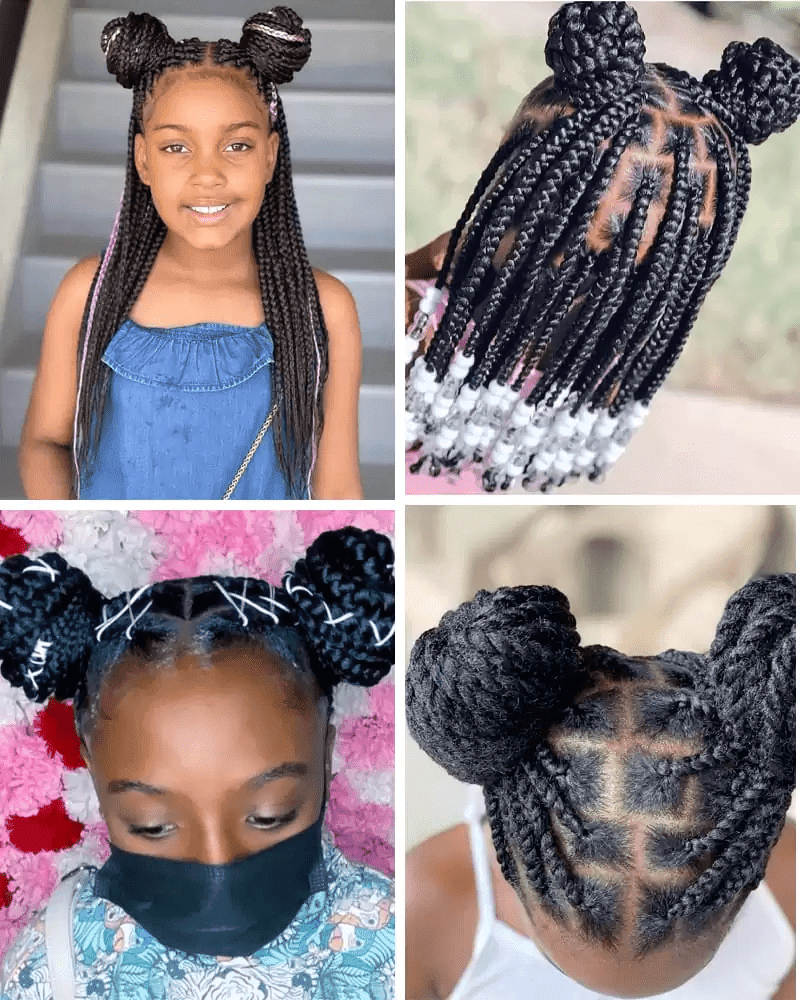
Knots are an adorable and simple option. With your child’s lovely box braids, you can easily shape them into various designs, and knots are among the most popular hairstyles for box braids.
Braided knots offer a great solution for parents looking for the perfect hairstyle for their little girls. These long plaits can be accessorized in countless ways, making them even more versatile.
The best part is the charming side knots, which can be enhanced with color and accessories. Your child will look like a little angel with these beautifully designed hairstyles. Whether you opt for full updos or half updos with two large knots, the results are stunning.
Here, we’ve selected four recent designs featuring double knots with box braids to inspire you. These styles are sure to convince you of their charm!
RIBBONS AND HAIR BOWS ARE GREAT WITH INDIVIDUAL BRAIDS
As we’ve mentioned before, ribbons and hair bows add a super-cool effect to kids’ hairstyles, enhancing their overall appearance. This holds true for children all around the world.
These accessories create a floral touch to your child’s hairstyle, complementing their angelic look. These nostalgic hairstyles bring out a sense of innocence and charm in their appearance.
The best part is that your kids can wear these accessories with highlighted braids, shorter plaits, updos, and buns. The images below will give you some inspiration for incorporating ribbons and hair bows into box braid hairstyles.
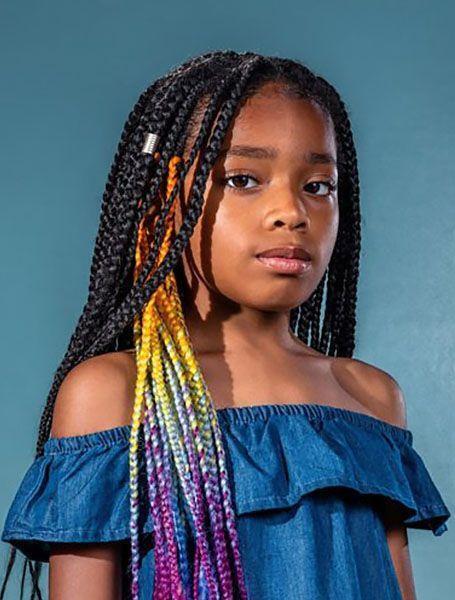
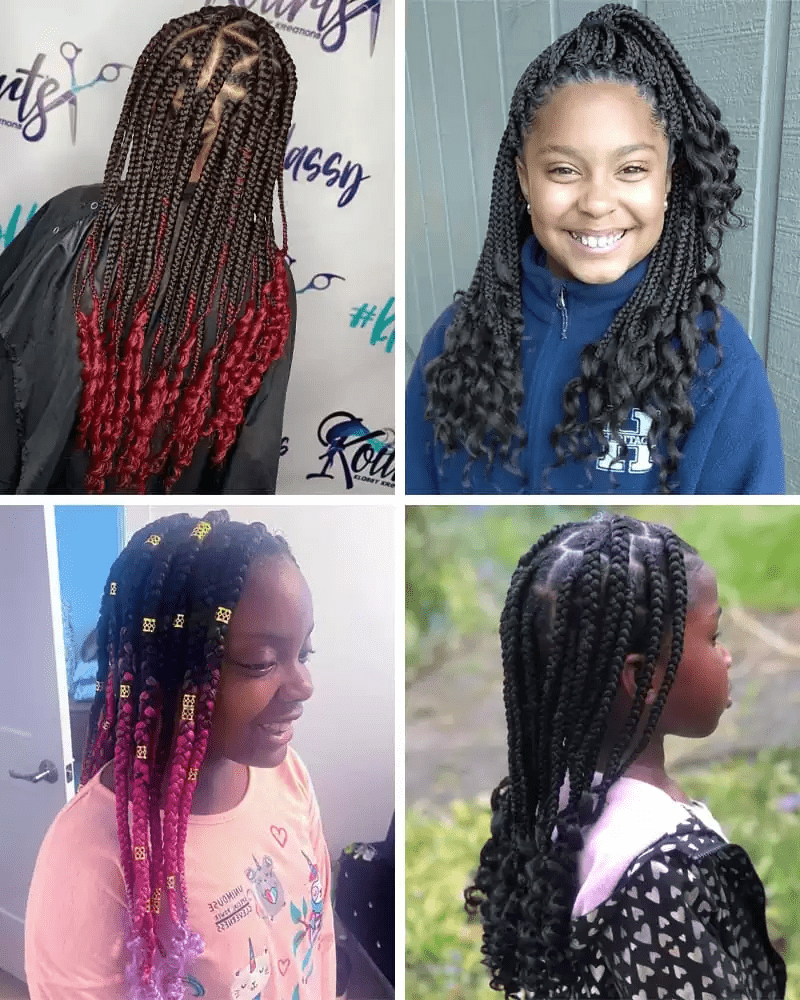
PUT SOME COLOR TO HER BOX BRAIDS
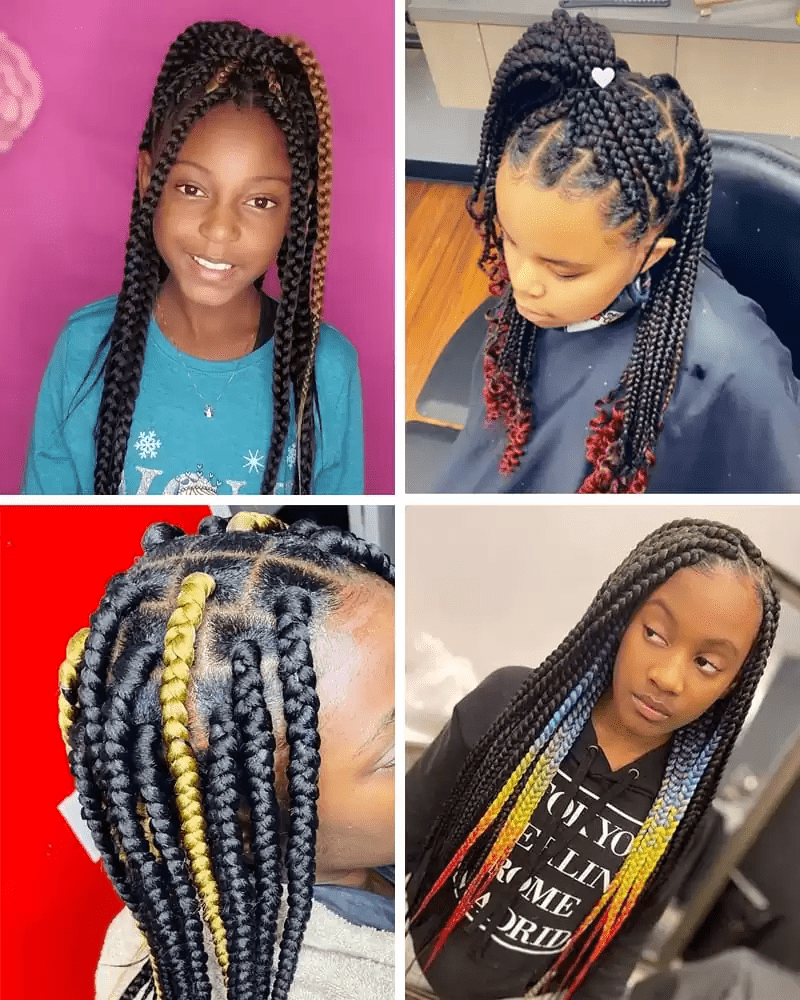
Let’s add some color to your kids’ lives by introducing vibrant shades into their braided hairstyles.
You’ll often notice colorful highlights in kids’ hairstyles, as full-color looks are more common among adults. For kids, subtle color highlights are a great way to add a playful touch to their braids.
In the images below, you’ll see how these colorful accents bring a magical charm to your child’s hairstyle. Burgundy is a popular choice for kids, and we also recommend trying light-colored braids for a soft yet striking effect in your kid’s box braids.
NO-RULES STYLES

Box braids are beloved by both adults and kids alike, and their versatility knows no bounds. There are no strict rules when it comes to styling these braids, as new and creative variations are constantly being discovered around the world. Here are some unique braid styles that break away from tradition. We hope you and your little one will love them!
KIDDIES BRAID HAIRSTYLES
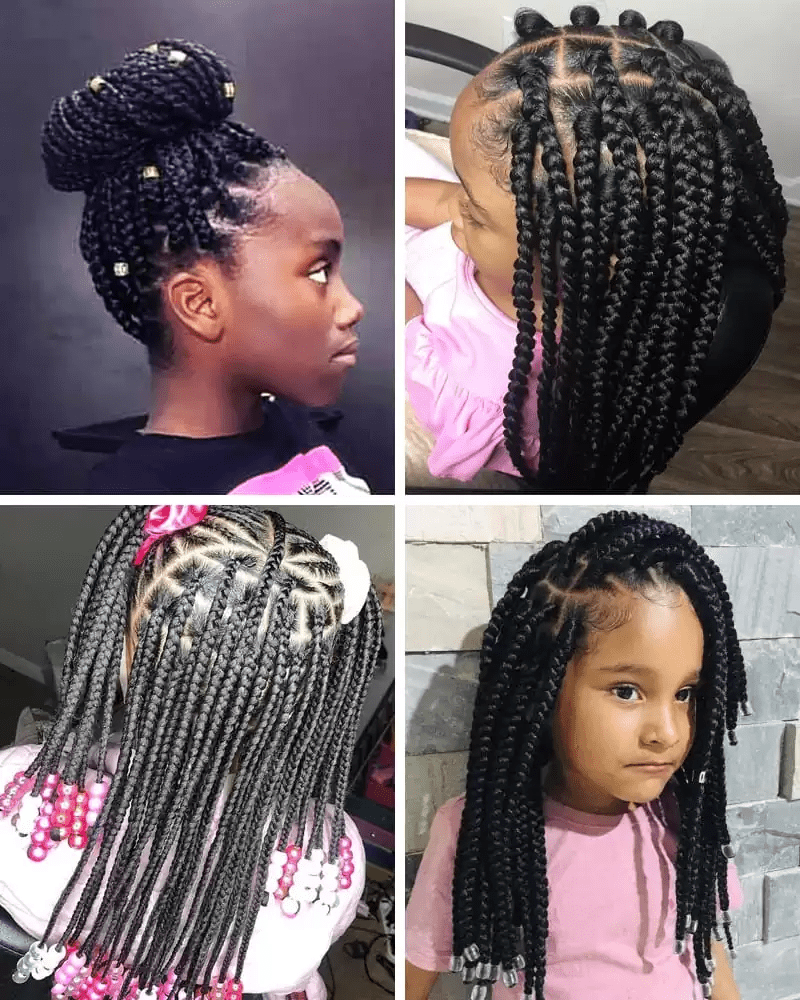
Just like adult women, kids have a vast array of hairstyles to choose from, many of which defy categorization. Here are some uniquely designed box-braided styles for your little ones. These braids are beautifully adorned with beads, hair bows, and more. Meanwhile, jumbo braids, side-swept styles, updos, and half ponytails add an extra layer of charm to their look.
BOHO BRAIDS FOR KIDS
Bohemian braids, also known as boho or gypsy braids, combine traditional square-shaped box braids with curls. These styles aren’t just for adults; they can look equally charming on kids. Boho braids offer a customizable look, allowing you to adjust the thickness, length, style, color, and accessories to suit your preferences. If you’re searching for a lovely braid style for your child, bohemian braids could be a fantastic choice.
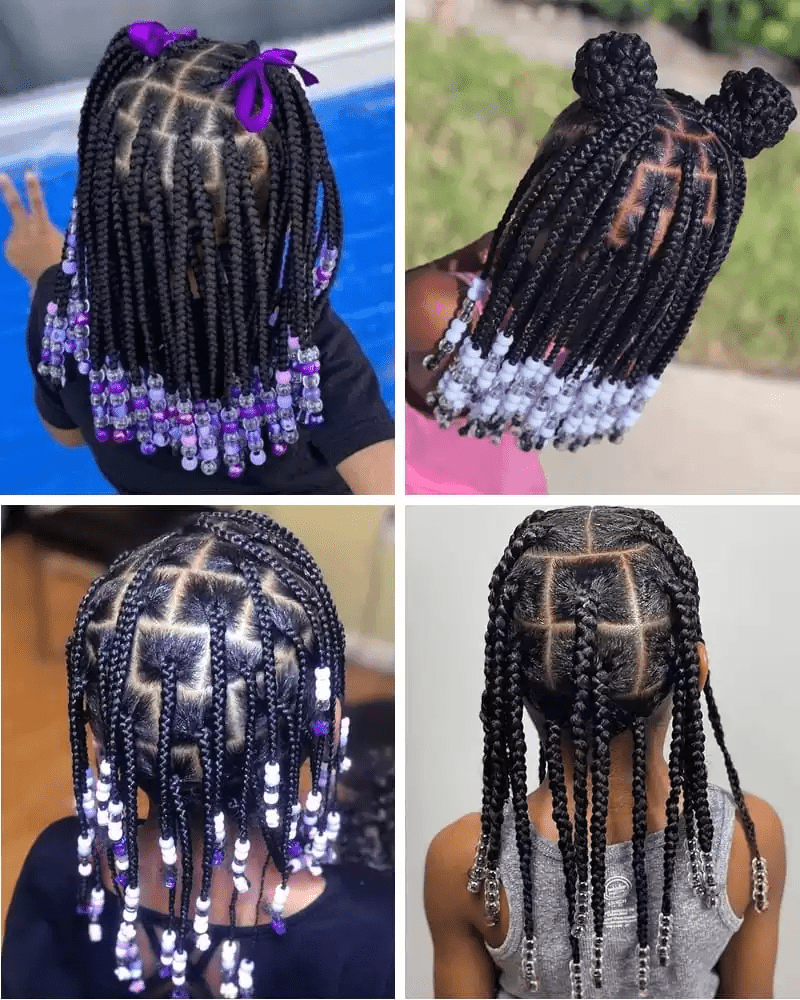
PURPLE BRAIDS
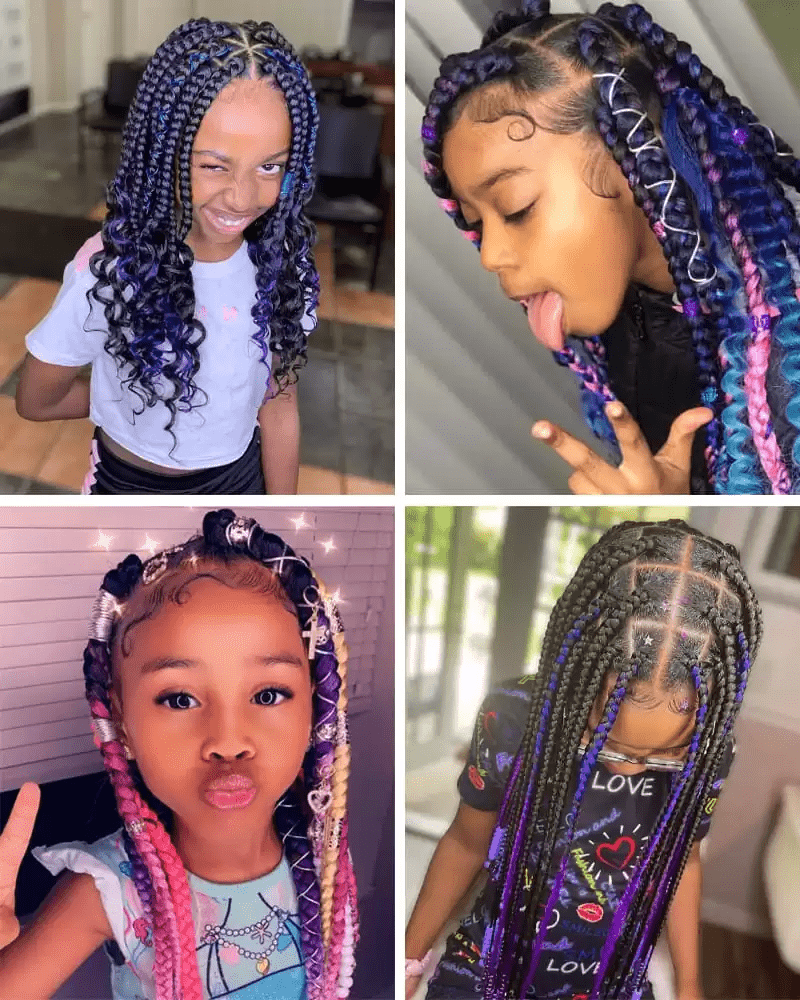
Here’s another vibrant option for coloring your child’s braids. While purple braids, like red braids, are less common among kids, their rarity doesn’t diminish their appeal. We’ve gathered four stunning box braid styles featuring purple hues that are sure to catch your eye. Plus, you can enhance these styles with traditional accessories like criss-cross rubber bands and glass beads.
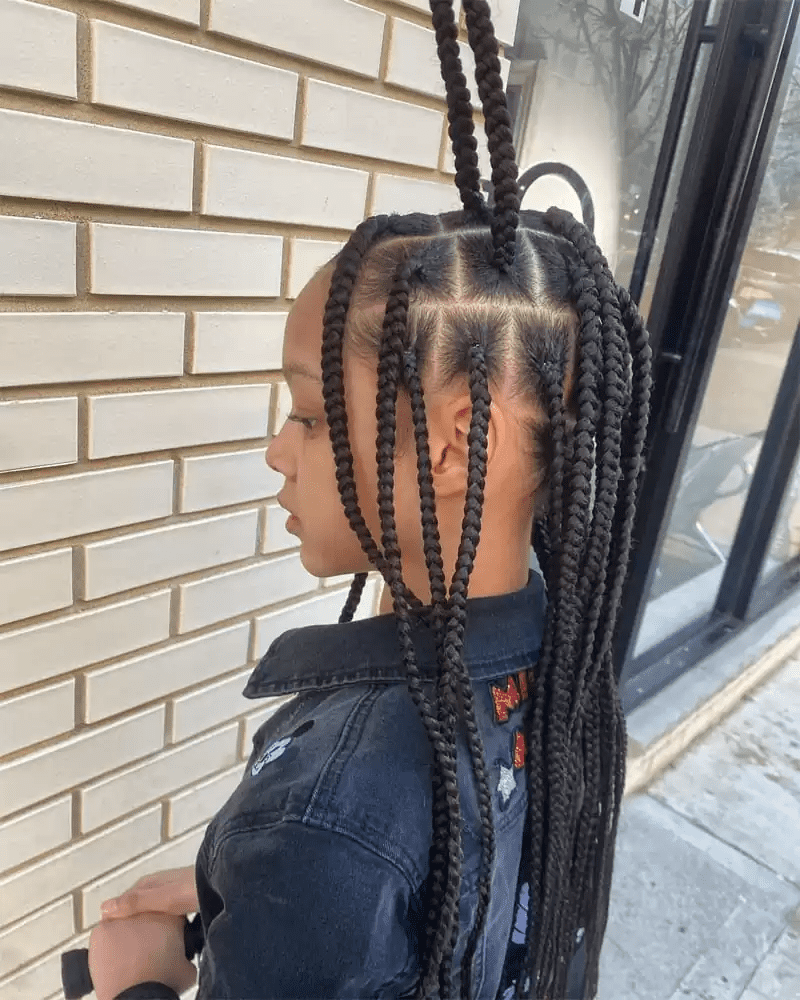
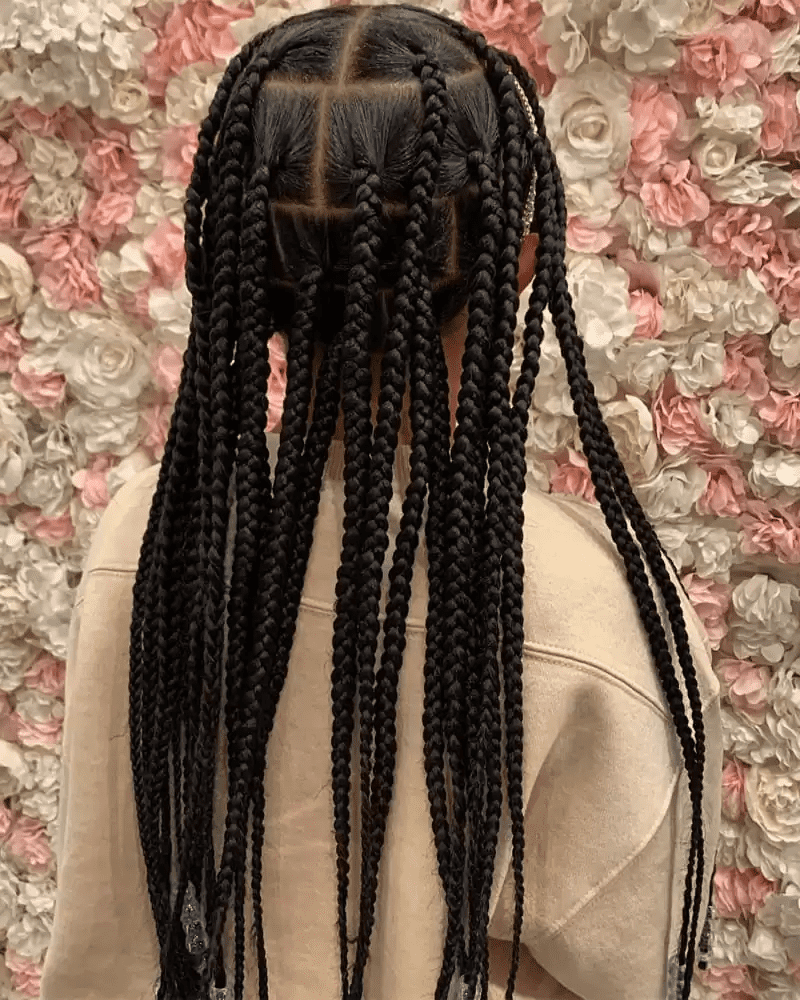
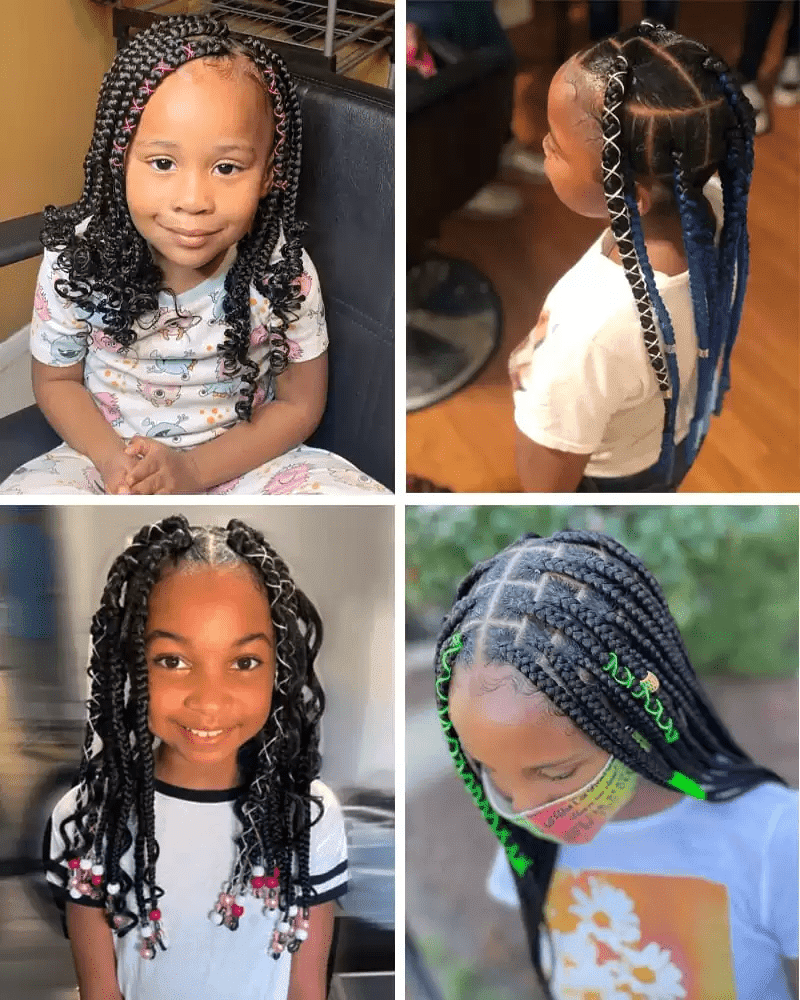
KNOTLESS BOX BRAIDS
Knotless braids are a unique variation of traditional braided styles. Unlike conventional braids that start with a knot at the root, knotless braids are created without knots. This approach reduces tension on the scalp and helps prevent hair damage and breakage. You can still adorn and accessorize knotless braids just like traditional box braids. If you’re considering knotless braids for your child, explore the following creative and accessorized styles.
KIDS RED BOX BRAIDS
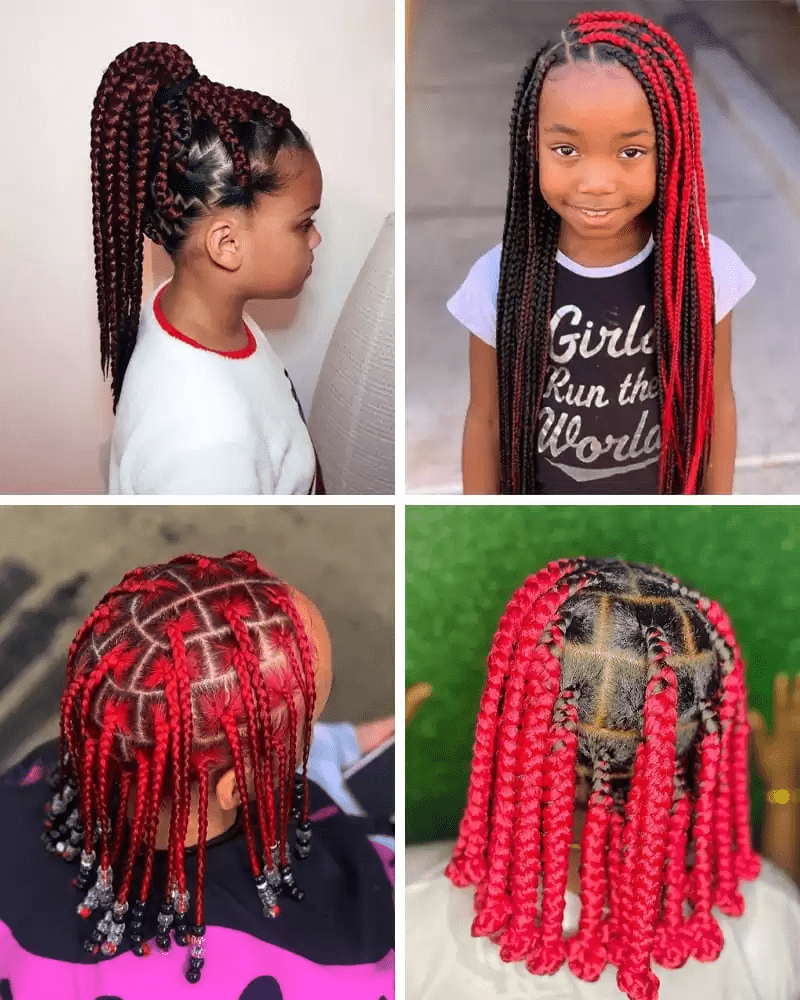
Vibrant shades like spicy red, burgundy, or fiery red can add a magical touch to your child’s hairstyle. Using these colors for red highlights can give her a stunning look. To achieve this effect, combining box braids with these eye-catching colors is key. While red box braids are less common among kids, they are far from being overlooked. Believe me, your child will look even cuter with these bold red hues than with traditional box braid styles.
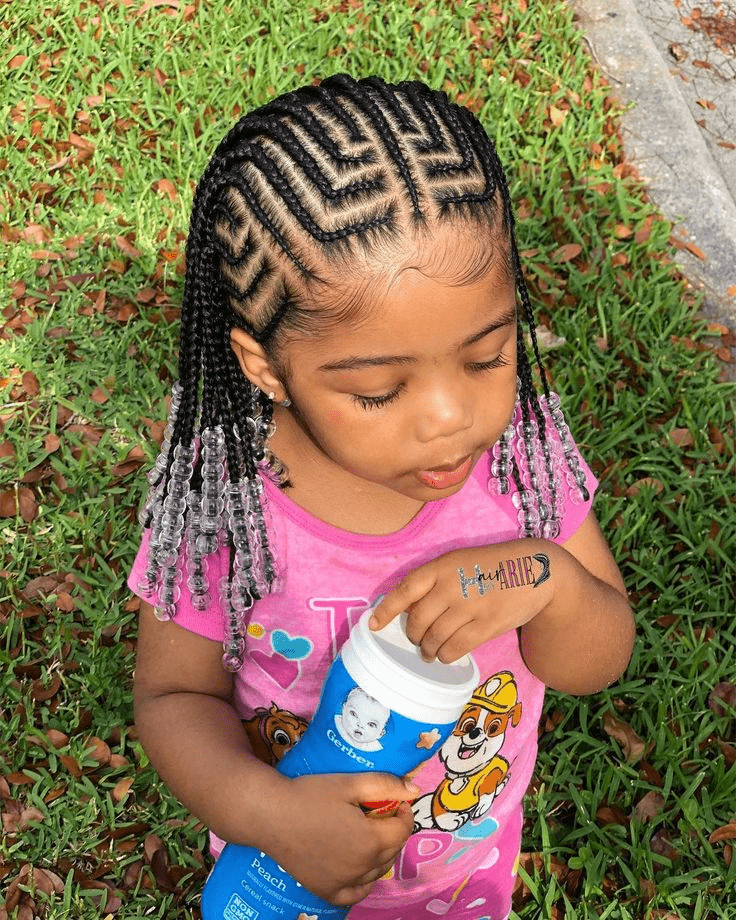
FULANI BRAIDS FOR KIDS
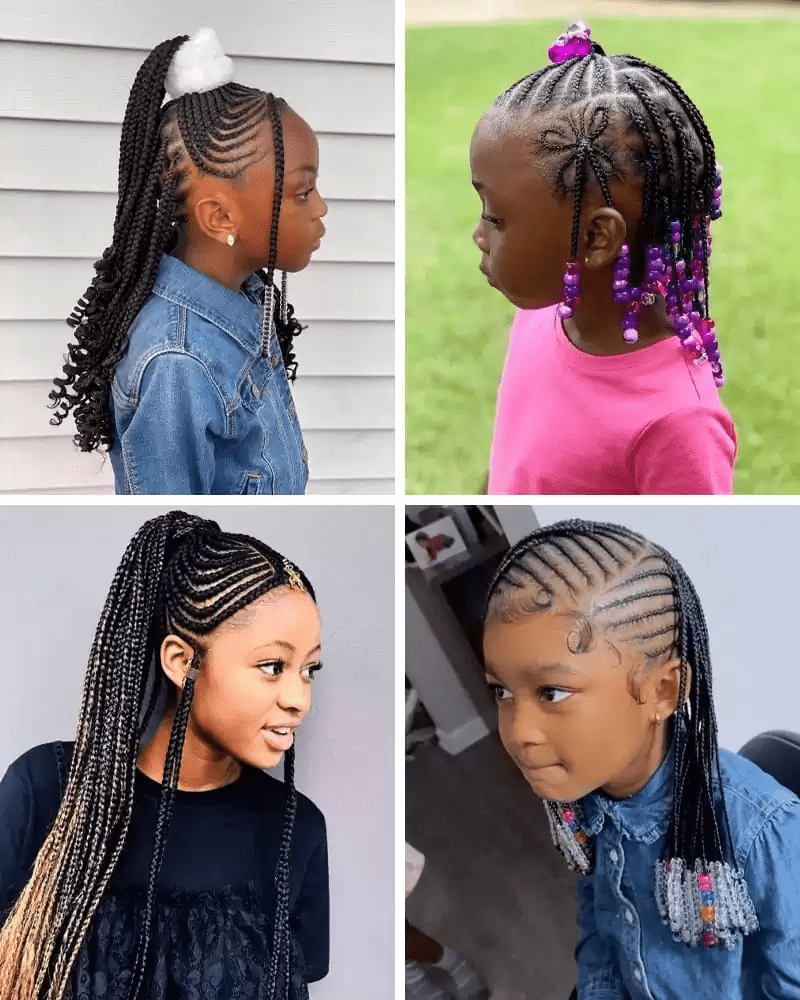
If you want your child to sport both cornrows and box braids simultaneously, Fulani braids are the ideal choice. These braids feature cornrows at the front and box braids at the back, offering a stylish and versatile look. You can enhance these braids with charming beads, hair bows, ribbons, and rubber bands to further elevate the hairstyle. Additionally, a ponytail or half ponytail pairs beautifully with Fulani braids. Below, you’ll find four of the best styles for kids to try.
CROCHET BOX BRAIDS
Unlike traditional box braids, crochet box braids are easy to create and maintain. They reduce tension on the scalp and promote healthy hair growth, making them an excellent choice for kids. Crochet braids can be either box braids or twisted braids, but we recommend the classic box braids for your child. Simply cornrow your child’s natural hair and use a crochet needle to attach pre-braided or pre-twisted extensions. The final result will resemble the styles shown in the images below.
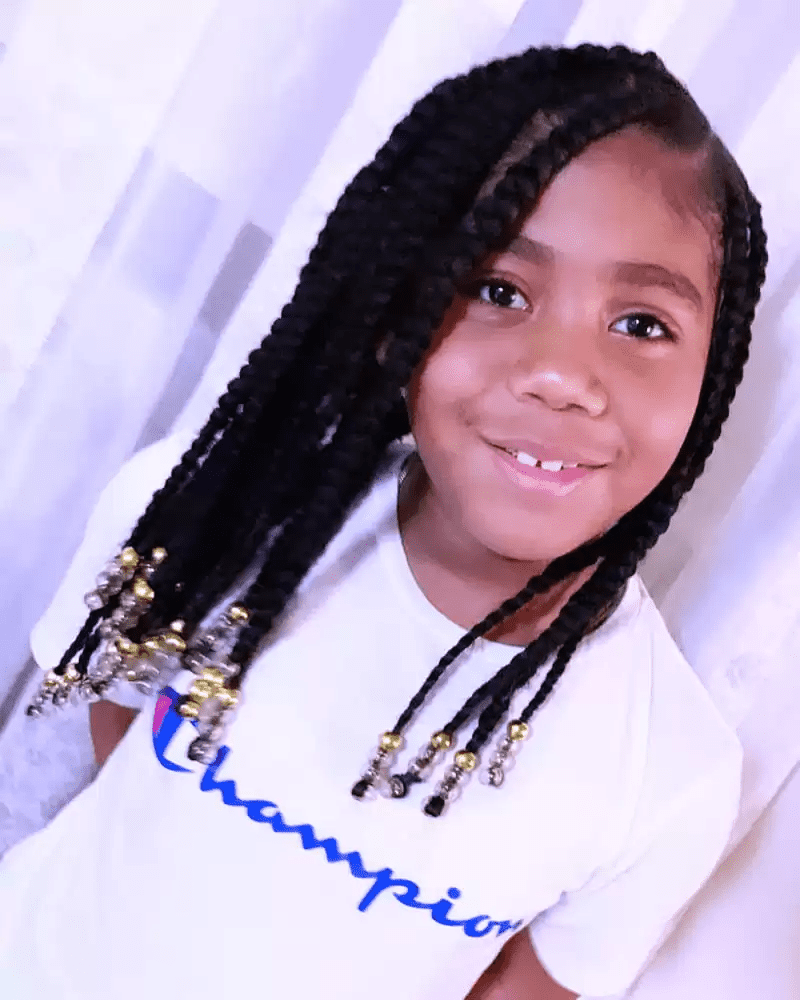
SHOULDER LENGTH BOX BRAIDS (BRAIDED BOB)
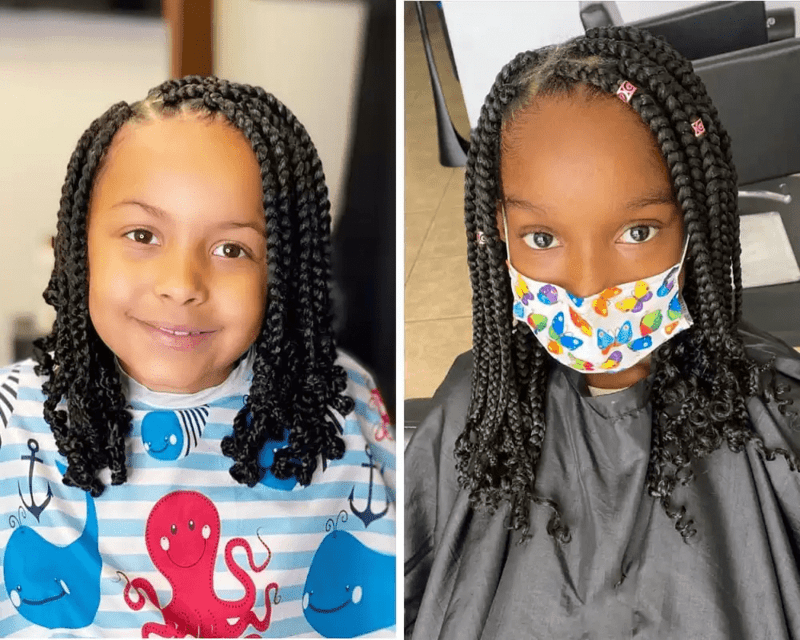
In addition to long single braids, your little ones can rock shoulder-length box braids or braided bob hairstyles for a charming look. The blend of their innocent faces with these stylish hairstyles will make them appear more confident, cute, and adorable. Individual braids can be accessorized with a variety of embellishments, so consider adding some beads to enhance their look. For extra flair, we recommend curling the edges of the braids. The combination of kinky edges, a bob style, and shoulder-length braids can create a heavenly appearance, as shown in the images below.
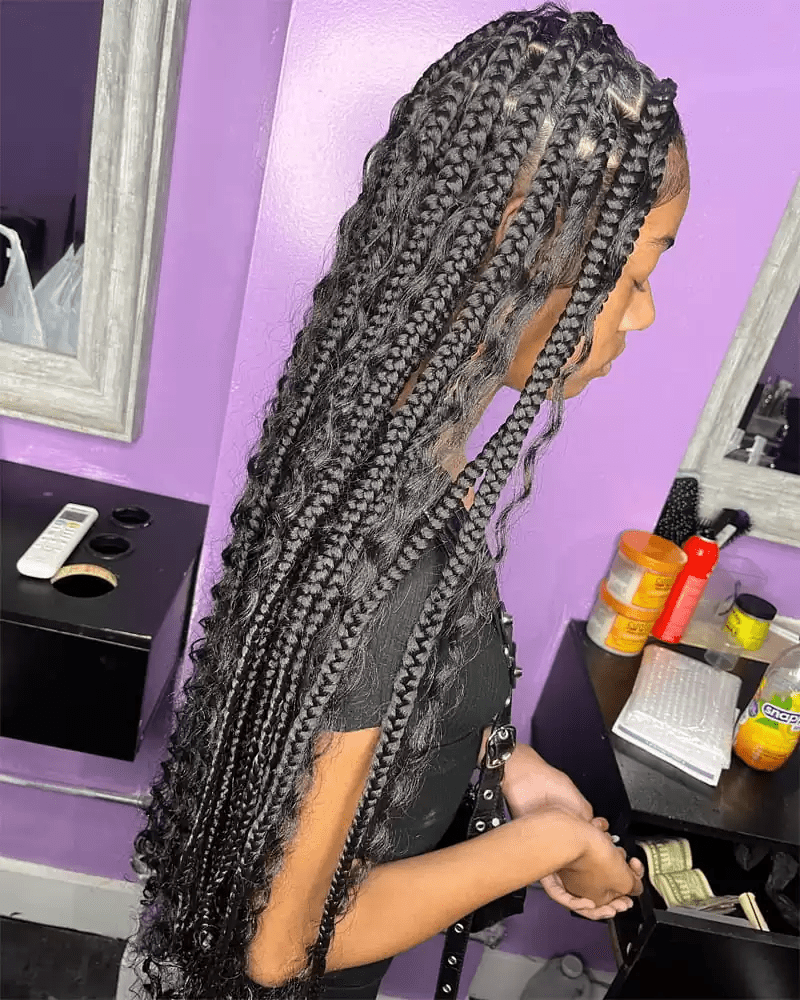
LONG BRAIDS, CUTE ANGELS
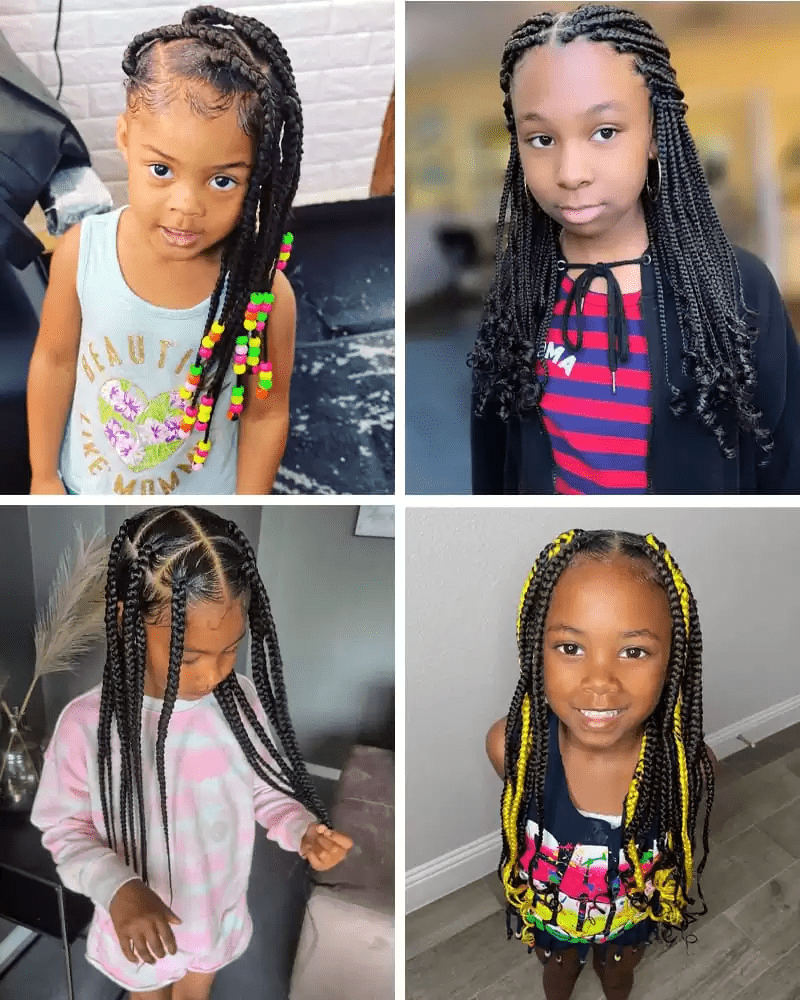
Kids can definitely wear long braids, and sometimes hip-length braids can be even more stunning than other styles. There are numerous variations of long box braids, including curly styles and goddess braids. To give your child an angelic look, consider adding colorful beads to the tips of the braids and incorporating bright highlights, like yellow, for extra flair.
Below, you’ll find examples of long box braids that combine curly edges, vibrant beads, and highlights. This combination can make your child look like a heavenly angel.
KIDS’ BOX BRAIDS WITH RUBBER BANDS
Crisscross rubber bands can add a fantastic touch to kids’ box braids, enhancing any style, whether it’s goddess braids, triangular box braids, square box braids, or more. These accessories come in various colors, allowing for a customizable and eye-catching look. As shown in the images below, rubber bands beautifully complement any box braid design and style, adding a unique and stylish flair.
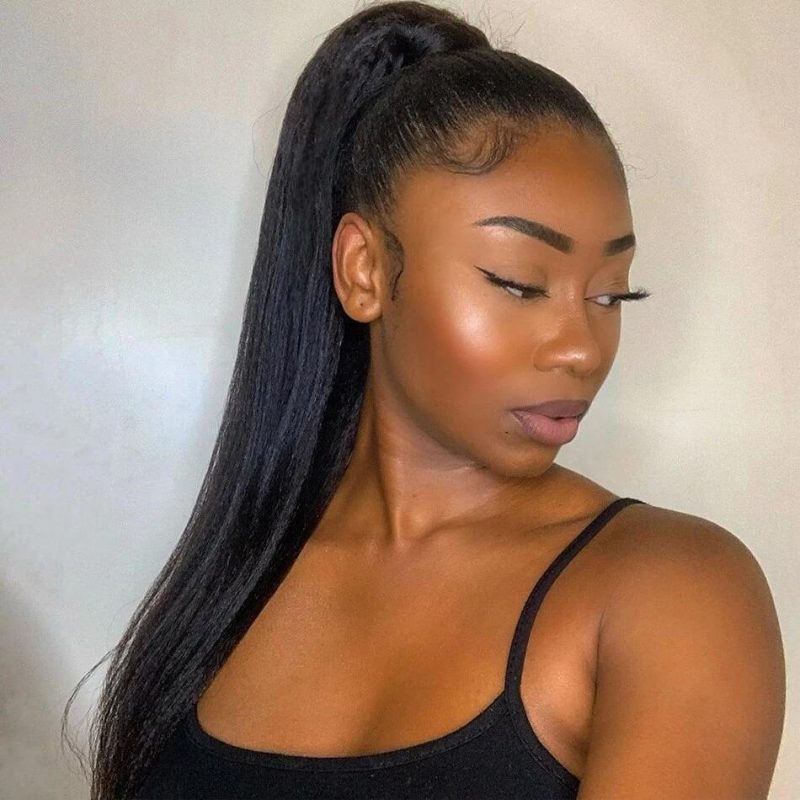
PONYTAILS ARE ALWAYS AWESOME WITH BRAIDS
Ponytails are a beloved and versatile hairstyle worn by people of all ages, from kids to adults, and they work wonderfully with natural hair, locks, curls, and braids. They’re not only cute but also easy to style and can be enhanced with various accessories.
For African-American kids, ponytails combined with box braids offer a stylish and practical option. You can transform box braids into playful ponytails that are perfect for school, outings, and parties. These easy-to-create hairstyles save time while providing a charming look. Additionally, accessorizing with beads, hair bows, bands, and other embellishments can add a unique touch to your child’s braided ponytail.
KIDS’ BRAIDS AND TOPKNOTS
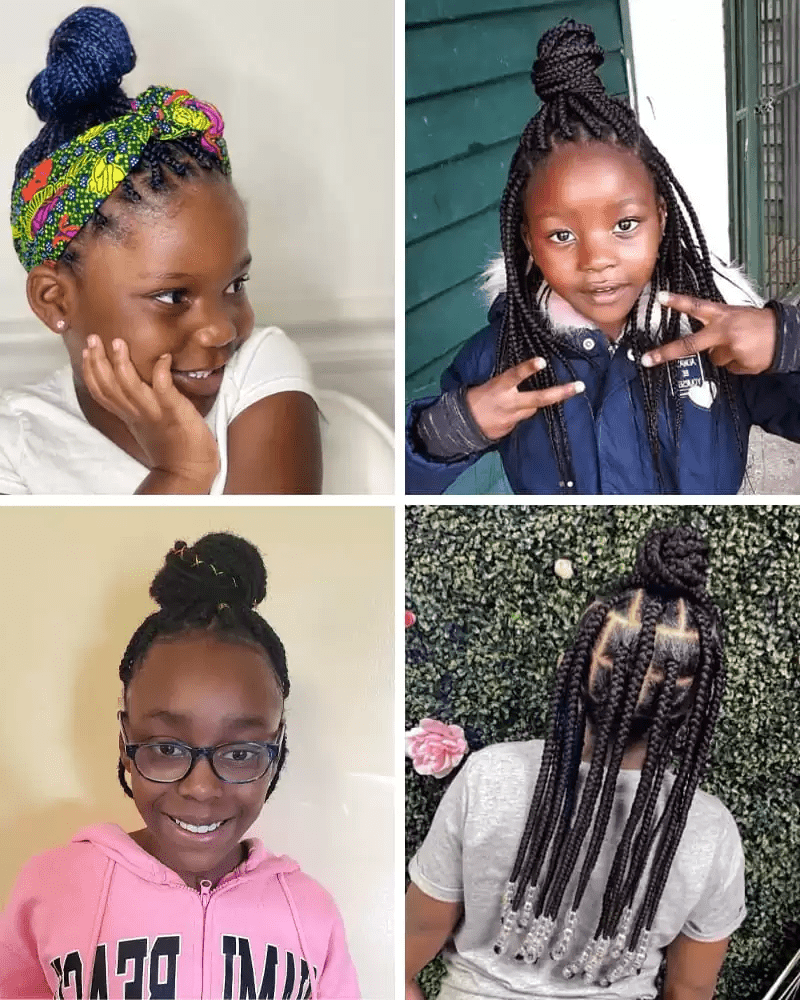
Previously, we explored double knots with braids for African-American kids. Similarly, single-knotted hairstyles with box braids are also a fantastic option. While the styles and designs are quite similar, both single and double knots offer an adorable look.
Single-knotted box braids can be accessorized with beads, ribbons, hair bands, and bows. Below, you’ll find some charming designs of single-knotted box braid hairstyles for ebony girls. We’re confident that these styles will catch your eye and be a great choice for your little ones.
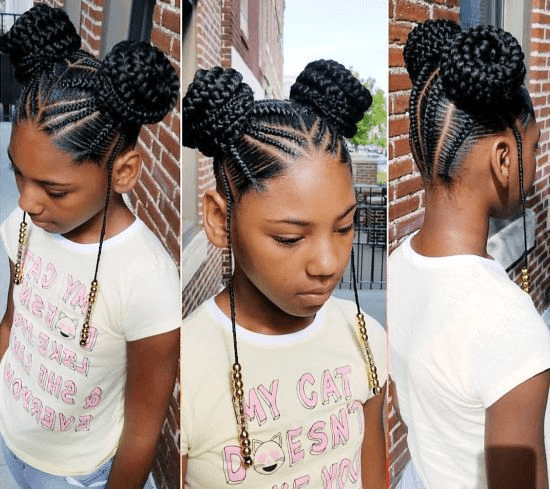
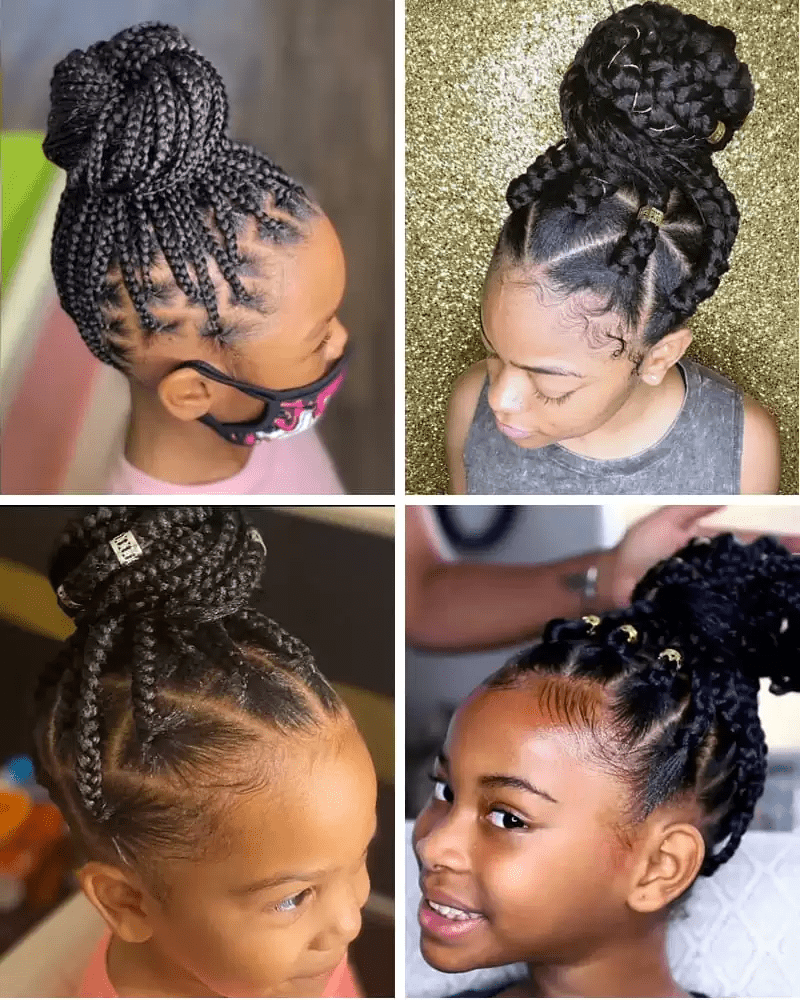
For many years, adult women have favored bun and updo hairstyles for special events like weddings and birthday parties.
Nowadays, buns are a popular choice not just for women, but for men and kids too. Buns paired with braids, curls, locks, and various accessories have become trendy. This makes braided bun hairstyles an excellent option for your school-going kids as well.
These styles offer both hair protection and a pretty look for your child. Below are some braided bun hairstyles for kids, designed using the classic box braid technique. You can further personalize these styles by adding beads, hair bows, ribbons, and other fun accessories.
FAQ
1. Are Box Braids Good for Kids?
Absolutely! Box braids are a fantastic protective hairstyle for kids. They help to moisturize the natural hair, reduce breakage, and promote healthy growth. The benefits of box braids are applicable to all ages, making them a great choice for children.
2. How Long Can Kids Keep Box Braids In?
While adults can typically wear box braids for 6 to 8 weeks, it’s best for kids to wear them for a shorter period. Ideally, kids should keep box braids in for 2 to 6 weeks, or up to 45 days. Wearing them longer can risk damage to their delicate hair and scalp.
3. Is There an Age Limit for Braids?
Yes, it’s generally recommended that kids start wearing box braids around ages 7 to 10. Some experts suggest that children aged 10 to 12 are best suited for this style. However, younger children can also wear box braids if they are installed with low tension to the scalp.
4. How Much Hair Does It Take for Kids’ Box Braids?
The amount of hair needed depends on the type of hair extensions you use. For Kanekalon hair, you will need 3-5 packs. For X-pressions hair, 2-3 packs should be sufficient.
5. How to Style Box Braids for Kids?
There are many creative styles for box braids, including Box Braids with Glass Beads, Goddess Box Braids, Braided Buns, Jumbo Braids, Braided Knots, Ribbons and Hair Bows, Colorful Braids, Topknots, Ponytails, Rubber Bands, Hip-Length Braids, Shoulder-Length (Bob) Braids, Crochet Braids, Red Box Braids, Purple Braids, Fulani Braids, and Knotless Braids.
6. How Old Should a Child Be to Get Box Braids?
Experts recommend starting box braids at ages 7-10. While younger children can also wear them, it’s important to ensure that the braids are installed with minimal tension to avoid damage.
7. Can a 3-Year-Old Get Box Braids?
While it’s possible to style a 3-year-old’s hair with box braids, it can be risky due to the sensitivity of their scalp. If you choose to do so, make sure the braids are done with very low tension to minimize potential damage.
8. Are Box Braids Safe?
Yes, box braids are generally safe and widely used by people of all ages. They are a protective hairstyle that can help reduce breakage and promote healthy hair growth. However, it’s important to avoid wearing them for more than 6 to 8 weeks to prevent 9. potential damage.
9. At What Age Can Kids Get Box Braids?
Box braids are usually recommended for children aged 7-10. While some younger kids do wear them, it’s crucial to ensure that the braids are applied with low tension to avoid harming their delicate hair and scalp.
CONCLUSION
Box braids offer a versatile and stylish solution for kids’ hair, perfect for any occasion. From the playground’s carefree energy to the glitz and glam of parties, there’s a box braid style for every adventure. These protective hairstyles not only look adorable but also keep your child’s hair healthy and manageable. So, unleash your little one’s inner fashionista and explore the endless possibilities of box braids! Remember to prioritize your child’s comfort and hair health when choosing a style. Happy braiding!