Press on nails are a popular alternative to salon-manicured nails. They’re quick, easy, and more affordable than going to a salon. However, one major issue with press on nails is how long they last.
If you’ve ever used press on nails, you know that they can be difficult to keep on for an extended period of time. Most people experience them falling off within a few days or even hours.
Thankfully, there are several ways to keep press on nails from popping off, so you can enjoy your beautiful manicure for up to two weeks. Read ahead for expert advice on how to make press on nails last longer.

How to Apply a Press On Nail
Preparation
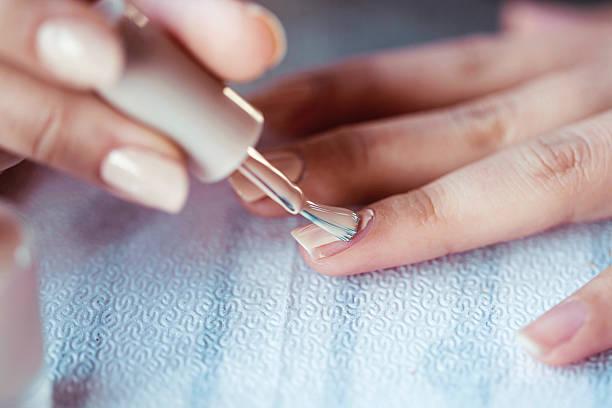
- Clean and Dry Nails: Start with clean, dry, and oil-free natural nails. Remove any old nail polish or residue using nail polish remover.
- Nail Prep: Gently push back your cuticles and file your natural nails to your desired length and shape. Use a buffer to create a slightly rough texture on the nail’s surface, which helps the press-on nails adhere better.
Application
- Choose the Right Size: Select press-on nails that fit your natural nails perfectly. Avoid nails that are too large or too small, as they may not adhere well.
- Glue Application: Apply a small drop of nail glue (included in most press-on nail kits) to the back of the press-on nail and another drop onto your natural nail. Use a gentle, even pressure to press the press-on nail onto your natural nail. Hold it in place for about 10-15 seconds to allow the glue to set.
- Press Firmly: Ensure you press firmly along the entire surface of the press-on nail to remove any air bubbles and create a secure bond.
How to Make Press On Nails Last Longer
We consulted with several experts in the beauty industry to get their advice on how to make press on nails last. Here are some of their tips:
Prepare your nails properly
Begin by meticulously preparing your natural nails. Cleanse them to remove any dirt or oils, then buff and shape them to your desired length and shape. Ensure that there is no residual nail polish or residue left behind.
Use the right glue
Opt for a high-quality nail glue specifically designed for press-on nails. Using the right adhesive is crucial for secure and long-lasting attachment. Avoid substitutes like super glue or other adhesives, as they may harm your natural nails.
Apply the press-ons carefully
Apply the press-on nails with care, ensuring they fit snugly on your natural nails. Pay close attention to eliminate any air bubbles, pressing down firmly to achieve a secure bond.
Cre the glue properly
If the glue you use requires curing, diligently follow the instructions provided on the product label. Proper curing is essential for a strong and durable bond.
Avoid Submerging in Water
After application, avoid exposing your nails to water for at least 24 hours. This period allows the glue to dry and set completely, enhancing the longevity of your press-ons. While press-on nails are water-resistant, it’s best to avoid prolonged exposure to water. Wear gloves while doing dishes or during activities that involve soaking your hands.
Be gentle with your nails
Be mindful of your press-on nails in daily activities. Activities that may damage them, such as typing, washing dishes, or opening jars, should be approached with care. Using gloves while doing household chores can help protect your nails.
Apply a top coat
Applying a protective topcoat not only adds a glossy finish but also acts as a shield, safeguarding your press-on nails and extending their lifespan. It helps prevent chipping and enhances their overall durability.
Nourish with Cuticle Oil
Incorporate cuticle oil into your nail care routine. Regularly applying cuticle oil helps maintain the health and strength of your natural nails, which, in turn, contributes to the longevity of your press-on nails.
Steer Clear of Nail Polish Remover
Be cautious about using nail polish remover, as it can potentially harm the adhesive used for your press-on nails. Instead, opt for gentler methods of nail care that won’t compromise the glue and cause your press-ons to detach prematurely.
Regular Filing
To prevent chipping or breakage, make a habit of filing your press-on nails regularly. This maintains their shape and smooth edges, reducing the risk of wear and tear that can lead to shorter durability.
How to Remove Press On Nails Properly
Properly removing press-on nails is essential to avoid damaging your natural nails and to ensure a clean removal. Below’s a step-by-step guide on how to remove press on nails safely and effectively:
Materials Needed
- Acetone-based nail polish remover
- Cotton balls or pads
- Aluminum foil
- Wooden cuticle stick or orange stick
- Nail buffer
- Moisturizing nail and cuticle oil
Step-by-Step Removal
- Choose a well-ventilated area with good lighting, and cover your work surface with a clean towel or paper towels to catch any spills.
- If your press-on nails are long, you may want to trim them down to a manageable length using nail clippers.
- Use a nail buffer to gently roughen the surface of each press-on nail. This helps the acetone penetrate the glue more effectively.
- Pour some acetone-based nail polish remover into a small bowl. Soak cotton balls or pads in the acetone.
- Take a soaked cotton ball or pad and place it over one of your press-on nails.
- Wrap a small square of aluminum foil around the cotton ball to hold it in place. Repeat this process for all of your press-on nails. Allow the foil-wrapped nails to soak for about 10-15 minutes.
- After soaking, carefully remove one of the foil wraps. The press-on nail should easily slide off. If it doesn’t, don’t force it. Soak for a few more minutes if needed.
- Use a wooden cuticle stick or an orange stick to gently lift and push away any remaining press-on nail or glue from your natural nail. Be very gentle to avoid damaging your natural nails.
- Continue removing the rest of the press-on nails one by one, following the same process.
- After removing all the press-on nails, wash your hands thoroughly with mild soap and warm water to remove any remaining acetone residue. Pat your nails and skin dry, then apply a moisturizing nail and cuticle oil to rehydrate your nails and cuticles.
- Give your natural nails a break from press-ons and allow them to recover. Consider applying a strengthening nail treatment if needed to restore their strength and health.
FAQs
- How long do press on nails usually last? Press on nails typically last for up to two weeks, depending on how well they’re applied and how well you care for them.
- Can I shower with press on nails? Yes, you can. However, avoid keeping your hands submerged in water for too long, as this can weaken the adhesive.
- Can I reuse press on nails? Technically, you can, but it’s not recommended as they may not adhere as well the second time around.
- Do I need to use a base coat before applying press on nails? While it’s not necessary, using a base coat can help the press on nails adhere better to your natural nails.
- Can I paint over press on nails? Yes, you can. However, be sure to wait until the adhesive has fully set before painting over them.
Final Takeaway
By following these tips and tricks, you’ll be able to enjoy your press on nails for much longer than before. Remember to clean your nails thoroughly, shape them properly, use high-quality press on nails, and take good care of them. With enough practice, you’ll be able to create a beautiful and long-lasting manicure in no time.