5-INGREDIENT STOVETOP MACARONI AND CHEESE

This stovetop macaroni and cheese is the recipe I grew up with—a comforting dish featuring a creamy sauce, perfectly tender pasta, and plenty of cheese. While baked macaroni and cheese is undeniably delicious, this stovetop version is just as satisfying and far simpler to prepare. As a child, it always felt like a special treat, but now I realize my mom likely loved making it because it’s an easy, no-fuss dinner that comes together with just five ingredients and minimal effort after a long day.

INGREDIENTS

  • 1 pound dried short pasta (e.g., macaroni)
  • 1 1/2 cups whole or 2% milk, divided
  • 2 tablespoons all-purpose flour
  • 2 to 3 cups shredded cheese (cheddar, Monterey Jack, Colby, or a mix)
  • 1 teaspoon kosher salt
  • 1/4 teaspoon powdered mustard
  • Optional add-ins (pre-cook before using): ham, cooked bacon, onions, peas, mushrooms, peppers, broccoli, cauliflower

EQUIPMENT

  • Large pot
  • Medium saucepan
  • Whisk
  • Spatula
  • Measuring cups and spoons
  • Colander
  • Large serving bowl
  • Mixing bowls

INSTRUCTIONS

  • Cook the Pasta: Bring 4 quarts of salted water to a boil in a large pot. Add the pasta and cook according to the package directions until al dente (about 8 minutes). Drain and set aside.
  • Warm the Milk: In a medium saucepan, heat 1 cup of milk over medium heat. While it warms, whisk the remaining 1/2 cup of milk with the flour in a small bowl until smooth. When the milk begins to steam, whisk in the milk-flour mixture. Continue whisking gently until the mixture thickens to the consistency of heavy cream, about 3–4 minutes.
  • Make the Cheese Sauce: Reduce the heat to low and add the shredded cheese a handful at a time, stirring until melted. Mix in the salt and powdered mustard. Taste and adjust seasonings as desired. Remove the saucepan from heat.
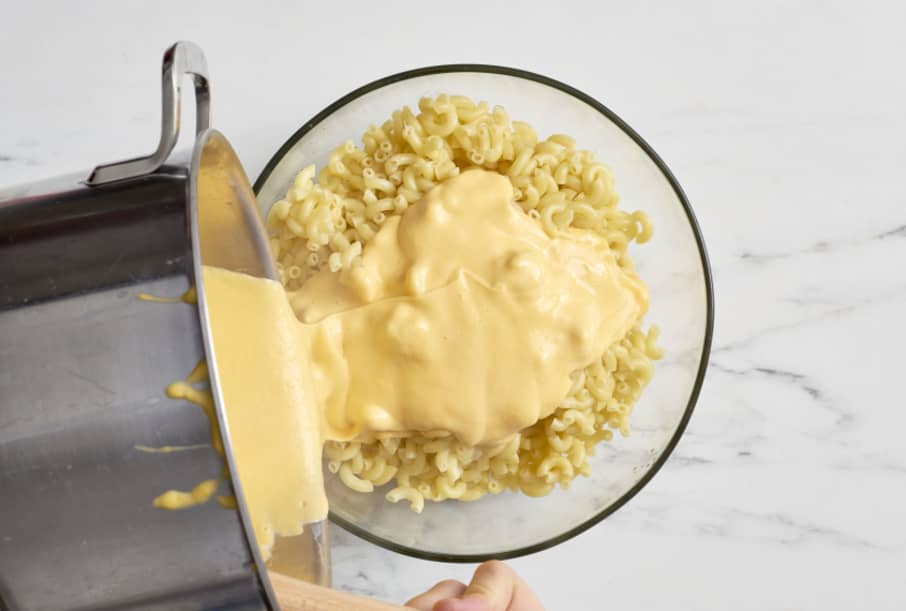
  • Combine Pasta and Sauce: Transfer the pasta to a large serving bowl. Pour in half the cheese sauce and stir to coat. Add the remaining sauce and any optional extras, stirring to combine. For a looser sauce, add up to 1/4 cup of milk. Serve immediately while warm.

RECIPE NOTES

  • Baked Version: For a crispy, golden crust, transfer the prepared mac and cheese to a casserole dish. Cover with foil and bake at 350°F for 30 minutes. Uncover, sprinkle with breadcrumbs (optional: add a few pats of butter), and bake uncovered for another 15–20 minutes until golden and bubbly.
  • Storage: Leftovers can be stored in the fridge for up to a week. Reheat in the microwave and add a splash of milk to restore creaminess if needed.

Enjoy your creamy, comforting stovetop mac and cheese!

17 FUN AND EASY AIR DRY CLAY PROJECTS FOR KIDS

Whether you’re looking for simple crafts to enjoy with your kids after school or on weekends, or DIY art projects that can become keepsakes and gifts for family and friends, this collection of air dry clay projects has something for everyone. From pinch pots and trinket dishes to coasters, keychains, photo holders, and magnets, the possibilities are endless with air dry clay—no kneading or baking required like traditional clay crafts. Can’t find air dry clay at your local craft store? Don’t worry! We’ve also included an easy DIY recipe that uses just three ingredients!

What Is Air Dry Clay?

Unlike traditional clays that require firing in a kiln or baking in an oven, air dry clay hardens and cures at room temperature. No heating is needed, and you don’t have to worry about your project cracking or exploding due to air bubbles during the cooking process. Crayola offers pre-packaged air dry clay, and there are plenty of simple homemade recipes you can try as well (check out our favorite one below!).

How to Make Homemade Air Dry Clay

Making your own air dry clay is super simple, and you only need three ingredients:

  • 1 cup baking soda
  • 1 cup cornstarch
  • 1 1/2 cups water

Here’s how to make your own air dry clay:

  • In a saucepan, combine the baking soda and cornstarch, mixing them well.
  • Add the water to the mixture and stir until everything is combined and there are no dry spots.
  • Set the burner to low-medium heat and stir the mixture for about 10 minutes until it begins to form a ball.
  • Turn off the burner and keep stirring until the mixture has a clay-like consistency.
  • Transfer the mixture to a countertop or large cutting board dusted lightly with cornstarch.
  • Knead the dough as it cools. Add more cornstarch as needed to reduce stickiness and make it firmer for easier manipulation.

    As the clay cools and dries, it will become less sticky and easier to work with!

    Air Dry Clay Project Supplies

    Before you dive into the fun air dry clay projects for kids, it’s a good idea to gather a few supplies that will help your little one bring their creations to life. Here are some of our top picks:

    • Rolling pin
    • Textured rolling pins
    • Sculpting and shaping tools
    • Number and alphabet stamps
    • Rubber stampers
    • Paint brushes
    • Acrylic paints

    These tools will allow for more detailed and creative projects, making the crafting experience even more fun!

    17 Air Dry Clay Projects for Kids

    Whether you’re using store-bought air dry clay or trying the homemade recipe above, here are some of our favorite air dry clay projects for kids that also make meaningful gifts and keepsakes:

    • Air Dry Clay Sunflower Bowls | Emma Owl
    • Purrfectly Cute Air Dry Cats | Nurture Store
    • Pinch Pot Snow Person | Make It Your Own
    • Kids Hand Ceramic Dish | My Poppet Makes
    • Easter Egg Pinch Pots | Red Ted Art
    • Air Dry Clay Texture Bead Pendant | The Kitchen Table Classroom
    • Air Dry Clay Keychains | Average But Inspired
    • Air Dry Clay Mini Pots | Journey Into Creativity
    • Clay Unicorn Magnets | Glued To My Crafts
    • Mini Clay Halloween Pumpkins | Sculpd
    • DIY Air Dry Clay Wall Hanging | Kara Madeline
    • Clay Mountain Photo Holder | Doodle & Stitch
    • Air Dry Clay Ornaments | Little Yellow Wheelbarrow
    • Whale Phone Holder | Doodle & Stitch
    • Mandala Trinket Dish | Colorful Craft Corner
    • Air Dry Clay Snails | Hobby Craft
    • Air Dry Clay Tiles | Polymer Clay

    I hope you and your little one have a blast with this collection of creative air dry clay projects!

    CONCLUSION

    In conclusion, air dry clay is a fantastic and easy medium for kids to explore their creativity while making fun and meaningful projects. Whether you choose to buy pre-made clay or create your own with the simple three-ingredient recipe, there are endless possibilities for crafting beautiful keepsakes and gifts. From pinch pots and keychains to unique photo holders and ornaments, these projects offer a great way for kids to develop their artistic skills while creating memories. So gather your supplies, get inspired, and enjoy these fun air dry clay crafts with your little one!