Making liquid soap from scratch once seemed daunting to me, but after trying it, I discovered it’s much simpler than it looks!
If you’ve already mastered cold process or hot process soap making, then crafting liquid soap is a natural next step.
This guide was originally part of my newest print book, The Big Book of Homemade Products for Your Skin, Health & Home. Unfortunately, due to space constraints, it didn’t make the final cut—so I’m sharing the tips and recipes here with you instead. Enjoy!
Liquid Soapmaking Tips
Before you dive into making liquid soap, here are a few key points to keep in mind.
YOU’LL NEED A DIFFERENT TYPE OF LYE:
One major difference between liquid soap and bar soap lies in the type of lye used.
Bar soap hardens thanks to sodium hydroxide (NaOH), which acts as the agent that turns oils into solid soap.
Liquid soap, on the other hand, is made by combining oils with potassium hydroxide (KOH). This type of lye is readily available from Etsy or online soap-making suppliers.
Keep in mind that potassium hydroxide purity levels can vary. My recipes are based on 90% purity, a common standard. If your bottle lists a different purity level, you can adjust your recipe using the Soapee calculator. Simply select Liquid Soap – using KOH and input the lye purity number in the first box.
CROCKPOT SIZE FOR LIQUID SOAP:
For this recipe size, I use a 4-quart crock pot (slow cooker), which I picked up at a local big-box store. Make sure to avoid slow cookers with non-stick or Teflon-coated interiors, as these materials can react negatively with lye.
SUPERFAT IS A LITTLE DIFFERENT THAN BAR SOAP:
Liquid soap differs slightly from bar soap in that it requires a lower superfat—typically no higher than 3%. A higher superfat may cause the soap to develop an oily layer.
YOU’LL NEED TO USE MORE WATER IN YOUR RECIPE:
When making liquid soap, the water amount is higher than in bar soap recipes. You’ll need roughly three times the weight of potassium hydroxide in water.
IT’S A GOOD IDEA TO DILUTE SOAP PASTE ONLY WITH WATER AND/OR GLYCERIN:
To ensure your liquid soap has the longest shelf life, dilute the finished soap paste with water or a combination of water and glycerin.
Avoid diluting with herbal teas or milk, as these can cause the soap to spoil more quickly—unless they were cooked into the recipe, like in the Calendula & Coconut Liquid Soap below.
OILS ACT DIFFERENTLY IN LIQUID SOAP THAN BAR SOAP:
When creating your own liquid soap recipes, remember that the choice of oils affects the soap’s consistency.
Using more olive oil results in a thicker soap, while more coconut oil creates a thinner soap.
For a deeper dive into how different oils impact liquid soap, check out this informative post on the Soapmaking Forum.
YOU HAVE LOTS OF HERBAL OPTIONS:
“There are many herbs you can experiment with beyond the ones listed in the recipes below. You can easily substitute them or omit them entirely, using plain oils and water in place of infused oils and herbal teas.
I’m currently working on a resource to provide more detailed options, but in the meantime, here are a few herbs and flowers you might consider exploring:
- Chamomile
- Plantain
- Calendula
- Dandelion
- Sunflower
- Violet leaf”
MY WAY IS NOT THE ONLY WAY:
First and foremost, it’s important to note that this is how I make liquid soap—it’s just one of many methods, not necessarily the best or only method.
There are many fantastic resources available for learning how to make liquid soap. Here are a few to get you started:
- Soapmaking Forum (I frequently recommend this site; it’s an invaluable resource for soapmakers.) – Liquid Soap & Cream Soap Forum
- Ultimate HP Soap – 30-Minute Liquid Soap
- Wholesale Supplies Plus – Learn to Make: Liquid Soap From Scratch
- Modern Soapmaking – Easy & Quick Tips for Making Liquid Soap Successfully
A quick search for ‘liquid soap’ on any search engine will lead you to even more helpful information!
Liquid Soap Making Overview
Step 1:
Weigh the oils for your recipe and place them into a slow cooker. Turn the heat to high. If you’re using milk powder, briefly blend it into the combined oils using an immersion blender.
Step 2:
Place the distilled water or cooled herbal tea in a stainless steel or heatproof plastic container. While wearing gloves and goggles, weigh out the potassium hydroxide and carefully sprinkle it into the water. Stir well. It’s normal for the lye solution to make a crackling noise when it’s first mixed.
Step 3:
Turn the slow cooker’s heat to low, then pour in the lye solution. Hand stir the mixture for about 5 minutes to ensure it’s fully incorporated. After that, begin blending with your immersion blender. Blend for 1 minute, then allow the blender to rest for a few minutes before blending again for another minute. Avoid running the motor continuously to prevent burning it out. It may take anywhere from 10 to 20 minutes to reach trace.
Step 4:
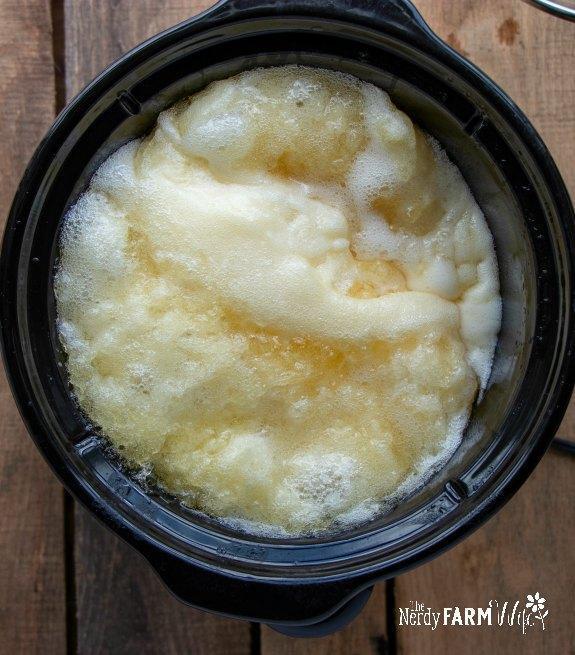
Keep the heat on low, cover the slow cooker with its lid, and check the mixture every 20 to 30 minutes. Stir with a heatproof spoon or spatula. The soap will start to darken and develop gel-like spots, with other areas separating into clear or cloudy liquid. This is completely normal—just stir everything back together, replace the lid, and continue cooking.
Step 5:
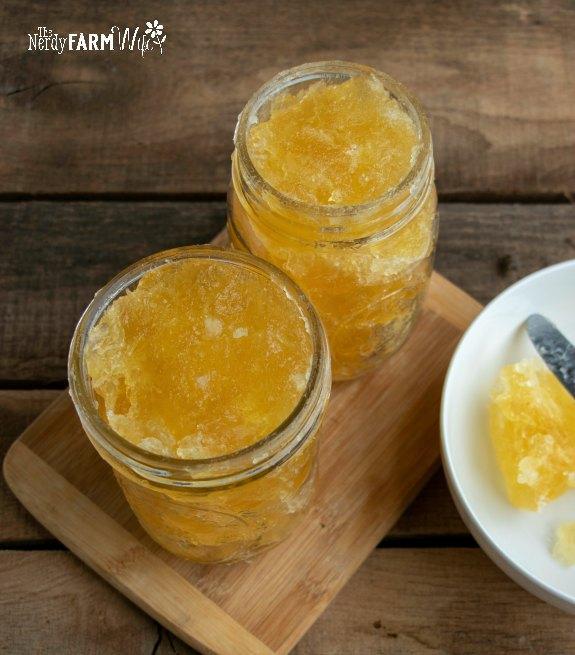
After 1 to 2 hours, the soap batter should become thicker and more concentrated. Continue cooking for another 30 minutes to 1 hour, or until the soap is glossy and resembles Vaseline, as shown in the photo. The total cook time for liquid soap may vary between 2 to 4 hours, depending on the temperature settings of your slow cooker.
Step 6 (Optional):
To check if the soap is fully saponified, you can perform an old-fashioned zap test to ensure there’s no residual lye.
To do this, scoop out 1 teaspoon (5 ml) of soap paste and allow it to cool to a safe, comfortable temperature. Mix the cooled paste with 1 teaspoon (5 ml) of distilled water. Dip your fingertip into the diluted paste and taste it with just the tip of your tongue (don’t swallow the soap!). If it gives your tongue a zapping or electric feeling, the soap needs more cooking. If it just tastes like soap without any zappy sensation, the soap is ready. Be sure to rinse your mouth thoroughly with cold water afterward.
If you’d prefer not to taste the soap but are still unsure, you can turn off the slow cooker, keep the soap covered, and let it sit for 6 hours or overnight to finish the saponification process on its own before proceeding with the next steps of the recipe.
Step 7:
Store the soap paste in covered jars if you want to dilute small amounts at a time. This method extends the shelf life of the undiluted soap paste, which can last for several years. If you choose to dilute the entire batch at once, the shelf life will be shorter. The pH of finished diluted soap typically ranges from 9 to 10.5, and because of its natural alkalinity, it generally doesn’t require a preservative for home use—provided it’s diluted with only distilled water or vegetable glycerine. However, those who sell liquid soap or prefer extra protection often add a preservative like Liquid Germall Plus. I personally don’t add preservatives to my soap, but it’s your choice.
Step 8:
To determine the starting dilution amount, weigh the fully cooked soap paste and multiply the weight by 0.2 (20%) to find how much glycerine you need. Then, multiply the weight by 0.8 (80%) to figure out how much distilled water is required.
For example, if your soap batch weighs 30 ounces (850 g), you would need 6 oz (170 g) glycerine and 24 oz (680 g) distilled water.
If you prefer to dilute a smaller amount, such as 4 ounces of paste, you’d need 0.8 oz (23 g) glycerine and 3.2 oz (91 g) distilled water.
If you don’t have glycerine or choose not to use it, simply substitute more distilled water in its place.
Step 9:
Combine the glycerine and distilled water in a deep stainless steel saucepan and bring to a boil. Add the soap paste to the boiling mixture, stirring gently to ensure the paste is covered by the liquid. Then, cover the pan and turn off the heat, leaving it on the still-hot burner. Allow the mixture to cool to room temperature, stirring occasionally and mashing with a fork, spatula, or potato masher to break up any lumps.
Repeat the boiling and cooling process 1 to 2 more times, allowing the soap paste to dissolve completely. Don’t rush this step or stir too vigorously, as the process takes time. Leave the mixture at room temperature for 2 to 3 days, stirring occasionally, until the paste is fully dissolved.
Step 10:
To add fragrance, gently warm the soap one last time, but do not allow it to simmer or boil. Once the soap is warmed (around 100°F), stir in the essential oil. To calculate the right amount, use 1% of the total diluted soap weight. For example, if you have 8 ounces (237 ml) of diluted soap, you would use 0.08 ounces or about 2.4 ml of essential oil, which is approximately ½ teaspoon. You can also use EO Calc for more precise measurements.
Some essential oils, such as lavender, blend well into liquid soap, while others may cause cloudiness or separation. If this is the case, you might want to use a solubilizer to keep the essential oils mixed evenly. A future article will go into more detail on adding essential oils to liquid soap.
Step 11:
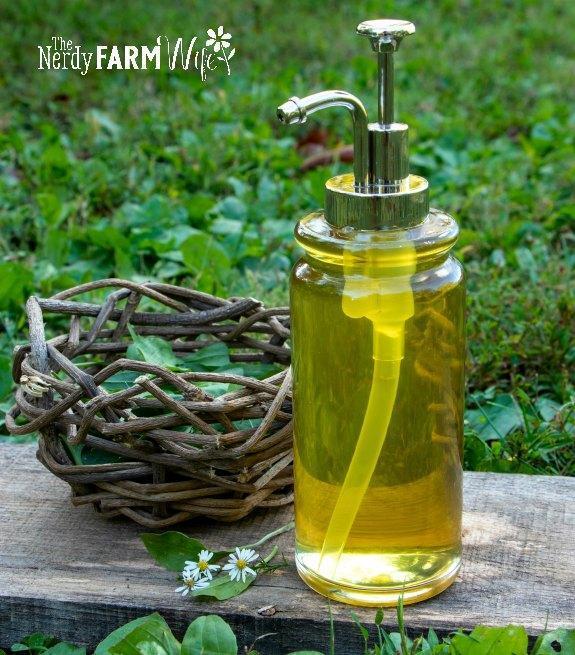
Pour the diluted soap into jars using a fine mesh strainer to catch any undissolved lumps. Let the soap sit undisturbed for several days so it can settle and clear. While the soap can technically be used immediately, giving it time to rest will improve its clarity.
Liquid Soap Recipes
Here are two recipes to kick off your liquid soapmaking journey. You can also check out the Dandelion & Honey Liquid Soap recipe already published on my site. Use the Soapee Calculator, the tips shared earlier in this article, and your creativity to experiment and create your own unique liquid soap recipes!
CALENDULA & COCONUT LIQUID SOAP
This soap captures the essence of sunshine in a jar, thanks to the bright yellow color from calendula flower-infused coconut oil. For added nourishment and appeal, I included a small amount of coconut milk powder in the oils, but you can also use cow or goat milk powder, or skip it altogether. Just keep in mind that milk powders should be used in small amounts for liquid soap to avoid scorching during the long cook time.
It’s important not to dilute soap paste with fresh milk, as it can spoil easily. For more on how to make calendula-infused oil, check out my article on Calendula Oil & Salve.
Yield: 60 ounces (1.7 kg) of diluted soap
Ingredients:
- 13.75 oz (390 g) distilled water
- 4.63 oz (131 g) potassium hydroxide (3% superfat)
- 8 oz (227 g) calendula-infused coconut oil (40%)
- 3 oz (85 g) castor oil (15%)
- 9 oz (255 g) high oleic sunflower oil (45%)
- 1/2 tsp coconut milk powder
- Up to 6 oz (170 g) vegetable glycerine, for dilution (or more distilled water)
- Up to 24 oz (680 g) distilled water, for dilution
- Equal amounts of orange and grapefruit essential oils (see step 10 in the Liquid Soap Making Overview for how to calculate essential oil amounts)
Directions:
- In a stainless steel or heatproof plastic container, place the distilled water. Wearing gloves and goggles, weigh out the potassium hydroxide and carefully add it to the water. Stir well and set the lye solution aside.
- Weigh the coconut, castor, and sunflower oils into a slow cooker. Blend in the coconut milk powder using an immersion blender. Turn the heat to low, then pour in the lye solution. Alternate between blending with the immersion blender and stirring by hand until trace is reached.
- Keep the heat on low, cover the slow cooker with the lid, and check every 30 minutes. Stir with a heatproof spoon or spatula. Continue cooking for approximately 2 to 3 hours.
- Store the paste in covered jars. Follow the dilution and scenting guidelines in the full Liquid Soap Making Overview.
HEMP & PLANTAIN LIQUID SOAP
This soap combines plantain-infused coconut oil, extra virgin olive oil, and nourishing hemp oil for a truly unique blend. It’s lightly scented with lavender essential oil, though you can skip the scent for a more natural version.
Note: I used rich, unrefined hemp seed oil from Mountain Rose Herbs to give the soap a subtle green hue. However, hemp seed oil has a shorter shelf life, so it’s best to use this soap within 4 to 6 months. Over time, the green hue may fade to a brownish color, though the soap remains effective and fragrant. I’ve had a jar of this recipe for over a year, and it’s still good, but the color has changed.
Yield: 60 ounces (1.7 kg) diluted soap
Ingredients:
- 13.75 oz (390 g) distilled water
- 4.63 oz (131 g) potassium hydroxide (2% superfat)
- 7 oz (198 g) plantain-infused coconut oil (35%)
- 2 oz (57 g) castor oil (10%)
- 6 oz (170 g) extra virgin olive oil (30%)
- 4 oz (113 g) high oleic sunflower oil (20%)
- 1 oz (28 g) unrefined hemp or avocado oil (5%)
- Up to 6 oz (170 g) vegetable glycerine, for dilution (or more distilled water)
- Up to 24 oz (680 g) distilled water, for dilution
- Lavender essential oil (see step 10 in the Liquid Soap Making Overview for how to calculate essential oil amounts)
Directions:
- Place the distilled water in a stainless steel or heatproof plastic container. Wearing gloves and goggles, carefully weigh out the potassium hydroxide and sprinkle it into the water. Stir well, and set the lye solution aside.
- Weigh the coconut, castor, olive, sunflower, and hemp oils into a slow cooker. Turn the heat to low, then pour in the lye solution. Alternate between using an immersion blender and stirring by hand until trace is reached.
- Keep the heat on low, cover the slow cooker with the lid, and check every 30 minutes. Stir with a heatproof spoon or spatula. Continue cooking for approximately 2 to 3 hours.
- Store the soap paste in covered jars. Follow the dilution and scenting guidelines in the full Liquid Soap Making Overview.
CONCLUSION
In conclusion, making your own liquid soap allows for creative freedom in selecting nourishing oils, natural ingredients, and essential oils to customize the formula to your needs. With the right ingredients, like plantain-infused coconut oil, hemp oil, or calendula, and careful attention to the cooking and dilution process, you can create a luxurious, natural soap that’s both effective and gentle on the skin.
By following the detailed steps provided in the soapmaking process—from creating the lye solution to diluting the soap paste—you’ll be able to craft a product that suits your preferences. Whether you want a soothing lavender scent, a bright, sunny color from calendula, or a gentle, unscented bar, homemade liquid soap offers a unique, customizable experience. Remember that patience is key, and each batch will have its own characteristics, including color changes over time depending on the oils used.
So, whether you’re making soap for personal use or as a creative gift, the process is both rewarding and satisfying. Happy soapmaking!