If you’re tired of your tape-in extensions or if they’re starting to feel uncomfortable, it may be time to remove them. Although tape-in extensions are easy to apply and maintain, removing them can be a bit tricky. However, with the right tools and technique, you can safely remove your tape-in extensions without damaging your natural hair. In this article, we’ll provide you with expert tips on how to remove tape-in extensions effectively and efficiently.
What Are Tape-In Extensions?
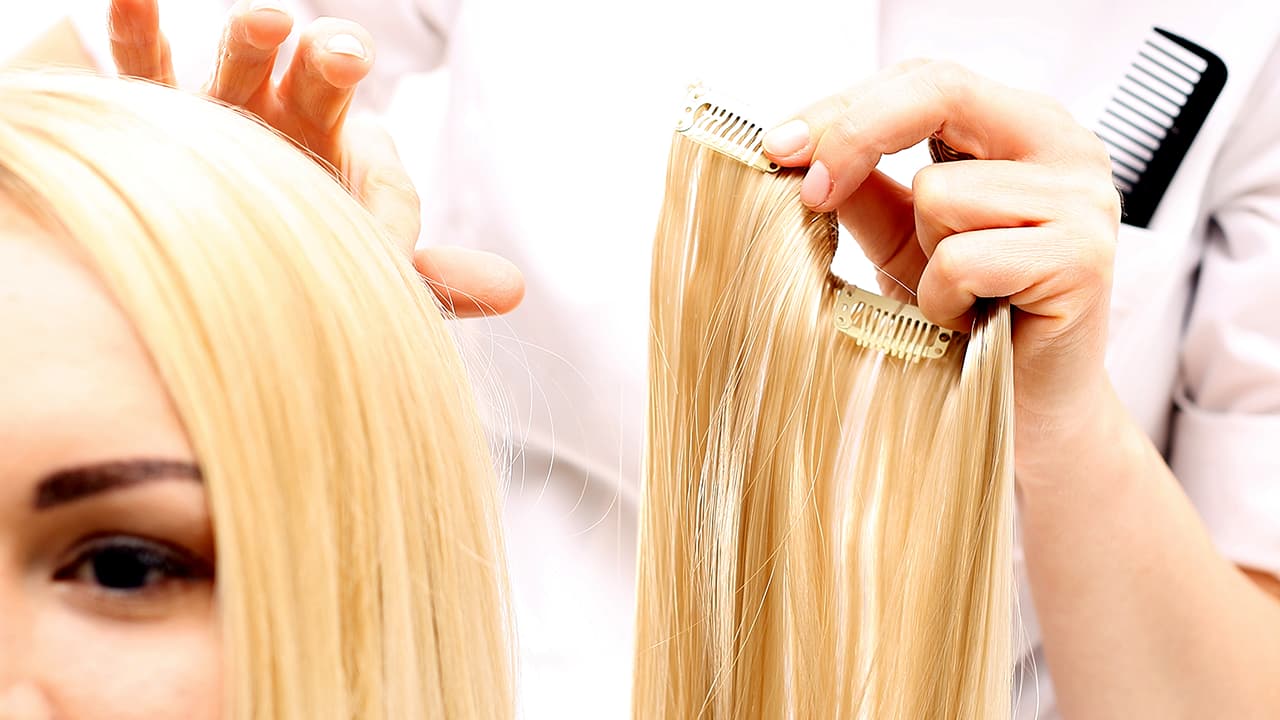
Tape-in extensions are a popular type of semi-permanent hair extension. They consist of thin wefts of hair that are attached to your natural hair using an adhesive tape. Unlike other types of hair extensions, tape-in extensions lay flat against the scalp, giving a natural and seamless look. Tape-in extensions are one of the most popular types of hair extensions because they are easy to install, low-maintenance, and provide long-lasting results.

Why You Need to Remove Tape-In Extensions
Even though tape-in extensions are designed to stay in place for several weeks, there are a few reasons why you might need to remove them earlier. Here are some of the most common reasons why people remove their tape-in extensions:
- Your extensions have grown out and need to be repositioned
- The tape has become loose or is starting to peel off
- Your extensions are causing discomfort or irritation
- You want to take a break from wearing extensions
Whatever your reason for removing your tape-in extensions, it’s important to do it safely and correctly to avoid damaging your natural hair.
How to Remove Tape-In Extensions: Step-by-Step Guide
Removing tape-in extensions requires patience and precision. Follow these step-by-step instructions to remove your tape-in extensions safely and effectively:
Step 1: Gather Your Tools
Before you start removing your tape-in extensions, you’ll need the following tools:
- Hair extension remover or adhesive solvent
- Wide-tooth comb
- Fine-tooth comb
- Sectioning clips
- Towel or tissue paper
Step 2: Prepare Your Hair
Start by brushing through your hair to remove any tangles. This will make the removal process smoother.
Step 3: Divide Your Hair
Part your hair horizontally, just above the tape wefts. Use hair clips to secure the upper section of your hair, leaving the lower section (closest to the tape) exposed.
Step 4: Apply Extension Remover
Apply hair extension remover or adhesive solvent to the tape tabs. Make sure to saturate each tab thoroughly but avoid applying the solution directly to your scalp.
Step 5: Gently Separate the Tape Tabs
Using a wide-tooth comb, gently separate the tape tabs from your natural hair. Start at the bottom of each weft and work your way up to the top. Be careful not to pull or tug on the extensions as you remove them.
Step 6: Remove Any Residual Adhesive
After removing the extensions, you may notice some residual adhesive on your natural hair. Don’t worry; this is normal. You can use a fine-tooth comb to gently remove any adhesive residue.
Step 7: Wash Your Hair
Once you’ve removed all of the extensions, wash your hair with a gentle shampoo to remove any remaining adhesive or residue. Rinse thoroughly and dry your hair with a towel.
Tips for Removing Tape-In Extensions
Removing tape-in extensions can be tricky, especially if you’ve never done it before. Here are some expert tips to help make the process easier and more efficient:
- Use a high-quality extension remover or adhesive solvent to ensure effective results.
- Work slowly and carefully to avoid damaging your natural hair.
- Avoid using excessive force when separating the tape tabs from your natural hair.
- Use a detangling spray or conditioner to help loosen any tangles or knots.
- If you’re having trouble removing your extensions, seek professional help from a stylist.
FAQs
Q1: Can I remove my tape-in extensions at home? A: Yes, you can remove your tape-in extensions at home, but it’s important to follow the correct technique to avoid damaging your natural hair.
Q2: How often should I remove my tape-in extensions? A: You should aim to remove your tape-in extensions every 6-8 weeks to prevent damage to your natural hair.
Q3: Can I reuse my tape-in extensions after removing them? A: Yes, you can reuse your tape-in extensions after removing them, but you’ll need to replace the adhesive tape before reapplying.
Q4: Will removing my tape-in extensions damage my natural hair? A: If you follow the correct technique, removing your tape-in extensions should not cause any damage to your natural hair.
Q5: How long does it take to remove tape-in extensions? A: The time it takes to remove tape-in extensions varies depending on the number of extensions and the condition of your natural hair. It typically takes between 1-2 hours to remove a full head of tape-in extensions.
Conclusion
Removing tape-in extensions requires patience, precision, and the right tools. By following the expert tips outlined in this article, you can safely and effectively remove your tape-in extensions without damaging your natural hair. Whether you’re taking a break from wearing extensions or repositioning them, it’s important to remove them properly to avoid any damage. Remember to take your time, work slowly and carefully, and seek professional help if you encounter any difficulties.
With these expert tips, you can confidently remove your tape-in extensions at home and give your natural hair the break it deserves.