

Ever wondered how to create stunning nail art without needing a salon visit? With this DIY Dot Nail Art tutorial, you’ll discover just how simple and fun it can be to design your own unique patterns at home. Dot nail art is perfect for beginners and pros alike, offering endless possibilities to express your creativity. So, why not grab your favorite nail polishes and give it a try? Let’s dive into the world of dots and transform your nails into mini masterpieces!
FOR THE BASE
we took them more round instead of square. This helps prevents chipping as it eliminates the two corners and creates one round edge that’s less likely to break.
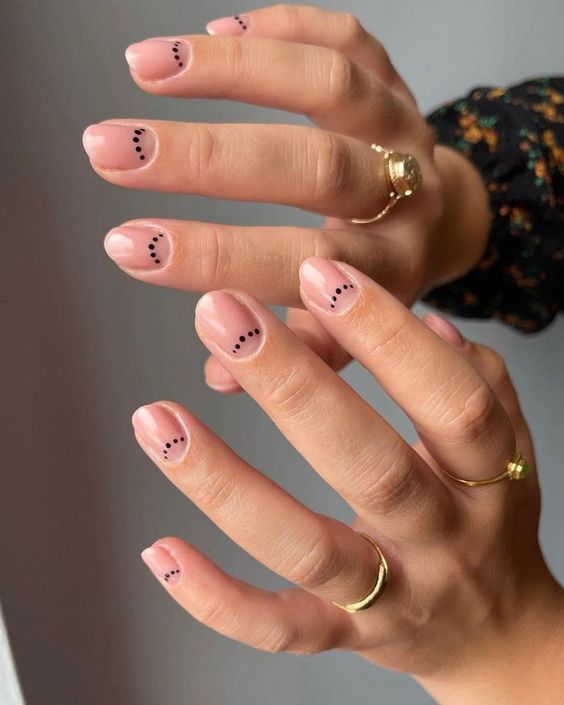
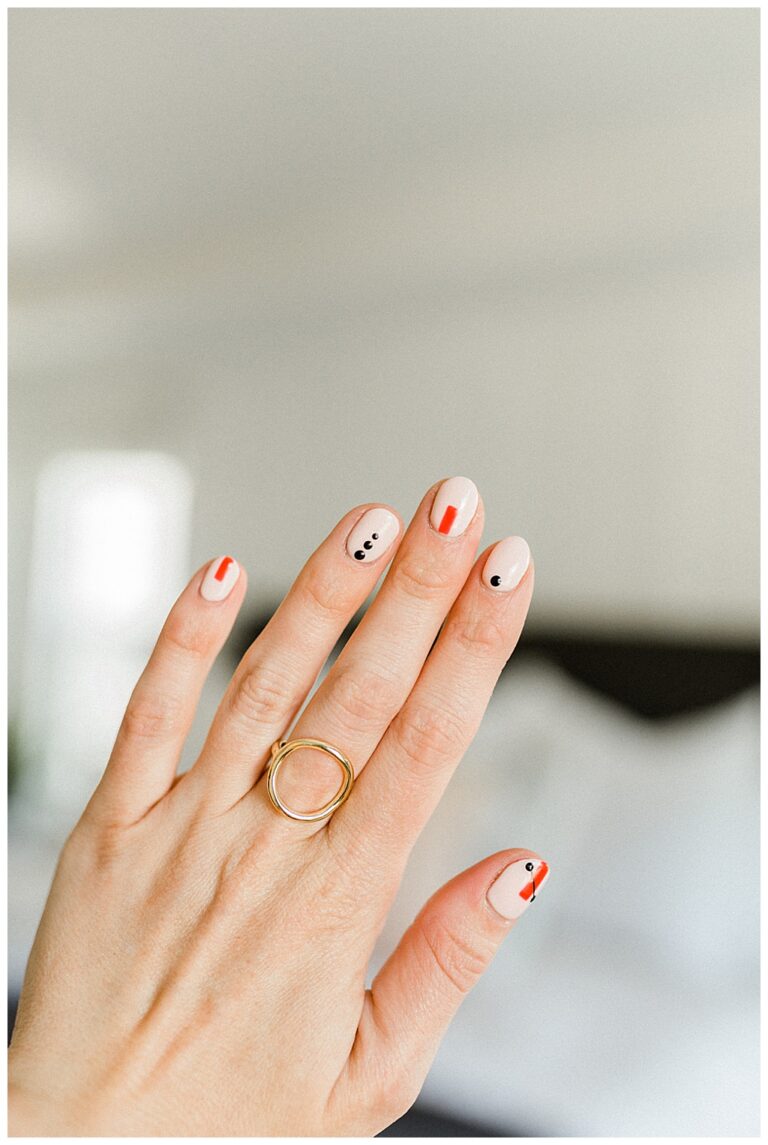
We chose a blush pink for the base color on nails—a perfect choice because it’s both on-trend and subtle enough to disguise any growth, helping the manicure last longer.
FOR THE ACCENTS
We used a vibrant poppy red gel polish and a thin nail art striping brush to create delicate rectangles. On the thumb and pinky nails, the rectangles extend halfway down from the tips, while on the middle finger, we flipped the design, drawing the rectangle upward from the cuticle.
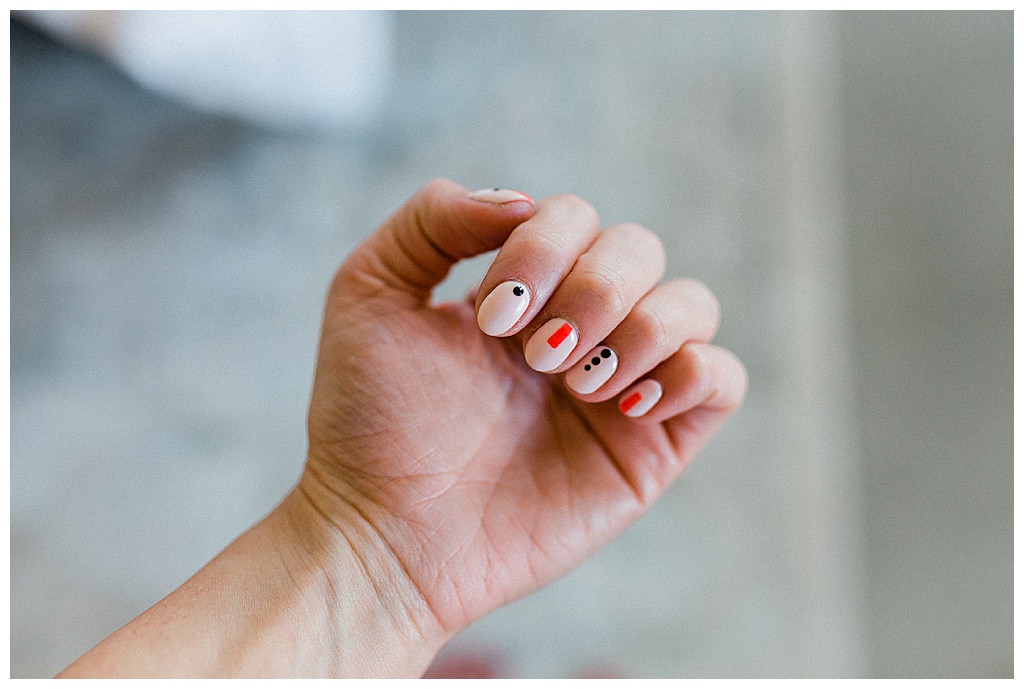
We also applied a black art gel polish, using the same liner brush to draw a thin diagonal line through the center of the rectangle on the thumb. Then, with a small dotting tool, we added tiny black dots at each end of the line for a polished finish.
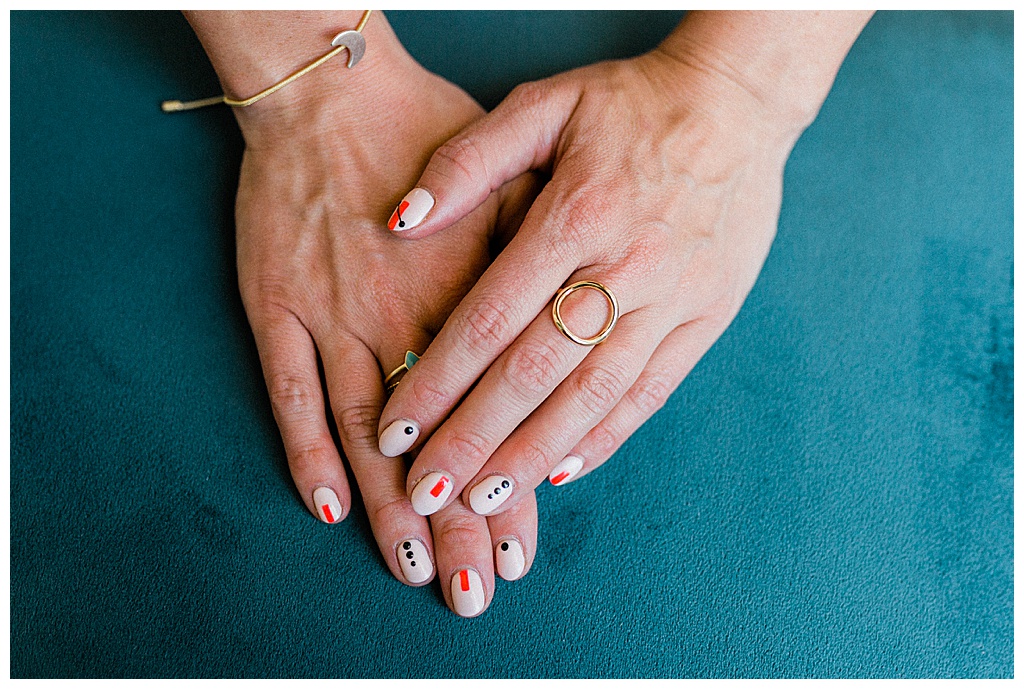
To complete the look, we added a large black dot on the pointer fingers and created a gradient of dots, from large to small, on the ring finger, starting at the cuticle. A high-shine topcoat sealed the design, giving it a polished finish.
Alright, everyone, I hope you’re loving this manicure as much as I do! This nail art is classic and fun, yet simple to create and easy to fix if (heaven forbid) you get a chip.
What’s your favorite color or design to wear on your nails? Do you go for bright and bold, neutrals, or patterns? I’d love to hear about your go-to nail art looks!


