
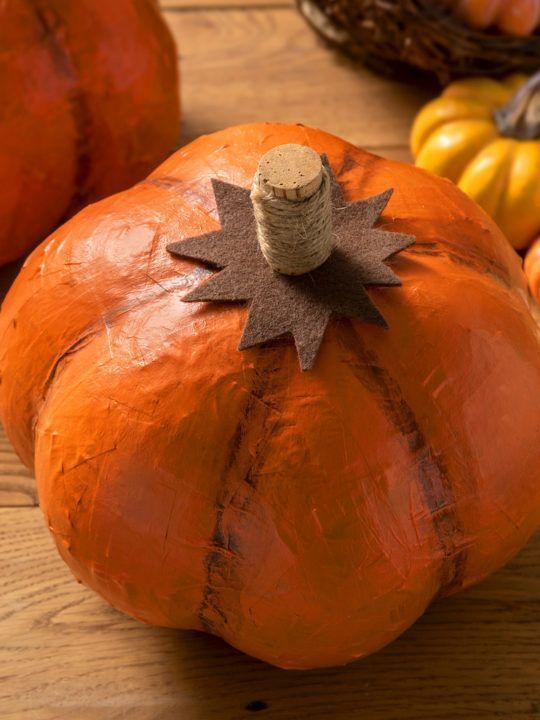
This paper mache pumpkin is an ideal project for those who enjoy getting their hands dirty and immersing themselves in a creative endeavor! I’m thrilled with how this pumpkin turned out and have plenty of ideas for improving my next one. The project evolved as I worked on it; I initially aimed for a neutral pumpkin, but as you can see, it took on a different look. Keep reading to discover how to make your own paper mache pumpkin!
TOOLS & MATERIALS
- Punch Balloon
- Paper Sacks or Newspaper
- Flour
- Salt
- Water
- Container to Mix In
- Twine
- Spray Paint
- Pumpkin Stem
- Foliage *optional
STEP-BY-STEP INSTRUCTIONS
Before diving into this project, there are a few preparations to make.
PREPARING THE PAPER
Begin by tearing your paper sacks or newspapers into strips. If you’re using paper sacks, aim for thin strips, as they will create a better 3-D effect on your pumpkin. If you opt for newspaper, wider strips are fine since the newspaper is lighter than the paper bag.
MAKING YOUR PASTE
Next, prepare your homemade paper mache paste. I started with a cup of flour and added a generous sprinkle of salt to prevent mold. Gradually mix in water with the flour and salt until you achieve a consistency similar to pancake batter.
PREPARING YOUR BALLOON

Inflate your balloon to the desired size of your pumpkin. Keep in mind that less air will give you more variation in shape.
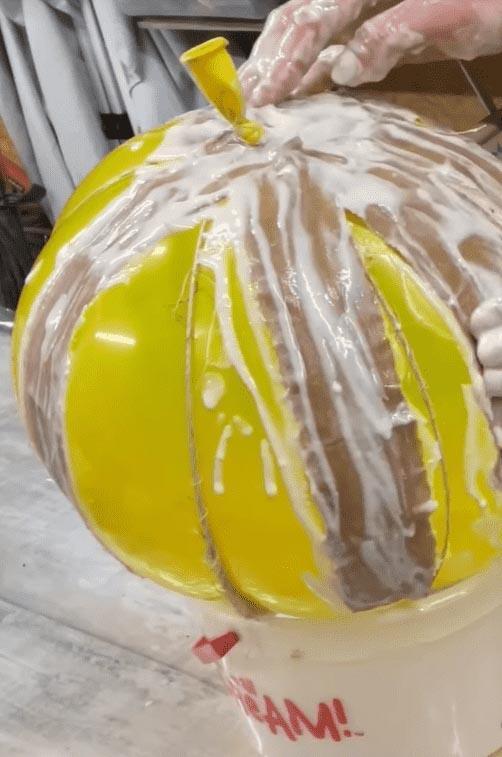
Next, take your twine and tie it around the balloon’s tail. Begin wrapping the twine around the balloon to create the ridges of your pumpkin. Each time you pass the twine over the balloon tail, make sure to wrap it around to secure it in place. Once you’ve created your desired number of ridges, you’re ready to move on to the next step.
GET MESSY
Now it’s time for the fun part—paper mache! Take your strips of newspaper and dip them into the paste you mixed earlier, ensuring they are thoroughly soaked so they can mold to the pumpkin shape. I recommend starting with a layer of newspaper in the crevices or using narrow strips of paper bag, as the thinner newspaper tends to fit better into the grooves of the pumpkin.
Soak the newspaper strips and apply them to your balloon pumpkin until it’s completely covered, making sure to overlap each strip. Allow the pumpkin to dry between layers.
To make the process easier, I found it helpful to place my pumpkin on an old ice cream bucket. This kept the pumpkin from rolling away while I worked on each side.
For my second layer, I repeated the same process but used paper bag strips instead. The thickness of the paper bag strips allowed me to get away with just two layers. If you’re using only newspaper for this project, I recommend applying additional layers to ensure sturdiness.
Once you’ve achieved your desired number of layers, be sure to let the pumpkin dry completely.
I initially hoped that the paper bag strips would give my pumpkin a neutral look, similar to THIS, but once it dried, the paste covered most of the brown. I found that homemade paste tends to be thicker and less translucent than store-bought paper mache. At this point, I decided to paint my pumpkin.
PAINTING THE PUMPKIN
To prepare my pumpkin for painting, I sanded it down using a sanding block like THIS. The paste had dried thicker in some areas where I hadn’t smoothed it out properly, so sanding not only helped even those spots but also provided a better surface for the paint to adhere to.
After sanding, I carefully removed the balloon from inside the pumpkin. This turned out to be quite a process and didn’t go as smoothly as I had hoped!
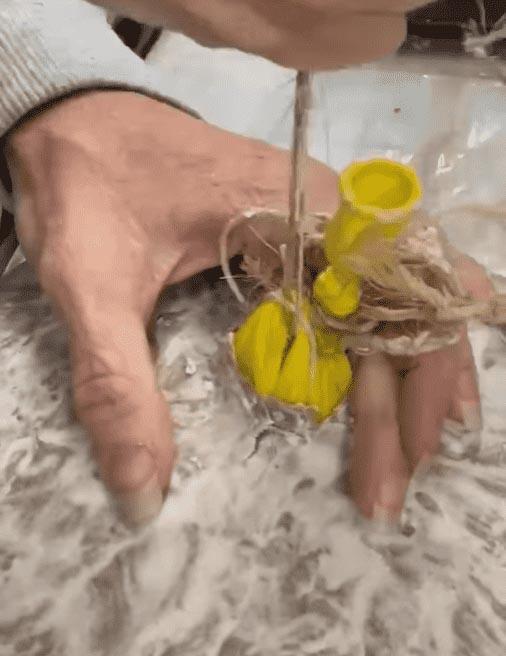
To remove the balloon, I used a pin to pop it, expecting it to deflate and get trapped inside the pumpkin. To prevent that, I securely held the end of the balloon while I popped it. However, the balloon didn’t deflate as I anticipated! While it did lose air, the twine wrapped around it kept everything in place.
To address this, I cut a small hole in the top of the pumpkin to help loosen the twine. Using my fingers and some leverage, I carefully pulled the twine away from the pumpkin’s walls and slowly lifted the balloon out. You don’t necessarily have to remove the balloon, but I wanted to clear the tail to make room for my stem.
Once the balloon was out, I spray-painted my paper mache pumpkin.
ADDING A STEM
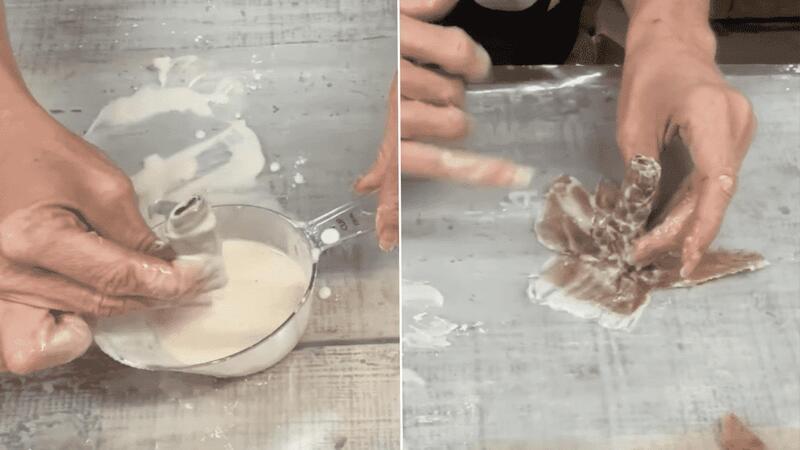
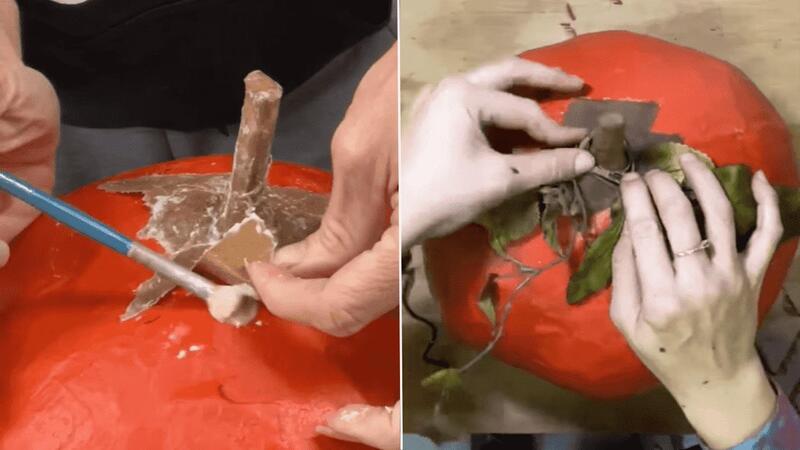
For the stem, I initially wanted to use a stem from a real pumpkin, but that plan didn’t work out. Instead, I created one using paper bag strips. I rolled up a strip and soaked it completely in Mod Podge, then added smaller strips at the base to make it easier to glue onto the pumpkin later.
After letting the stem dry completely, I used a paintbrush and the homemade paste to attach it to the top of the pumpkin. I wiped away any excess paste and allowed it to dry thoroughly.
Next, I used some brown paint and a small paintbrush to color the stem. To give my pumpkin a little extra flair, I took some faux foliage and created a ring to place around the stem, securing it with hot glue.
ADDING SOMETHING EXTRA
This project is fantastic because it allows you to unleash your creativity and customize it to your heart’s content. You can make your pumpkins in any size you desire, choose to leave them bare for a neutral look, or paint them in vibrant, funky colors. You could even cut the pumpkin in half to create a unique bowl! The possibilities are endless!
STYLING YOUR PAPER MACHE PUMPKIN
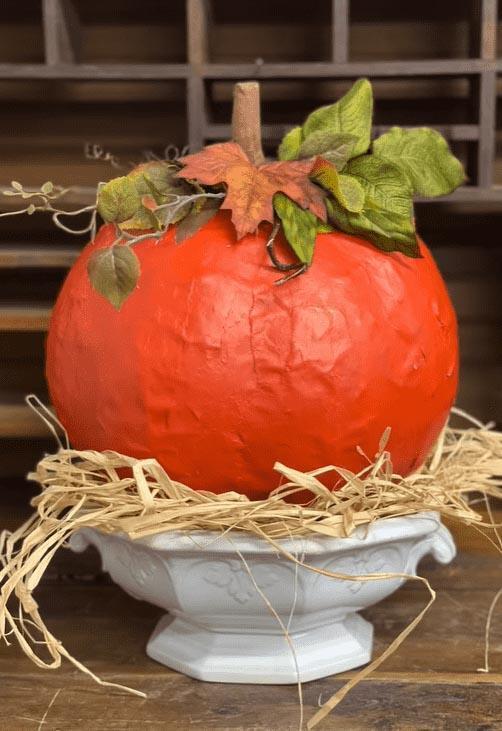
To style my pumpkin, I used a tureen and added some straw inside, allowing it to peek out around the bottom of the pumpkin for added texture. An urn would also work wonderfully for styling your pumpkin!


