Many view mini twists as just a step toward achieving a voluminous twist-out, but before rushing to undo them, why not embrace the look on its own? Mini twists have been gaining popularity on TikTok (with the hashtag #minitwists reaching 65.8 million views) and for good reason—they’re a low-key yet stylish protective hairstyle.
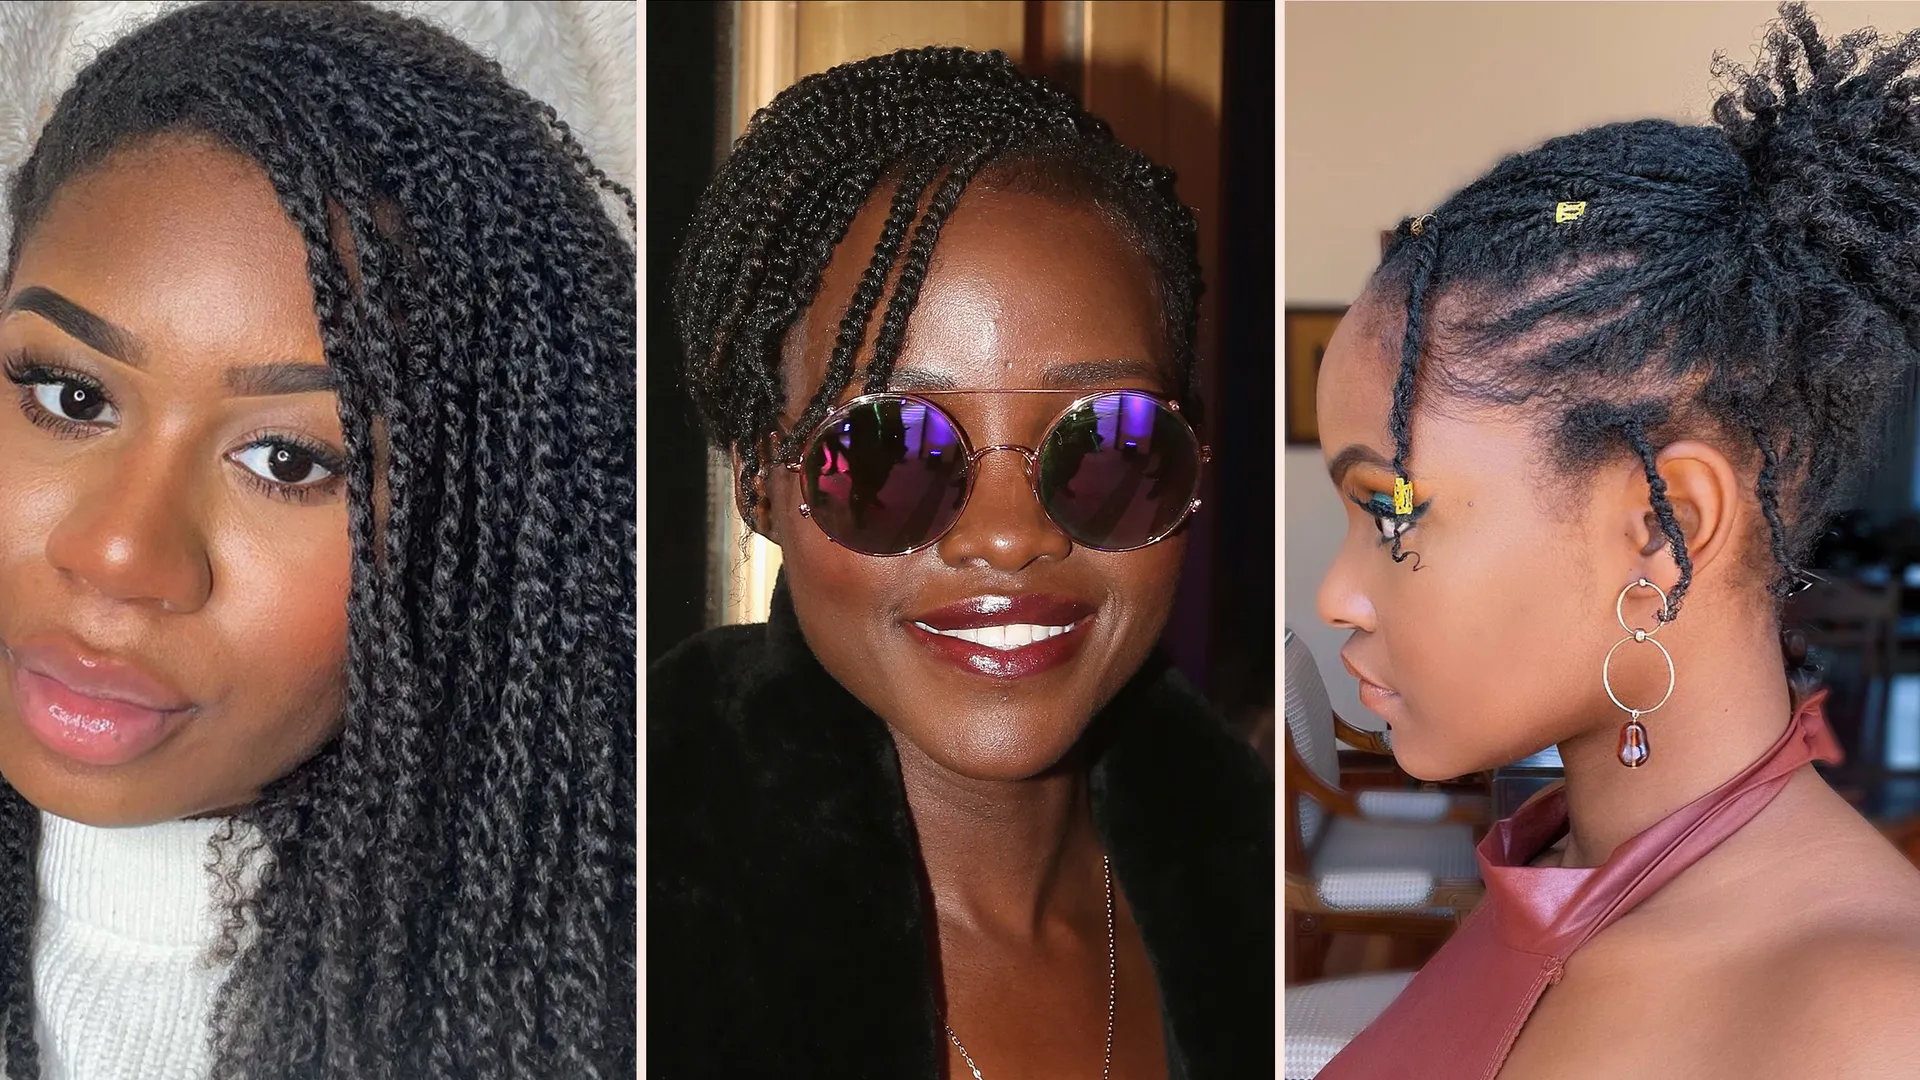
“Mini twists are a low-maintenance protective style for natural hair,” explains Sabrina Rowe Holdsworth, a New York City-based hairstylist and founder of NTRL by Sabs. “They help retain length, lock in moisture, and offer a versatile foundation for various styles.” Celebrities like Lupita Nyong’o and Tabitha Brown demonstrate the adaptability of mini twists, rocking them in half-up ponytails and chic side-part bobs.
However, before committing to mini twists, it’s important to consider the time and effort involved in creating them and how long they will last.
Ahead, hair experts break down everything you’ll need to know to achieve the look at home.
WHAT ARE MINI TWISTS?
Mini twists are a protective hairstyle where small sections of hair are twisted into two-strand twists. “Each piece of hair is repeatedly crossed over the other, forming a rope-like pattern,” explains Ashanti Johnson, a Chicago-based hairstylist and braider for synthetic braiding hair brand Rebundle. This style can be done on natural hair alone or with the addition of kinky texture extensions to enhance length and fullness.
Tools You’ll Need
If you’re planning to do mini twists at home, make sure your styling station is ready with these essentials:
- Parting comb to help section your hair.
- Wide-tooth comb or brush for detangling as you work.
- Leave-in conditioner or curl cream to define and enhance your curls.
- Hair clips or scrunchies to keep sections secure while you twist.
- Braiding gel to create clean, neat parts.
HOW TO DO MINI TWISTS
Preparation:
As with any protective style, it’s best to begin with freshly-washed hair to ensure your mini twists look neat and last as long as possible. Dirty hair may have product buildup or tangles that can make styling difficult. Moisturizing your hair beforehand is also crucial, as it’s harder to thoroughly hydrate your strands once the twists are in.
Mini twists require a bit of tension, so well-conditioned hair is less likely to break during the process. Sabrina Rowe Holdsworth recommends applying a deep conditioner for 20 to 30 minutes, followed by sealing your hair with a leave-in conditioner once you’re out of the shower.
For added length and uniformity, you can opt to stretch your curls by blow-drying before twisting. Though optional, Holdsworth explains that this can make your twists look longer and more consistent. If you decide to blow dry your hair, Ashanti Johnson suggests reapplying your leave-in conditioner afterward to restore some of your natural curl pattern. This step will prevent your twists from feeling limp and lifeless.
Now, you’re ready to twist.
Step 1:
Divide your hair into four to six sections, depending on its thickness—each section should be manageable enough to hold in one hand. Secure the sections with scrunchies, leaving one section loose to work with.
Step 2:
From the loose section, grab a smaller piece of hair, about the width of a pencil. Apply a pea-sized amount of braiding gel to this segment, which helps define the section and makes the part on your scalp look neater.
Step 3:
Smooth a pea-sized amount of twisting cream or gel along the length of the small section. Sabrina Rowe Holdsworth recommends using Camille Rose Naturals Almond Jai Twisting Butter for its soft hold and curl definition.
Step 4:
Split this small section into two even parts and begin twisting them together, wrapping one strand over the other in a clockwise motion. Continue twisting down to the very ends of the hair.
Step 5:
To secure the twist, twirl the ends around your finger, using the same motion you would for a finger coil. Repeat this process for each section of hair until your entire head is complete.
HOW LONG DO MINI TWISTS LAST?
Mini twists can last up to four weeks, but after that, they may start to mat and tangle, eventually resembling locs, explains Jamila Powell, a Florida-based hairstylist and founder of the hair-care brand Naturally Drenched. If you plan to keep your mini twists for a while, there’s good news: you can still wash them. Powell recommends diluting two to three tablespoons of shampoo in an empty nozzle bottle with water. “Apply the mixture to your twists and scalp, gently massaging your scalp with your fingertips before rinsing thoroughly,” she advises. Repeat the process with conditioner, and then dry your hair with a microfiber towel, which is gentler on your hair and absorbs more water. For faster drying, you can use a blow dryer.
Regardless of how long you keep your mini twists, it’s essential to maintain moisture. Powell suggests spritzing a hydrating mist (like Pattern Hydrating Hair Mist) two to three times a week and using a hair oil to lock in that moisture.
DO MINI TWISTS HELP GROW OUT YOUR HAIR?
Stylists agree that mini twists, like many protective styles, can support hair growth and length retention. “This is because your hair isn’t subjected to daily manipulation,” explains Jamila Powell.
Board-certified dermatologist and licensed cosmetologist Yolanda Lenzy, MD, clarifies that while hairstyles themselves won’t accelerate hair growth—since nothing can speed up your natural growth rate—keeping your hair in a protective style can help prevent excess breakage. She notes that “mini twists, especially without added extensions, can be a good low-tension option for those looking to promote healthy hair.”
MINI TWIST INSPIRATION
Style mini twists your way. Choose a middle or side part, a pixie or bob, and add accessories for a personalized look.
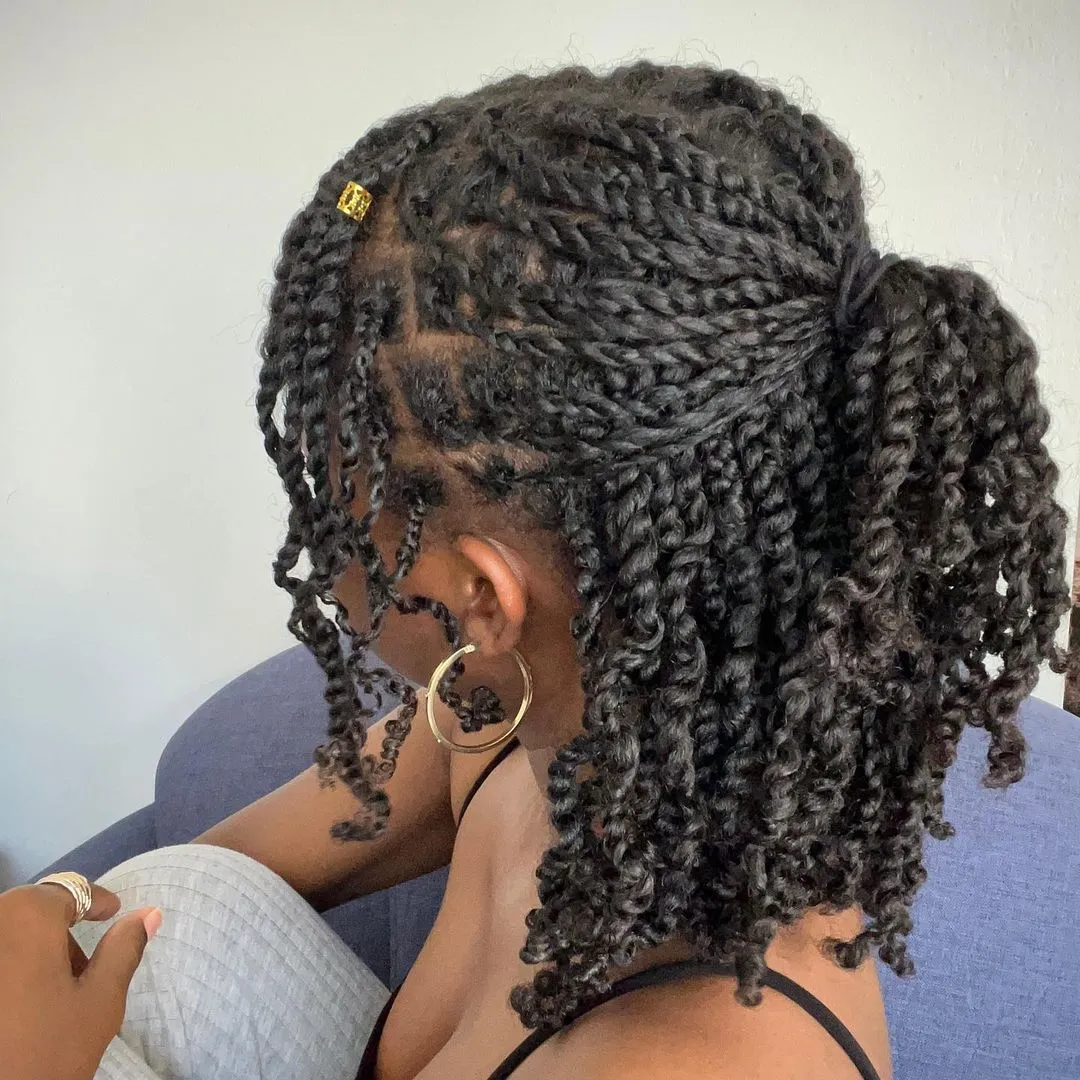
LONG MINI TWISTS

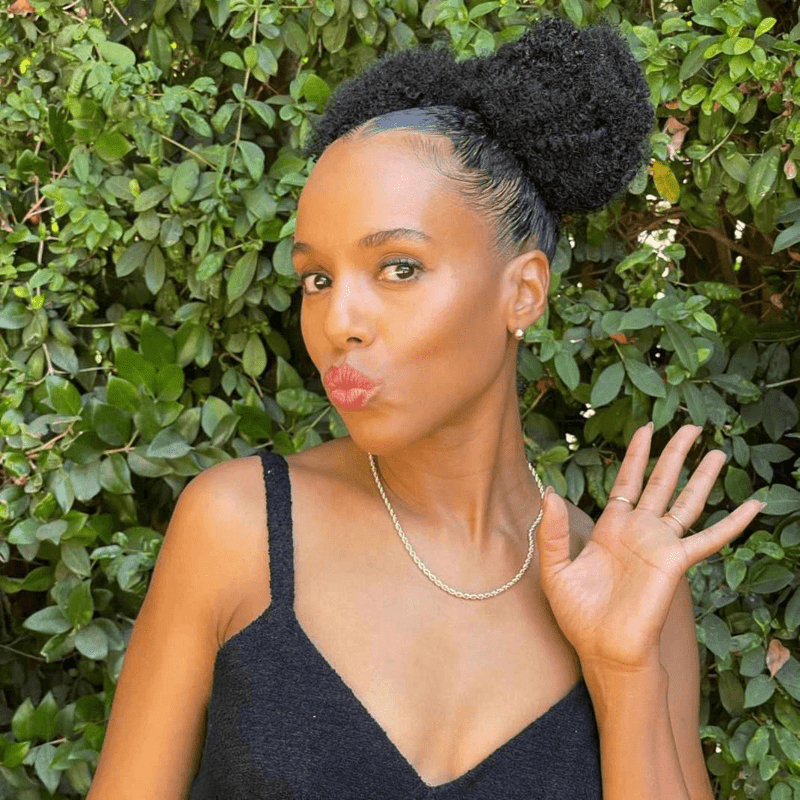
MINI TWIST PUFF
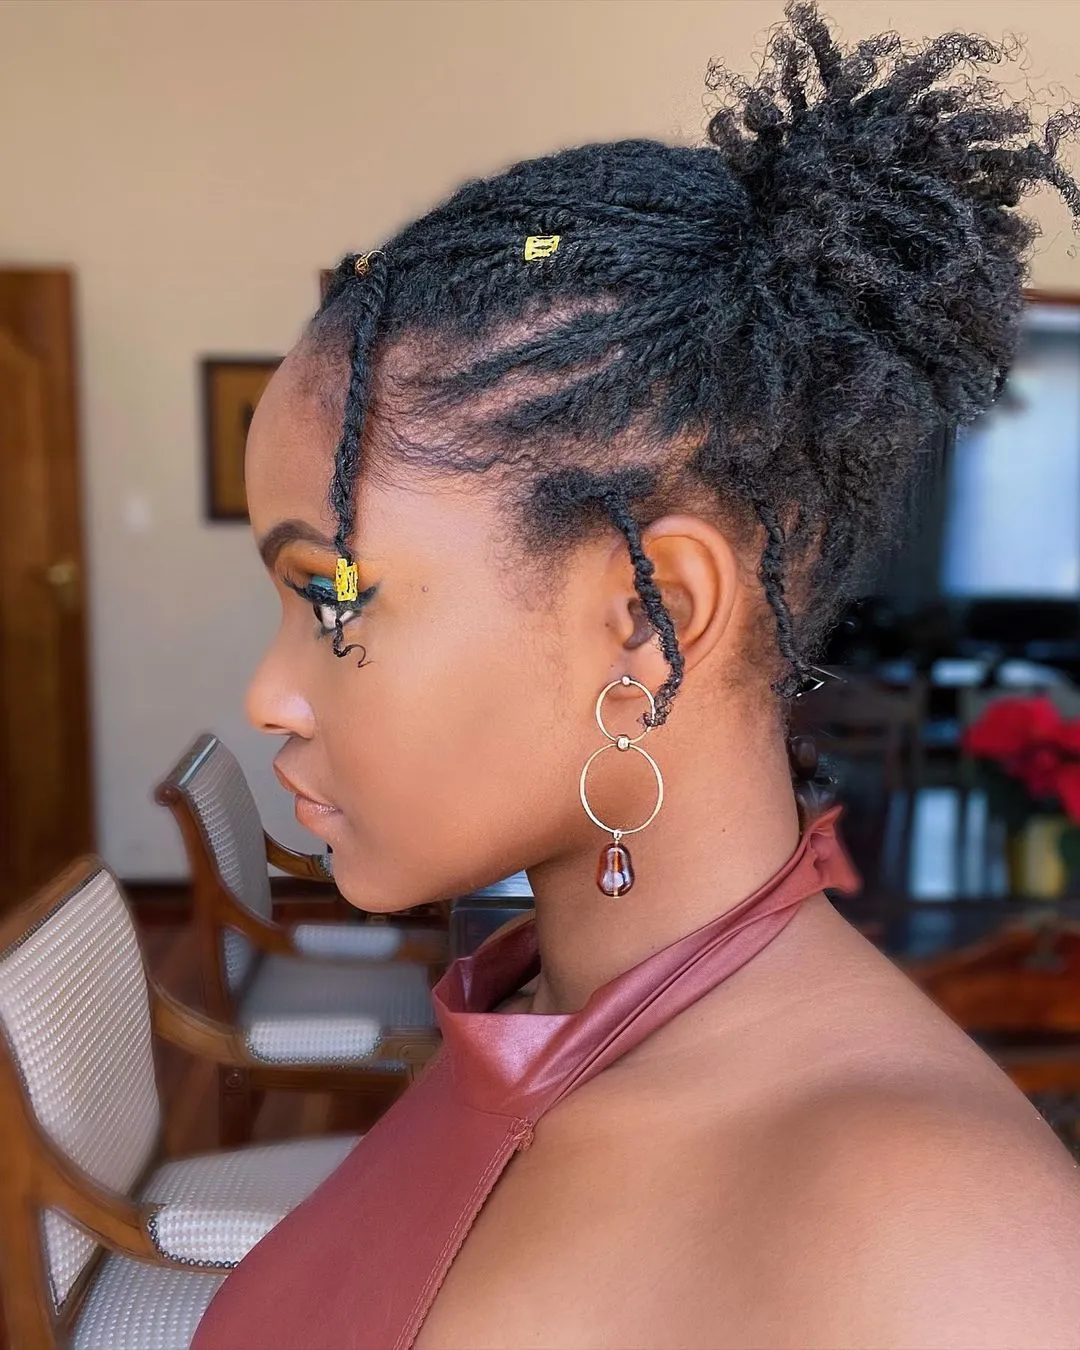
MINI TWIST SPACE BUNS
HALF UP MINI TWISTS
MINI TWIST PIXIE