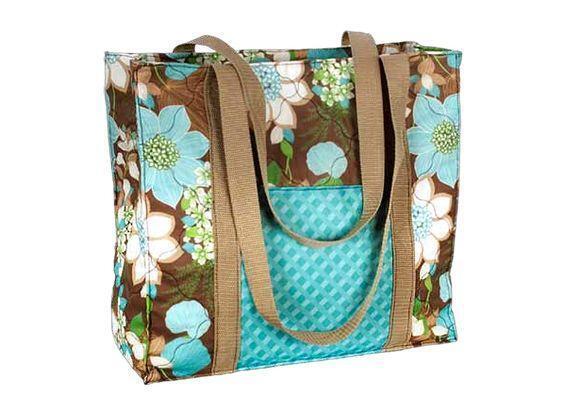
Are you looking for a fun and eco-friendly way to add a touch of nature to your wardrobe? Look no further than this wildflowers tote bag tutorial! In this guide, we’ll show you how to create a beautiful and durable tote bag adorned with vibrant wildflowers. Whether you’re a seasoned crafter or just starting out, this project is perfect for all skill levels. We’ll provide clear instructions and helpful tips along the way. So, let’s gather your supplies and get started on your wildflower tote bag adventure!
SUPPLIES NEEDED
- Wild Flowers Fabrics
- 2 Stash Starters (1 yd.)
OTHER SUPPLIES
- 3 yds. nylon webbing for straps (1 inch width)
- 5/8 yd. Pellon® 987F Fusible Fleece
- 1 yd. Pellon® SF101 Shape Flex Fusible Interfacing
- Coordinating thread
- Removable marker (for marking on printed fabric)
- Snap (optional)
- Basic sewing supplies
- Rotary cutter, mat, and acrylic ruler
- Sewing machine and iron
- Even-feed foot (optional)
- 5 in x 13 in firm cardboard or plastic canvas (optional)
STEP-BY-STEP GUIDE
CUTTING
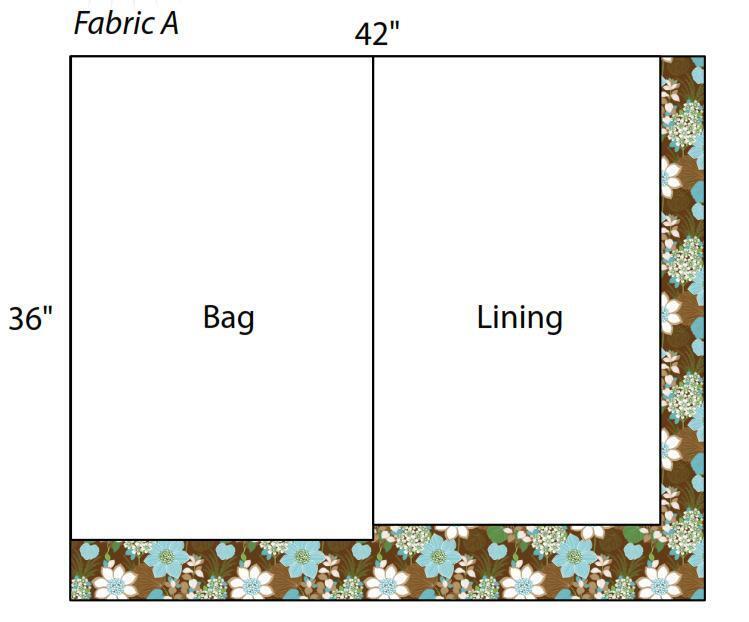
Fabric A: 1 – 20″ x 32″ (bag)
1 – 19″ x 31″ (lining)
Fabric B: 1 – 16″ x 21″ (outside pockets)
2 – 12 ½” x 10″ (inside pockets)
Fusible Fleece: 20″ x 32″
Fusible Interfacing: 19″ x 31″
QUIlTING
- Following the manufacturer’s instructions, apply the fusible fleece to the wrong side of the bag fabric and the fusible interfacing to the wrong side of the lining fabric.
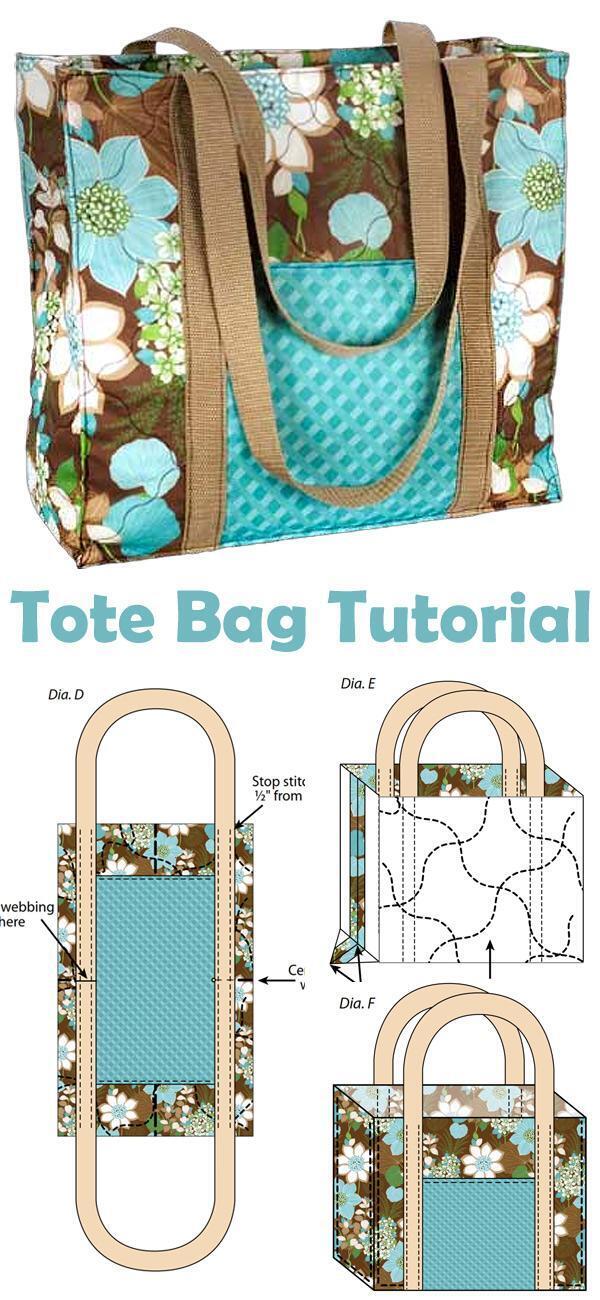
- Using a removable marker, mark diagonal quilting lines on the right side of the bag, spaced 3 inches apart in both directions. Quilt along these lines using either a serpentine stitch or a straight stitch (refer to Diagram A). If needed, use the even-feed foot for better fabric handling.
- Trim the bag to match the dimensions of the lining piece. Remove any markings from the bag. Mark the crosswise and widthwise centers of both the bag and the lining with a marker or by using thread basting (see Diagram A). Set the lining aside until you reach Step 11.

MAKING THE BAG
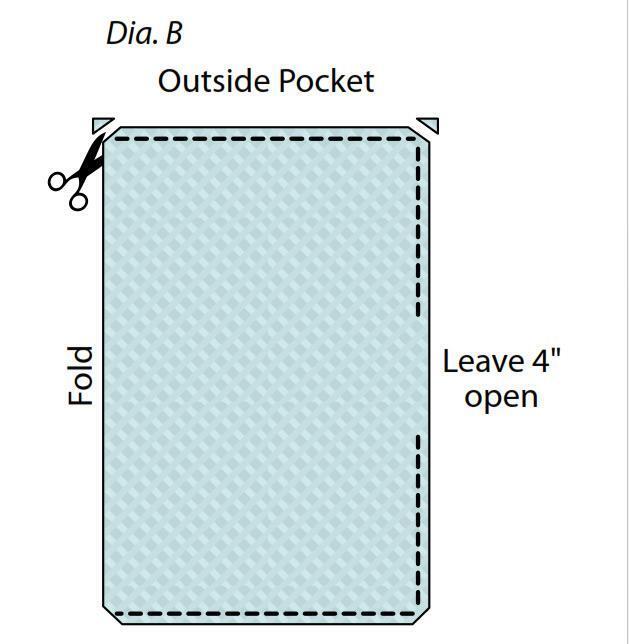
- Fold the outside pocket in half, aligning the long edges. Sew around the outside edges, leaving a 4-inch opening for turning (refer to Diagram B). Clip the corners diagonally and turn the pocket right side out. Press it well, then topstitch along the short ends. Fold the pocket into quarters and press firmly to create placement folds.
- Position the pocket on the bag, aligning it with the center markings. Baste along the long edges to secure it in place (see Diagram C).
- Before attaching the webbing, seal the ends using a match or other heat source to prevent fraying. Then, fold the webbing in half and mark the center with a pin.

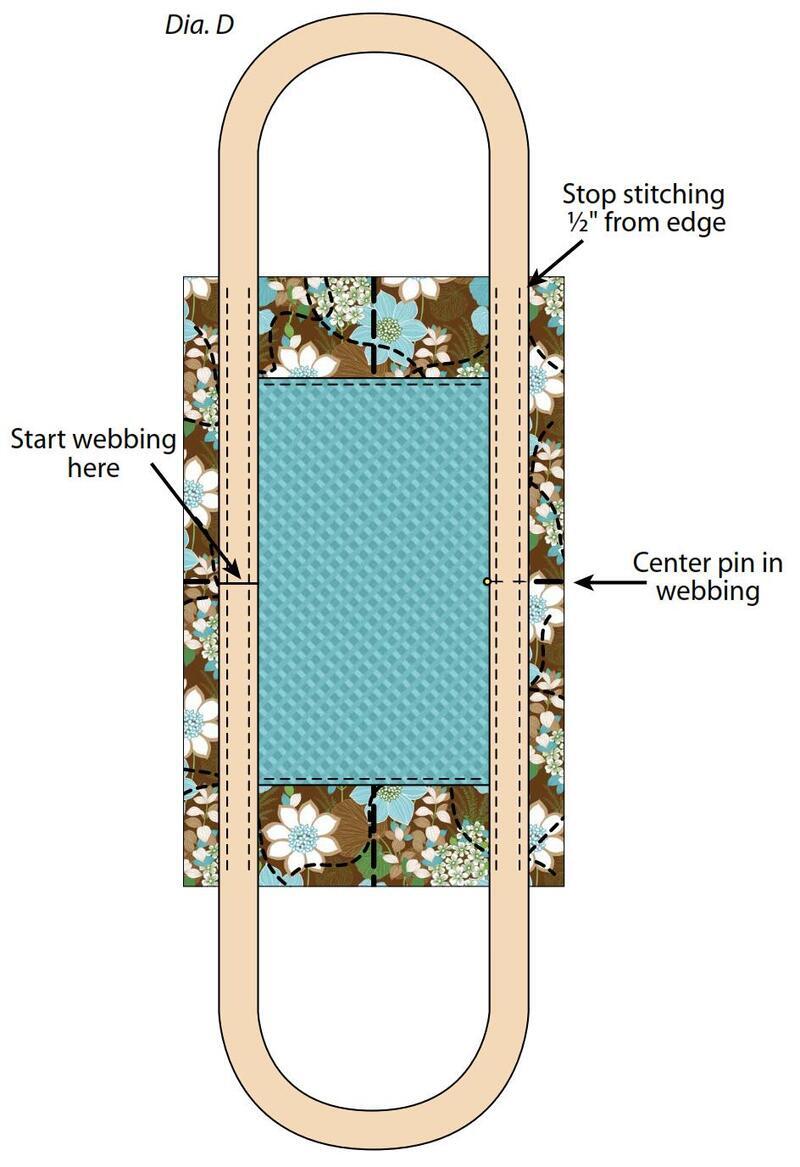
- With one end positioned at the center of the bag, lay the webbing along one side of the pocket, centering it over the long edges of the pocket (refer to Diagram D). Place the center pin in the webbing at the opposite side of the pocket, aligning it with the center fold. Pin the webbing evenly in place over the sides of the pocket.
- Ensure the ends of the webbing are abutted together and pin or baste them securely.
- Note: Be careful to avoid twisting the webbing while pinning it in place. Topstitch along the edges of the webbing, stopping ½ inch from the top edges of the bag. Remove any thread basting used.
- Fold the bag in half with the right sides together and pin the sides. Sew the side seams and finger press the seams open.
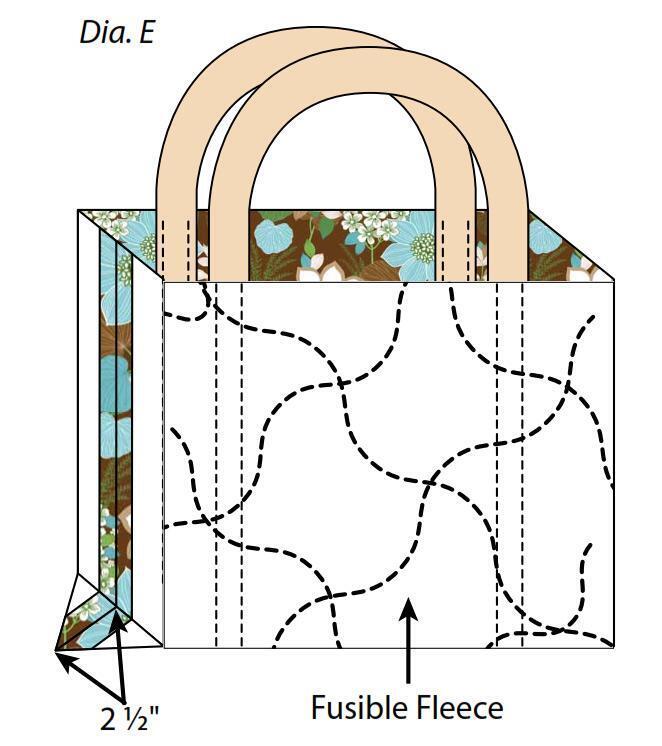
- To box the bottom, bring the center bottom crease to the side seam (right sides together). Mark 2 ½ inches from the point and stitch from edge to edge (see Diagram E). Repeat this step for the other side.
- Turn the bag right side out and press along the top, bottom, and side edges. IMPORTANT: Avoid touching the webbing with the hot iron!
- Pin the bag layers together and edge stitch along the bottom and sides of the bag to provide shaping (refer to Diagram F).
Note: The stitching at the bottom edge will help prevent items in the outside pocket from slipping into the bottom of the bag.

MAKING THE LINING
- Fold the inside pockets in half, matching the right sides of the long edges, and pin them in place. Sew around the edges, leaving a 3-inch opening on one long side. Clip the corners diagonally and turn the pockets right side out. Press them flat, then topstitch along the folded edges.
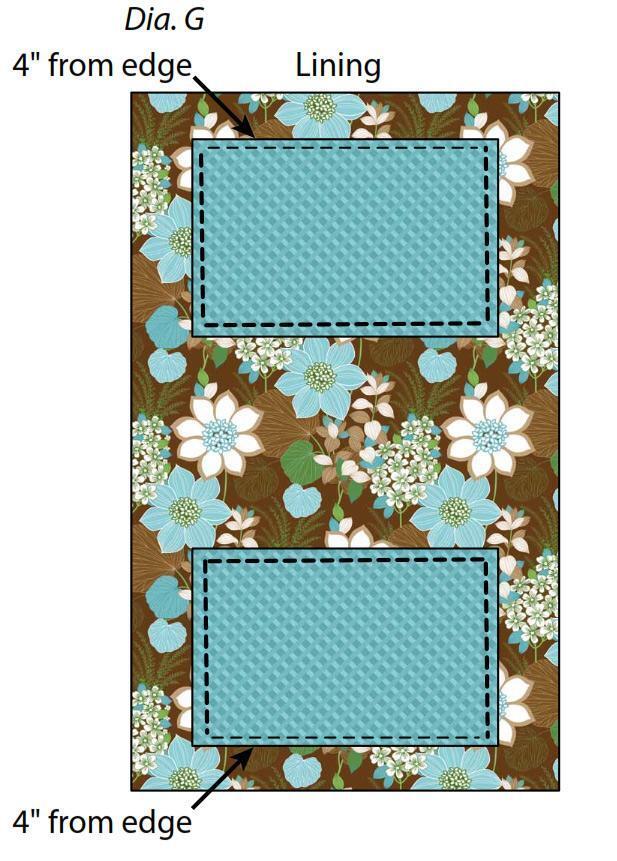
- Center the pockets on the short ends of the lining, positioning them 4 inches from the short edges (refer to Diagram G). Sew them in place by stitching around the sides and bottom. If desired, stitch through the pockets to divide them into smaller sections.
- Pin and sew the side seams of the lining, leaving a 5-inch opening on one side for turning. Box the corners by following the instructions from Step 9 above.
FINISHING THE BAG
- Pin the straps away from the top edge of the bag. Place the bag inside the lining, aligning the side seams and top edges. Pin in place and sew along the top edge.
- Turn the bag right side out through the opening in the lining and sew the opening closed. Push the lining into the bag and press the top edge.
- Unpin the straps and edge stitch around the top of the bag, ensuring to catch the straps in the stitching.
- If desired, sew a snap closure inside the bag at the top edge.
- Optional: Use any remaining fabric to create a cover for the cardboard or plastic canvas, then place it in the bottom of the bag.