
Looking for a unique and stylish way to decorate your front door this Halloween? A boho-inspired wreath can add a touch of whimsy and charm to your home. This DIY project is perfect for those who love natural elements and bohemian aesthetics. With just a few simple supplies, you can create a one-of-a-kind wreath that will impress your guests. In this guide, we’ll walk you through the steps of crafting a boho Halloween wreath from scratch. We’ll cover everything from choosing the right base to adding the perfect finishing touches. So, let’s get started and create a spooky yet stylish!
WHAT YOU’LL NEED
TOOLS
Scissors
Hot glue gun & glue
Wire cutters
Paint Brushes
(Optional) Floral Wire
SUPPLIES
Starter Wreath
Light Color Faux Maple Leaves
Variety of Faux Pampas Grass stems
Faux Rabbit Tails
Black Floral Sticks
Clip on Bats & Spiders
Faux Butterflies
Plastic Skulls in a Variety of Sizes
Acrylic Paint for Skulls
DIY HALLOWEEN WREATH TUTORIAL
STEP 1: APPLY FAUX MAPLE LEAVES TO WREATH BASE
Before starting, I recommend painting your skulls first, ideally the day before, so they have plenty of time to dry and are ready to be attached!
To begin, I picked up a white berry wreath from Home Goods, specifically from the Martha Stewart collection. Since Home Goods’ inventory can be unpredictable, I’ve linked some alternatives. For instance, using two of these white berry wreaths from Amazon would work just as well. You can also find more options listed in the supplies section.
Next, I grabbed some light-colored faux maple leaves from the craft store and cut off all the individual leaves. I started placing them around the wreath but decided I wanted the leaves to be slightly lighter. So, I gave them a light spritz with some white spray paint I had on hand.
Once the leaves were dry, I hot-glued them securely to the wreath. I made sure they were well-attached since other elements would be glued on top of or directly to the leaves.
STEP 2: CREATE THE FOCAL POINT
With the leaves securely attached, I started arranging the faux grasses and skulls, focusing on creating a bold focal point on one side, similar to my inspiration wreath. I played around with the placement until I achieved the look I wanted.
If you were wise enough to paint your skulls in advance, they should be dry and ready to go. If not, don’t worry—I used a gentle hair dryer to speed up the drying process. It took me about three coats of paint to get full coverage on the skulls.
Once I was satisfied with the arrangement, I hot-glued the faux grasses in place, followed by the skulls. While you can use floral wire to attach the grasses, I found that hot glue worked perfectly fine. If any stems or leaves were too long, I trimmed them down with wire cutters to get the perfect fit.
STEP 3: ADD THE FINISHING TOUCHES (SPIDERS, BATS, BUTTERFLIES, MORE GRASSES)
With the focal point complete, I began arranging the spiders, bats, butterflies, and additional grasses. I experimented with their placement until I was happy with the overall look, then glued everything into place.
For the butterflies, which were attached to wires, I simply wrapped the wires around the wreath and secured them. This allowed me to adjust their positioning slightly since they were only fastened with wire.
As for the dollar store clip-on bats and spiders, I clipped them onto the wreath without gluing them. However, I did glue on some bats I got from Amazon (linked above) to ensure they stayed in place.
STEP 4: GLUE ON BLACK STICKS
The final step is to glue on the black decorative sticks. I found mine in the Target dollar section for $3 per bundle, and I used five in total. You can secure these with floral wire, but I opted for a generous amount of hot glue instead.
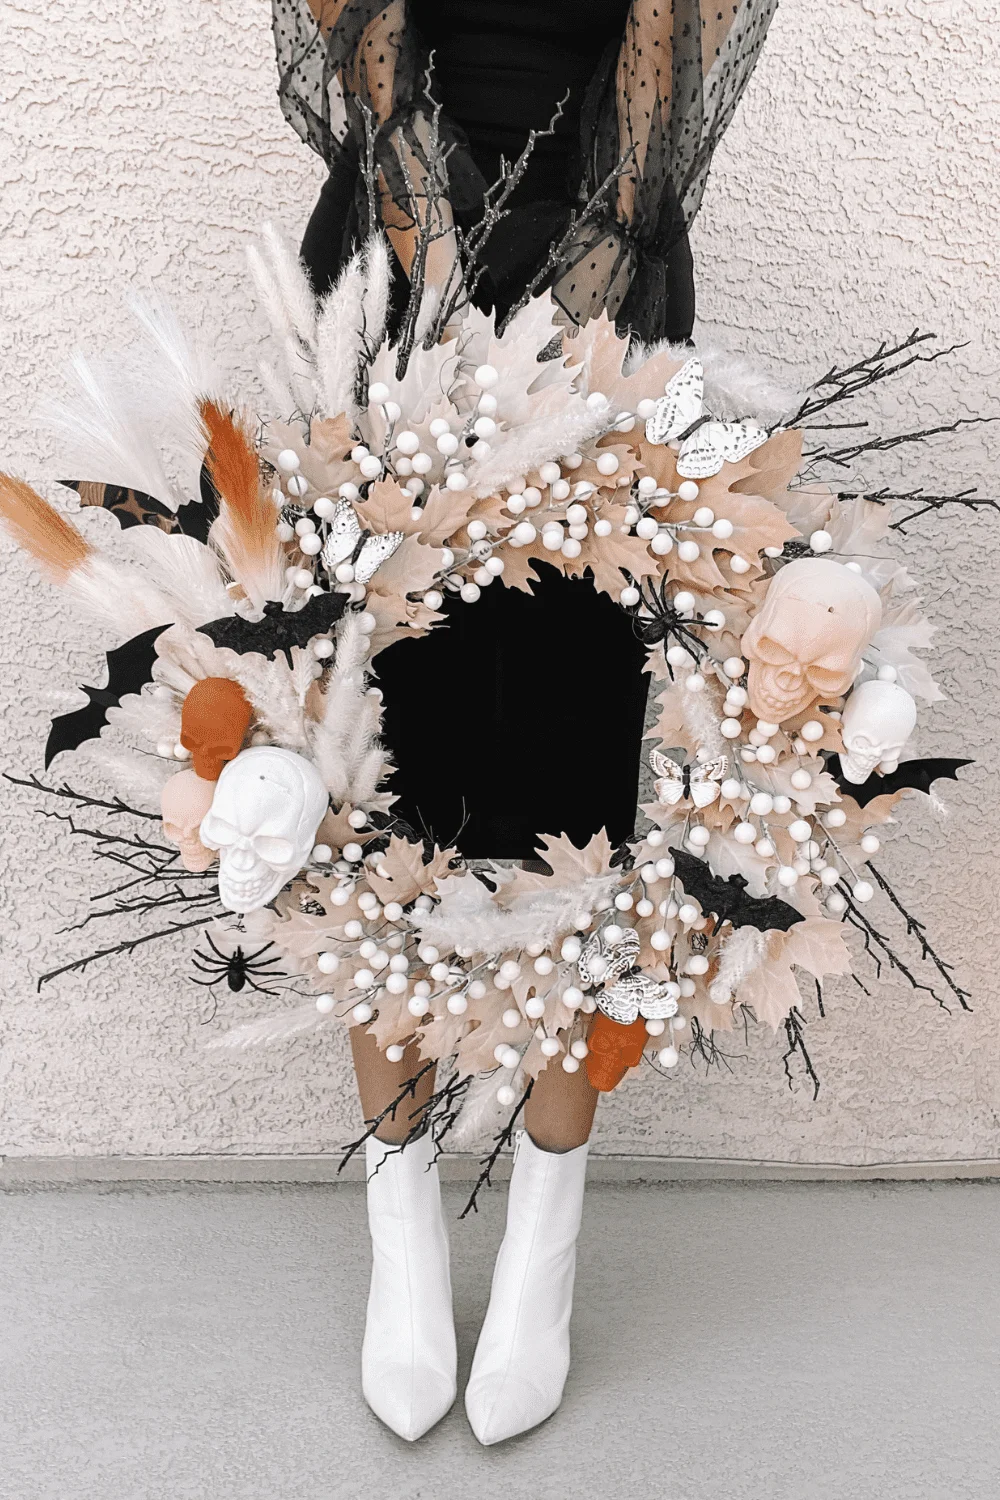
And with that, your wreath is complete!
CONCLUSION
By following these steps, you can create a beautiful and unique boho Halloween wreath that will add a touch of personality to your home. Remember, the beauty of this project lies in its customization. Feel free to experiment with different materials, colors, and textures to create a wreath that truly reflects your personal style. Happy crafting!


