
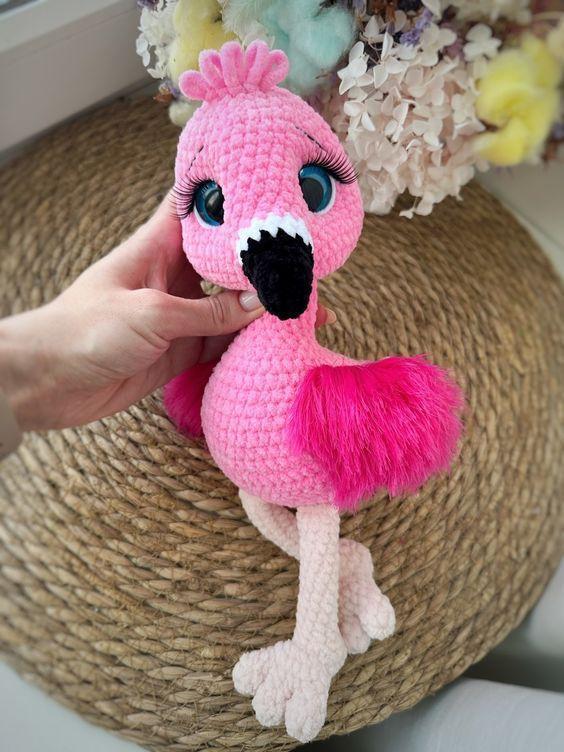
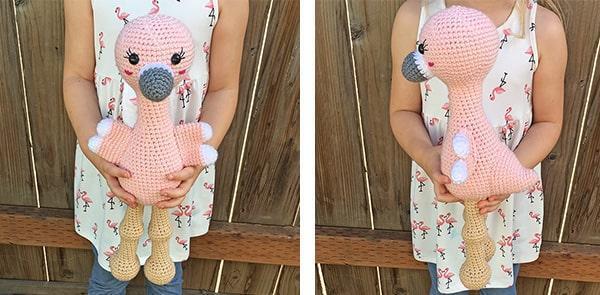
Looking for a fun and colorful crochet project? This free crochet flamingo pattern is the perfect choice! With its vibrant pink hues and elegant curves, this adorable bird will be a delightful addition to your home or a thoughtful gift for a loved one. In this guide, you’ll find detailed instructions and helpful tips to guide you through the creation of your very own crochet flamingo. So, grab your yarn and hook and let’s get started!
MATERIALS
- Size 4 worsted weight yarn (125g of pink; small amount of white, grey, and beige)
- 3.5 mm crochet hook 12mm safety eyes
- Black crochet/embroidery thread for eyelashes (optional)
- Scissors
- Tapestry needle
- Stuffing
- Stitch markers
NOTES
- Stuff the body gradually as you crochet, ensuring it’s firm but not overly stretched. I suggest stuffing the body before moving on to the neck.
- You’ll be working in the round, and I recommend using a stitch marker at the start of each round.
- The body and head will be created as a single piece. For stability, use tight stitches and firm stuffing to prevent a wobbly neck.
Abbreviations – US terminology
- MC- Magic circle
- SC- Single crochet
- SC INC- Single crochet increase
- INV DEC- Invisible decrease
- St(s)- Stitch(es)
- Sl st – Slip stitch
HOW TO MAKE CROCHET FLAMINGO PATTERN
BEAK
Color: Grey
- Round 1: Create a magic circle and work 6 single crochets (SC).
- Round 2: Increase in each stitch (SC INC) for a total of 12 stitches.
- Round 3: SC around (12 stitches).
- Round 4: SC in the first stitch, SC INC in the next; repeat around (18 stitches).
- Rounds 5-7: SC around (18 stitches).
- Change to white.
- Rounds 8-9: SC around (18 stitches).
- Fasten off, leaving a long tail for sewing onto the head.
BODY
Color: Pink
- Round 1: Create a magic circle and work 6 SC.
- Round 2: SC INC in each stitch (12 stitches).
- Round 3: SC in the first stitch, SC INC in the next; repeat around (18 stitches).
- Round 4: SC in the first 2 stitches, SC INC in the next; repeat around (24 stitches).
- Round 5: SC in the first 3 stitches, SC INC in the next; repeat around (30 stitches).
- Round 6: SC in the first 4 stitches, SC INC in the next; repeat around (36 stitches).
- Round 7: SC in the first 5 stitches, SC INC in the next; repeat around (42 stitches).
- Round 8: SC in the first 6 stitches, SC INC in the next; repeat around (48 stitches).
- Rounds 9-15: SC around (48 stitches).
- Round 16: SC in the first 6 stitches, then work an invisible decrease (INV DEC) in the next; repeat around (42 stitches).
- Rounds 17-18: SC around (42 stitches).
- Round 19: SC in the first 5 stitches, then INV DEC in the next; repeat around (36 stitches).
- Rounds 20-21: SC around (36 stitches).
- Round 22: SC in the first 4 stitches, then INV DEC in the next; repeat around (30 stitches).
- Rounds 23-24: SC around (30 stitches).
- Round 25: SC in the first 3 stitches, then INV DEC in the next; repeat around (24 stitches).
- Rounds 26-27: SC around (24 stitches).
- Round 28: SC in the first 2 stitches, then INV DEC in the next; repeat around (18 stitches).
- Rounds 29-36: SC around (18 stitches).
START OF HEAD
- Round 37: SC in the first 2 stitches, then SC INC in the next; repeat around (24 stitches).
- Round 38: SC in the first 3 stitches, then SC INC in the next; repeat around (30 stitches).
- Round 39: SC in the first 4 stitches, then SC INC in the next; repeat around (36 stitches).
- Round 40: SC in the first 5 stitches, then SC INC in the next; repeat around (42 stitches).
- Round 41: SC in the first 6 stitches, then SC INC in the next; repeat around (48 stitches).
- Round 42: SC in the first 7 stitches, then SC INC in the next; repeat around (54 stitches).
- Rounds 43-50: SC around (54 stitches).
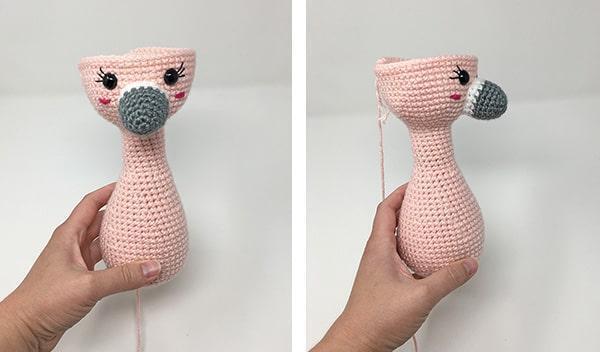
NOTE: Now it’s time to attach the facial features. Place the safety eyes 7 stitches apart between rounds 47 and 48. (For a girl version, consider sewing on the eyelashes before securing the safety eyes).
- Beak: Sew the beak centered between the eyes, adding a small amount of stuffing.
- Cheeks: Using your tapestry needle and yarn for the cheeks, pass through one stitch on either side of the beak, just under the eyes.
NECK
(Ensure you stuff the neck and shoulders firmly as you go to maintain a sturdy structure.)
- Round 51: SC in the first 7 stitches, then INV DEC in the next; repeat around (48 stitches).
- Round 52: SC in the first 6 stitches, then INV DEC in the next; repeat around (42 stitches).
- Round 53: SC in the first 5 stitches, then INV DEC in the next; repeat around (36 stitches).
- Round 54: SC in the first 4 stitches, then INV DEC in the next; repeat around (30 stitches).
- Round 55: SC in the first 3 stitches, then INV DEC in the next; repeat around (24 stitches).
- Round 56: SC in the first 2 stitches, then INV DEC in the next; repeat around (18 stitches).
- Round 57: SC in the first stitch, then INV DEC in the next; repeat around (12 stitches).
- Round 58: INV DEC around (6 stitches).
Fasten off and sew the remaining opening closed. Weave in your ends.
TAIL
Color: Pink
- Round 1: Create a magic circle with 6 SC.
- Round 2: Work SC INC in each stitch (12 stitches).
- Rounds 3-4: SC around (12 stitches).
- Round 5: SC in the first stitch, then SC INC in the next; repeat around (18 stitches).
- Round 6: SC around (18 stitches).
- Round 7: SC in the first 6 stitches, then SC INC in the next 6 stitches, and SC in the last 6 stitches (24 stitches).
- Round 8: SC around (24 stitches).
- Round 9: SC in the first 6 stitches, then SC INC in the next 3 stitches; repeat from * one more time, then SC in each of the last 6 stitches (30 stitches).
- Round 10: SC around (30 stitches).
- Round 11: SC in the first 6 stitches, then SC INC in the next 3 stitches, SC in the next 12 stitches, SC INC in the next 3 stitches, and SC in the last 6 stitches (36 stitches).
- Round 12: SC around (36 stitches).
- Round 13: SC in the first 15 stitches, then SC INC in the next 6 stitches, and SC in the last 15 stitches (42 stitches).
Fasten off, leaving a long tail for sewing.
WINGS
Make 2 (I left the wings unstuffed).
Each wing consists of two “feathers” that will be joined together.
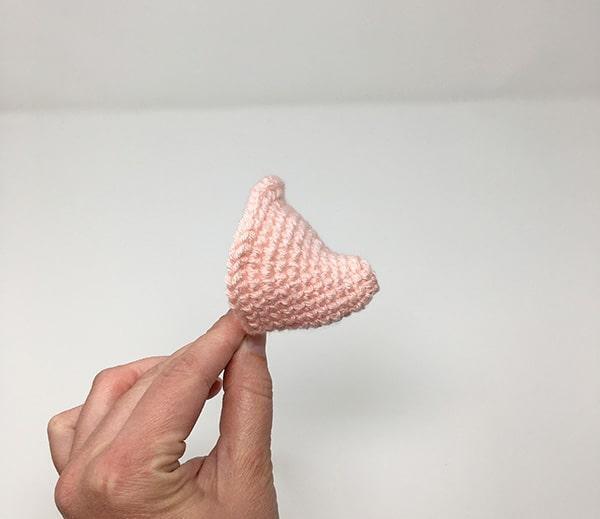
Small Feather
Color: White
- Round 1: Create a magic circle with 6 SC.
- Round 2: Work SC INC in each stitch around (12 stitches).
- Round 3: SC around (12 stitches).
- Change to pink.
- Round 4: SC around (12 stitches).
Fasten off.
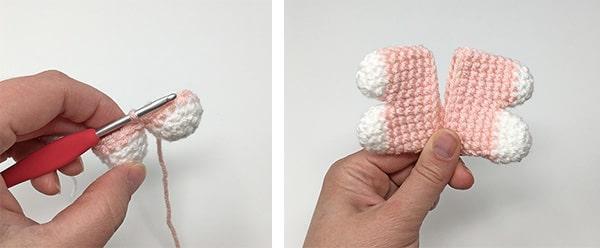
Large Feather
Color: White
- Round 1: Create a magic circle with 6 SC.
- Round 2: Work SC INC in each stitch around (12 stitches).
- Rounds 3-4: SC around (12 stitches).
- Change to pink.
- Round 5: SC around (12 stitches).
Do not fasten off. This is where we will join the feathers and continue working on the wing.
- Round 6: Attach to the first feather with 1 SC. SC around the first feather, then continue SC around the second feather (24 stitches). This completes your join and establishes the starting point for the next round.
- Rounds 7-10: SC around (24 stitches).
Fasten off, leaving a long tail for sewing onto the body.
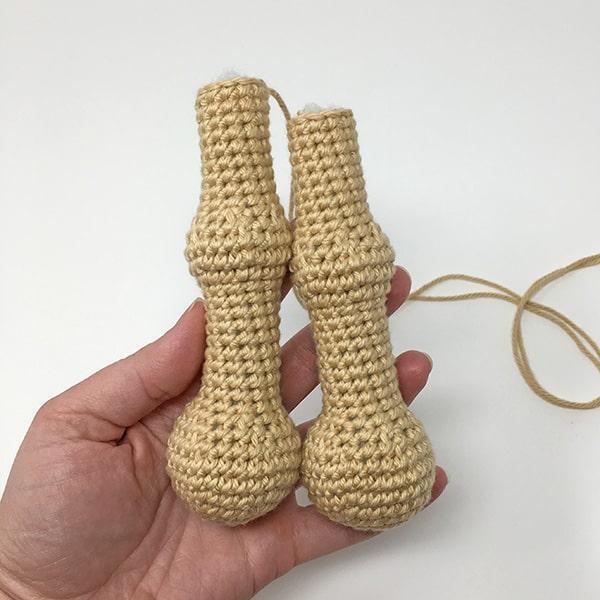
LEGS
Make 2, stuffing as you go.
Color: Beige
- Round 1: Create a magic circle with 6 SC.
- Round 2: Work SC INC in each stitch (12 stitches).
- Round 3: SC in the first stitch, SC INC in the next; repeat around (18 stitches).
- Round 4: SC in the first 2 stitches, SC INC in the next; repeat around (24 stitches).
- Round 5: SC in the first 3 stitches, SC INC in the next; repeat around (30 stitches).
- Rounds 6-7: SC around (30 stitches).
- Round 8: SC in the first 3 stitches, INV DEC in the next; repeat around (24 stitches).
- Round 9: SC in the first 2 stitches, INV DEC in the next; repeat around (18 stitches).
- Round 10: SC in the first stitch, INV DEC in the next; repeat around (12 stitches).
- Rounds 11-20: SC around (12 stitches).
- Round 21: SC in the first stitch, SC INC in the next; repeat around (18 stitches).
- Round 22: SC in the first 2 stitches, SC INC in the next; repeat around (24 stitches).
- Round 23: SC around (24 stitches).
- Round 24: SC in the first 2 stitches, INV DEC in the next; repeat around (18 stitches).
- Round 25: SC in the first stitch, INV DEC in the next; repeat around (12 stitches).
- Rounds 26-34: SC around (12 stitches).
Fasten off, leaving a long tail for sewing.
ASSEMBLY
- Attach the Wings: Sew the wings onto the body, positioning the top of each wing at round 26 and the bottom at round 15.
- Attach the Tail: Center the tail on the back of the body, sewing it in place while adding stuffing as needed.
- Attach the Legs: Sew the legs onto the bottom of the flamingo, centering them between rounds 2 and 5.
CONCLUSION
Congratulations on Completing Your Flamingo! We hope you had a wonderful time bringing this pattern to life. Don’t forget to share your finished creation with us in the group—we can’t wait to see how your flamingo turned out!


