

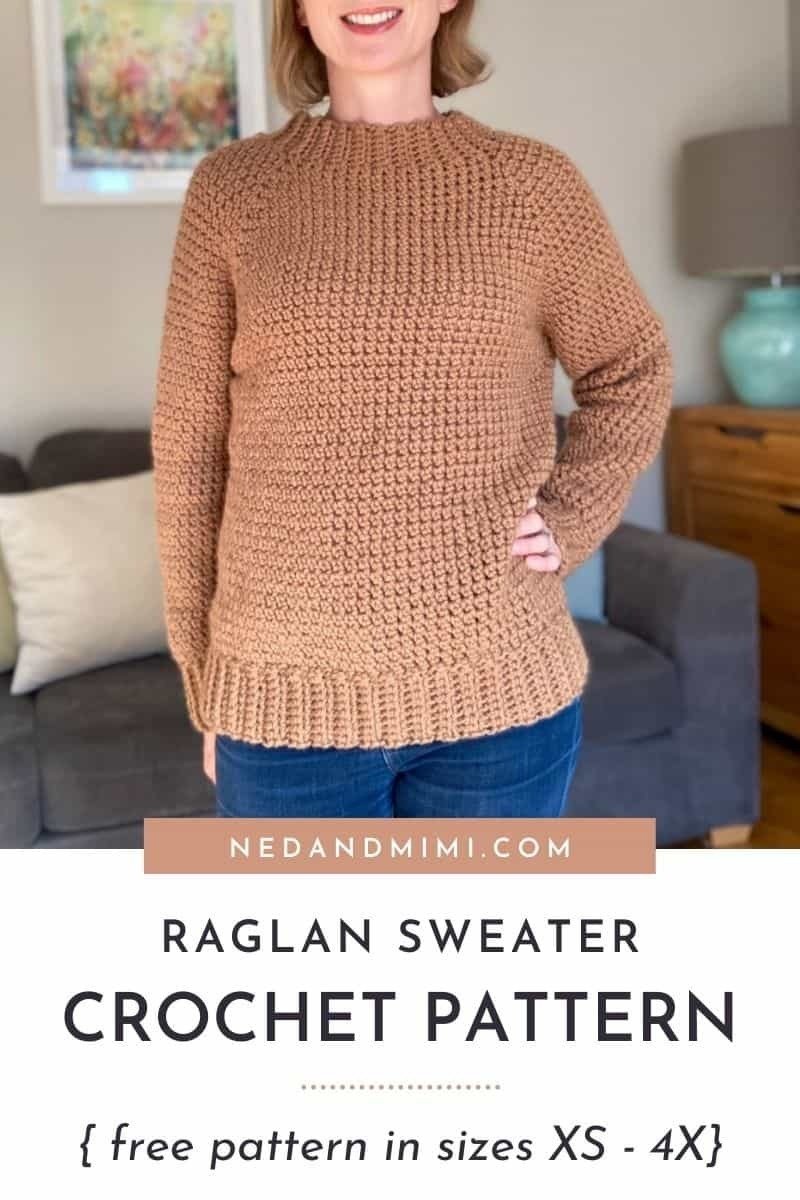
This chunky crochet raglan sweater is the perfect cozy staple for your winter wardrobe! It’s worked from the top down with #5 bulky yarn, making it a fast project, and you can even try it on as you go for the perfect fit.
The pattern includes 8 sizes (XS–4X) and uses just one simple stitch throughout, making it an ideal choice for beginners or anyone crocheting their first sweater or pullover.
Designed for a classic fit, you can easily achieve an oversized look by opting for a larger size. You can also adjust the sweater’s length by adding or removing body rounds to suit your style.
What you’ll need for this top down crochet sweater
Yarn
Any #5 bulky yarn will work wonderfully for this pattern. I used Paintbox Yarns Simply Chunky for my sweater, a 100% acrylic yarn that’s perfect for those with wool sensitivities. Plus, with its wide range of available shades, you’re sure to find a color that matches your style!
Some suitable alternatives include:
- WeCrochet Brava Bulky (100% Acrylic)
- WeCrochet Wonderfluff (70% Baby Alpaca, 7% Merino Wool , 23% Nylon)
- WeCrochet Mighty Stitch Bulky (80% Acrylic 20% Superwash Wool)
- Lion Brand Hue and Me (80% Acrylic, 20% Wool)
- Cascade 128 Superwash (100% Superwash Merino)
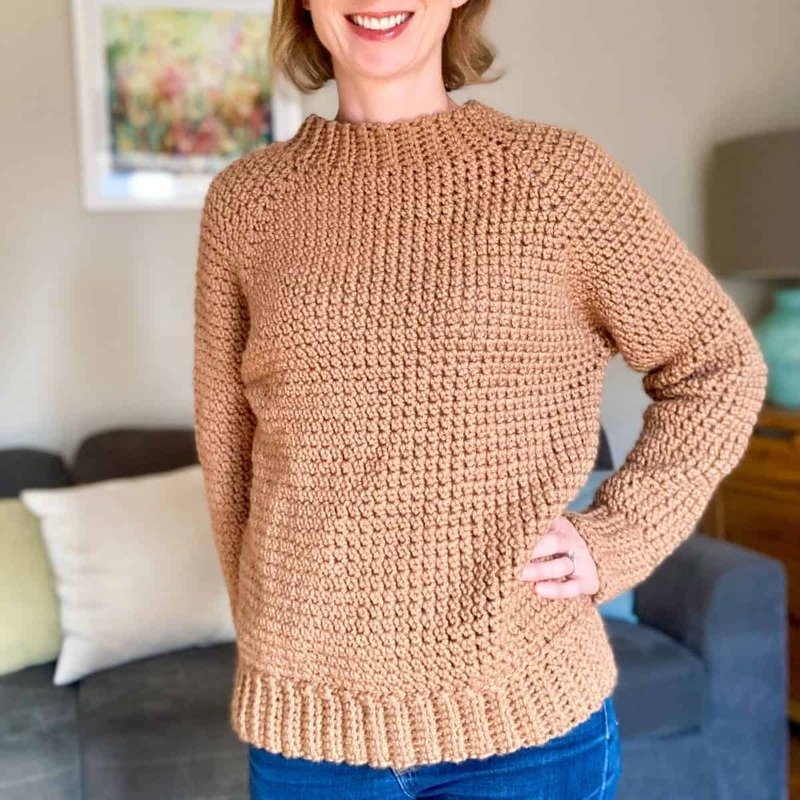
I crocheted my sweater in a solid color, but if you’re looking for a bit more flair, check out the inspiration below! Some talented ladies who tested this pattern created stunning striped versions that you’re sure to love!
Hook
For my sweater, I used a 6mm (J-10) crochet hook. If you tend to crochet tightly or loosely, you may need to adjust your hook size to match the gauge in the pattern. Going up or down a hook size will help you achieve the right fit and drape.
If this is your first time crocheting a sweater, it’s crucial to match the pattern gauge as closely as possible. This will help ensure your sweater turns out the correct size and fits as expected!
Other supplies
You’ll also need a yarn needle to weave in the ends and 5 stitch markers to mark the 4 raglan corner stitches and the first stitch of each round. (Trust me, I wouldn’t recommend attempting this pattern without stitch markers—they’re essential for keeping track of your work!)
Crochet Raglan Sweater Sizing
This sweater is designed with 3”–5” (7.5–12.5 cm) of positive ease at the bust. The term “ease” refers to the difference between your actual bust measurement and the finished garment measurement. In this pattern, the sweater is intentionally made to be slightly larger than your bust size, creating a relaxed fit, which is what we call “positive ease.”
The sizes in this pattern are based on the body measurements standardized by the Craft Yarn Council, ensuring a consistent and accurate fit across all sizes.
How to crochet this Chunky Raglan Sweater
This sweater is worked seamlessly from the top down in a raglan style, meaning the sleeves are shaped as you crochet without the need for seaming, making it a smooth and easy-to-follow construction.
There are 2 things that I really love about this type of construction:
Seamless
That’s right—once you finish this sweater, it’s truly complete! There’s no seaming involved, just a few ends to weave in, making the finishing process quick and hassle-free.
Easy to adjust
One of my favorite aspects of top-down crochet sweaters is the ability to try them on and make adjustments as you go. For instance, if you find the underarm area a bit tight after finishing the yoke, you can easily add a few more even yoke rounds (without increases) before splitting for the sleeves and body.
Similarly, if you want to adjust the length of your sweater, you can simply add or subtract body rounds until you achieve the desired length. The same principle applies to the sleeves, allowing you to customize the fit to your preference!
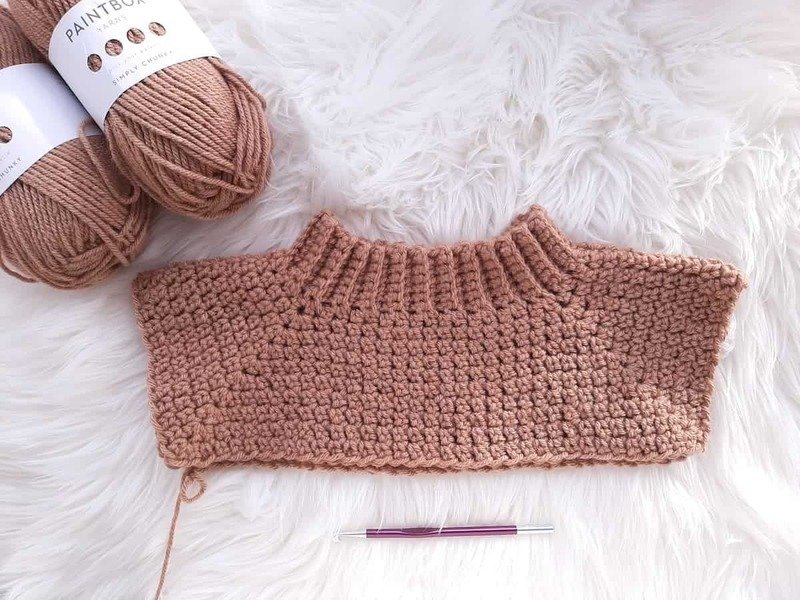
A note on ribbing
Once you’ve completed the body of the sweater, the final step is to work the ribbing section. This ribbing is done directly into the last body row, joining it with a series of slip stitches.
You can find the full written instructions for this technique in the pattern below. However, if you’d like to see step-by-step photos and a video, check out my tutorial on “How to Attach Ribbing to Crochet.” While the tutorial focuses on attaching single crochet ribbing to a hat, the technique is exactly the same!
Crochet Raglan Inspiration
For some color inspiration, take a look at the stunning projects created by my talented testers! Their unique color combinations and creativity are sure to spark some ideas for your own sweater!
FINISHED SIZES
This sweater is designed with approximately 3”–5” (7.5 cm–12.5 cm) of positive ease at the bust, providing a comfortable and relaxed fit.
Note: The pattern PDF also includes a schematic for a visual representation of the measurements, making it easier to understand the sizing and fit.
GAUGE
Ribbing: 4 sts x 14 rows = 1″ x 4″ / 2.5cm x 10cm measured over sc (blo).
Body: 10 sts x 9 rows = 4″ x 4″ / 10cm x 10cm measured over esc.
Materials
Hook:
6mm (J-10) crochet hook (or hook required to meet gauge)
Yarn:
Any #4/Medium/Worsted weight yarn in 2 colors.
The amounts given here are for Paintbox Yarns Simply Chunky (136m/149yds per 100g skein; Weight 5/Bulky; 100% Acrylic).
XS: 861 yds / 787m
S: 976 yds / 892m
M: 1061 yds / 970m
L: 1195 yds / 1093m
XL: 1348 yds / 1233m
2XL: 1493 yds / 1365m
3XL: 1673 yds / 1530m
4XL: 1782 yds / 1629m
PATTERN NOTES
SKILL LEVEL

ABBREVIATIONS (US TERMS)
- ch = chain
- st = stitch
- sp = space
- sl st = slip stitch
- sc = single crochet
- esc = extended single crochet (see Special Stitches)
- blo = back loop only
- INC = Increase
- DEC = Decrease
- RS = Right Side
- WS = Wrong Side
- rem = remaining
- beg = beginning
- pm = place marker
Sizing
This sweater is designed with 3”–5” (7.5–12.5 cm) of positive ease at the bust. The sizes in this pattern are based on the body measurements established by the Craft Yarn Council.
Before you begin, take a moment to go through the pattern and highlight or mark the stitch and row counts corresponding to the size you are making. This will make your crocheting process much smoother and more manageable!
Construction
- This garment is worked seamlessly from the top down, in a raglan style.
- The garment is crocheted in 3 sections as follows:
- Yoke – begin with the neckline ribbing, then work the yoke rounds without turning, working 2 increases every 3 rounds.
- Body – split the yoke to create the armholes and work the body in the round. Finish with “join-as-you-go” ribbing.
- Sleeves – join yarn at the underarm on each side, and work sleeves in the round, decreasing evenly to the wrist. Again, finish each sleeve with “join-as-you-go” ribbing.
- Each round begins and ends along the raglan line at the back right-hand side of your sweater; the “seam” will run diagonally along this line.
- To adjust the length of the sweater body, or the sleeves, simply repeat the last round of the relevant section as required.
General Pattern Notes
- Ch 1 at the start of each row/round does not count as a stitch.
- All rounds are worked without turning. Join at the end of each round with a sl st.
- Instructions are given for the smallest size, with all larger sizes given in parentheses ( ).
- The stitch count for each row/round is given in [ ] at the end of the row/round. If no stitch count is given, then the count is the same as the previous round/row.
Print-friendly PDF
The print-friendly PDF version of this pattern also contains:
- Schematic (sweater construction and measurements)
- Yoke Rounds 1 – 4 (step-by-step pictures)
- Split for Armholes (step-by-step pictures)
- Sleeve Round 1 (step-by-step pictures)
- Table with yoke stitch counts for each round
SPECIAL STITCHES
Extended Single Crochet (esc)
Step 1: Insert hook into indicated st and pull up a loop. [2 loops on hook]
Step 2: Yarn over and pull up a loop i.e. ch 1. [2 loops on hook]
Step 3: Yarn over and pull through both loops.
Extended Single Crochet Two Together (esc2tog)
This stitch decreases the stitch count by 1.
Step 1: Insert hook into indicated st and pull up a loop. [2 loops on hook]
Step 2: Yarn over and pull up a loop i.e. ch 1. [2 loops on hook]
Step 3: Insert hook into next st and pull up a loop. [3 loops on hook]
Step 4: Yarn over and pull up a loop i.e. ch 1. [3 loops on hook]
Step 5: Yarn over and pull through all 3 loops.
Written Pattern
YOKE
ALL SIZES: XS (S, M, L, XL, 2XL, 3XL, 4XL)
NECKLINE RIBBING
ROW 1: Leaving a long tail (for seaming), ch 8, sc in second ch from hook and each ch across, turn. [7]
ROW 2: Ch 1 (does not count as a st, here and throughout), sc (blo) in each st across, turn. [7]
ROWS 3 – 50 (52, 52, 56, 56, 56, 60, 60): Repeat ROW 2.
Do not fasten off.
Pull up a long loop, tie a loose knot (to prevent your work from unravelling), and remove hook.
Fold ribbing in half and seam edges together with a yarn needle, using the tail from the starting chain.
Turn ribbing the right way around and begin yoke.
YOKE
ROUND 1: Ch 1, esc evenly around edge of ribbing (working 1 st for each ribbing row), sl st to join to beg st, do not turn. [50 (52, 52, 56, 56, 56, 60, 60)]
Mark 4 corners by placing stitch markers in the following sts:
- XS: 1, 10, 26, 35
- S: 1, 10, 27, 36
- M: 1, 10, 27, 36
- L: 1, 11, 29, 39.
- XL: 1, 11, 29, 39
- 2XL: 1, 11, 29, 39
- 3XL: 1, 12, 31, 42
- 4XL: 1, 12, 31, 42
Note: each INC round will add 8 sts to the stitch count i.e. 2 sts added at each corner. On EVEN rounds, the stitch count will be the same as the previous round. On each round, move the stitch markers up to each new corner stitch.
ROUND 2 (INC): Ch 1, 3 esc in join st (pm in second st of 3 sts just made), *esc in each st to next marked st, 3 esc in marked st (pm in second st of 3 sts just made); repeat from * twice more, esc in each remaining st, sl st to join to beg st. [58 (60, 60, 64, 64, 64, 68, 68)]
Note: pm in sl st just made – this will make it easier to finish the next round. You may find it helpful to mark the sl st at the end of all INC rounds.
ROUND 3 (INC): Sl st to first marked st, ch 1, 3 esc in first marked st (pm in second st of 3 sts just made), *esc in each st to next marked st, 3 esc in marked st (pm in second st of 3 sts just made); repeat from * twice more, esc in each remaining st, ending with last esc in joining sl st, sl st to join to beg st. [66 (68, 68, 72, 72, 72, 76, 76)]
SIZES 2XL (3XL, 4XL) only
ROUND 4 (INC): Repeat ROUND 3. [80 (84, 84)]
ALL SIZES: XS (S, M, L, XL, 2XL, 3XL, 4XL)
ROUND 4 (4, 4, 4, 4, 5, 5, 5) (EVEN): Sl st to first marked st, ch 1, esc in first st (pm in st just made), *esc in each st to next marked st, esc in marked st (pm in st just made), repeat from * twice more, esc in each remaining st, ending with last esc in joining sl st,, sl st to join to beg st (i.e. the first marked st). [66 (68, 68, 72, 72, 80, 84, 84)]
Note: DO NOT pm in sl st just made – you will not work into this sl st at the end of the next round.
SIZES XS (S, M, L, XL) only
ROUNDS 5 – 19 (19, 19, 19, 22): Repeat ROUNDS 2 – 4. [146 (148, 148, 152, 168)]
SIZES 2XL (3XL, 4XL) only
ROUNDS 6 – 21 (21, 21): Repeat ROUNDS 2 – 5. [176 (180, 180)]
YOKE (BUST INC ONLY)
The following yoke rounds will add stitches to the BUST only – no stitches will be added to the sleeves. Do not attempt this section without stitch markers!
SIZES S, (M, L, XL, 2XL, 3XL 4XL) only
ROUND 20 (20, 20, 23, 22, 22, 22) (INC): Ch 1, 2 esc in first marked st (pm in second st of 2 just made), esc in each st to next marked st, 2 esc in marked st (pm in first st of 2 sts just made), esc in each st to next marked st, 2 esc in marked st (pm in second st of 2 sts just made), esc in each st to next marked st, 2 esc in marked st (pm in first st of 2 sts just made), esc in each remaining st, sl st to join to beg st. [152 (152, 156, 172, 180, 184, 184)]
SIZES M, (L, XL, 2XL, 3XL, 4XL) only
ROUND 21 (21, 24, 23, 23, 23) (INC): Sl st to first marked st, ch 1, 2 esc in first marked st (pm in second st of 2 just made), esc in each st to next marked st, 2 esc in marked st (pm in first st of 2 sts just made), esc in each st to next marked st, 2 esc in marked st (pm in second st of 2 sts just made), esc in each st to next marked st, 2 esc in marked st (pm in first st of 2 sts just made), esc in each remaining st, sl st to join to beg st. [156 (160, 176, 184, 188, 188)]
SIZES L (XL, 2XL, 3XL, 4XL) only
ROUNDS 22 – 23 (25 – 25, 24 – 25, 24 – 26, 24 – 27) (INC): Repeat previous round 2 (1, 2, 3, 4) times. [168 (180, 192, 200, 204)]
BODY
SPLIT FOR ARMHOLES
SIZE XS only
JOINING ROUND: Ch 1, *esc in marked st, ch 1, sk next 32 sts, esc in next marked st*, esc in each st to next marked st, repeat from * to * once more, esc in each remaining st, sl st to join to beg st. [82 esc, 2 ch]
SIZES S, (M, L, XL, 2XL, 3XL 4XL)
JOINING ROUND: Sl st to first marked st, ch 1, *esc in marked st, ch 3 (5, 5, 7, 9, 11, 13), sk next 32 (32, 33, 37, 39, 40, 40) sts, esc in next marked st*, esc in each st to next marked st, repeat from * to * once more, esc in each remaining st, ending with last esc in joining sl st, sl st to join to beg st.[88 (92, 102, 106, 114, 120, 124) esc, 6 (10, 10, 14, 18, 22, 26) ch]
ALL SIZES: XS (S, M, L, XL, 2XL, 3XL, 4XL)
ROUND 1: Ch 1, esc in each st around, working 1 esc in each underarm ch, sl st to join to beg st. [84 (94, 102, 112, 120, 132, 142, 150)]
ROUND 2: Ch 1, esc in each st around, sl st to join to beg st. [84 (94, 102, 112, 120, 132, 142, 150)]
ROUNDS 3 – 23: Repeat ROUND 2.
Note: if you would like to make your sweater a little longer, you can repeat ROUND 2 until your desired length is reached. (Remember that the ribbing will add approx. 2.5”/5cm in length to the finished sweater!)
Do not fasten off.
BODY RIBBING
Note: Ribbing is worked at a right angle to the body, and is joined to the body as you go.
ROW 1: Ch 10, sc in second ch from hook and in each ch until you reach the body, sl st to join to next body st. [9]
ROW 2: Sl st to next body st, turn. Sk 2 sl sts, sc (blo) in each st across, turn.
ROW 3: Ch 1, sc (blo) in each st across, sl st to join to next body st.
Repeat previous 2 rows until you have worked a ribbing row for each body st.
Cut yarn and fasten off, leaving a long tail for seaming the ribbing.
SLEEVES
ALL SIZES: XS (S, M, L, XL, 2XL, 3XL, 4XL)
Note: before beginning the sleeves, take note of the 2 “body” sts to the left and right of the underarm chain. To avoid any gaps, you will work an “esc2tog” into the side of this body st and the armhole st beside it.
Join yarn in center of underarm chain.
ROUND 1: Ch 1, esc in join ch and each of next 0 (1, 2, 2, 3, 4, 5, 6) chs, esc2tog in side of “body” st and next armhole st, esc in each armhole st around until 1 st rem before “body” st, esc2tog in next st and side of “body” st, esc in each of next 0 (1, 2, 2, 3, 4, 5, 6) chs, sl st to join to beg st. [33 (35, 37, 38, 44, 48, 51, 53)]
ROUND 2: Ch 1, esc in each st around, sl st to join to beg st. [33 (35, 37, 38, 44, 48, 51, 53)]
ROUND 3 (DEC): Ch 1, esc2tog in first 2 sts, esc in each st around, sl st to join to beg st. [32 (34, 36, 37, 43, 47, 50, 52)]
SIZES XS (S, M, L) only
ROUND 4 (EVEN): Repeat ROUND 2.
ROUNDS 5 – 28 (30, 30, 30): Repeat previous 2 rounds 12 (13, 13, 13) more times. [20 (21, 23, 24)]
SIZE XL only
ROUND 4 (DEC): Repeat ROUND 3. [42]
ROUND 5 (EVEN): Repeat ROUND 2. [42]
ROUNDS 6 – 29: Repeat previous 3 rounds 8 more times. [26]
SIZE 2XL only
ROUNDS 4 – 5 (DEC): Repeat ROUND 3. [45]
ROUND 6 (EVEN): Repeat ROUND 2. [45]
ROUNDS 7 – 30: Repeat previous 4 rounds 6 more times. [27]
SIZE 3XL (4XL) only
ROUNDS 4 – 6 (DEC): Repeat ROUND 3. [47 (49)]
ROUND 7 (EVEN): Repeat ROUND 2. [47 (49)]
ROUNDS 8 – 32: Repeat previous 5 rounds 5 more times. [27 (29)]
Note: if you would like to make your sleeves a little longer, you can repeat the final sleeve round until your desired length is reached. (Remember that the ribbing will add approx. 2.5”/5cm in length to the finished sleeves!)
SLEEVE RIBBING
Work ribbing as per BODY.
Cut yarn and fasten off, leaving a long tail for seaming the ribbing.
Finishing
SEAMING
Turn the sweater inside out, and whip stitch the ribbing edges together on both the BODY and the SLEEVES.
BLOCKING
Block sweater to measurements.
Weave in remaining ends.
All done!


