
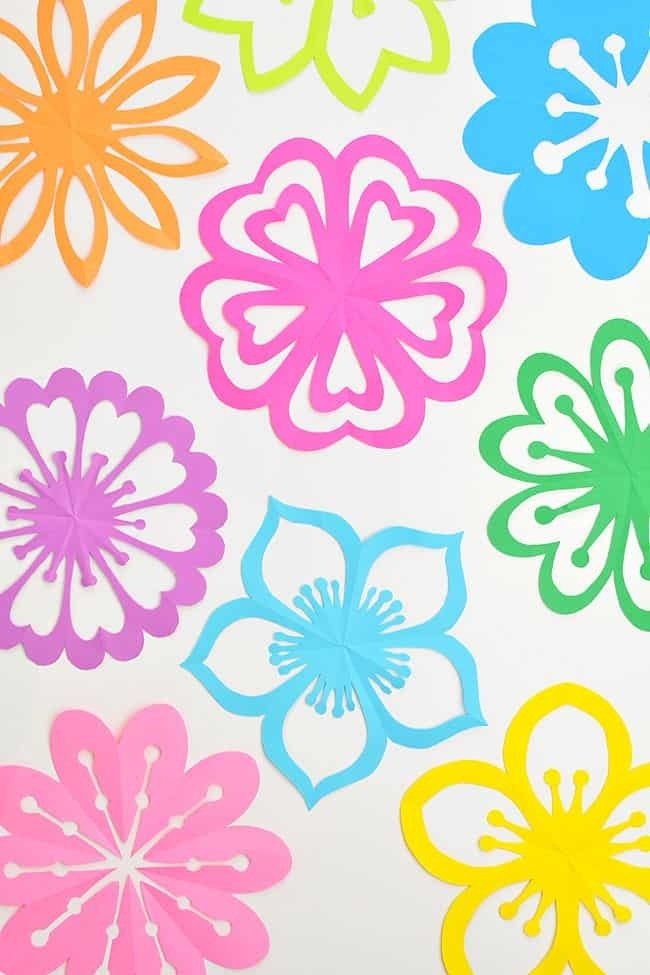
Did you know that you can create stunning paper flowers using the same technique as making paper snowflakes? It’s a fun and creative process! Follow our simple photo and video tutorials below to learn how to make beautiful paper flowers step by step.
How to Create Paper Flowers
Turn an ordinary sheet of printer paper into a gorgeous flower! Using a kirigami technique, make delicate flower designs just like you would when crafting a paper snowflake.
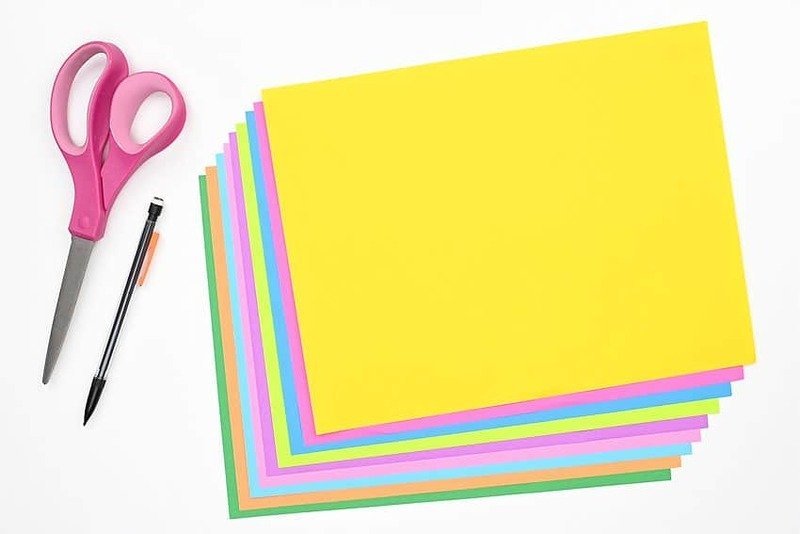
Materials
1 pieces colored printer paper
Equipment
pencil; scissors
INSTRUCTIONS
Step 1: Find what you need
Gather Your Materials. To get started, you’ll need just one sheet of paper for each flower you want to create. Keep it simple and enjoy the process!
Step 2: Fold the flower base
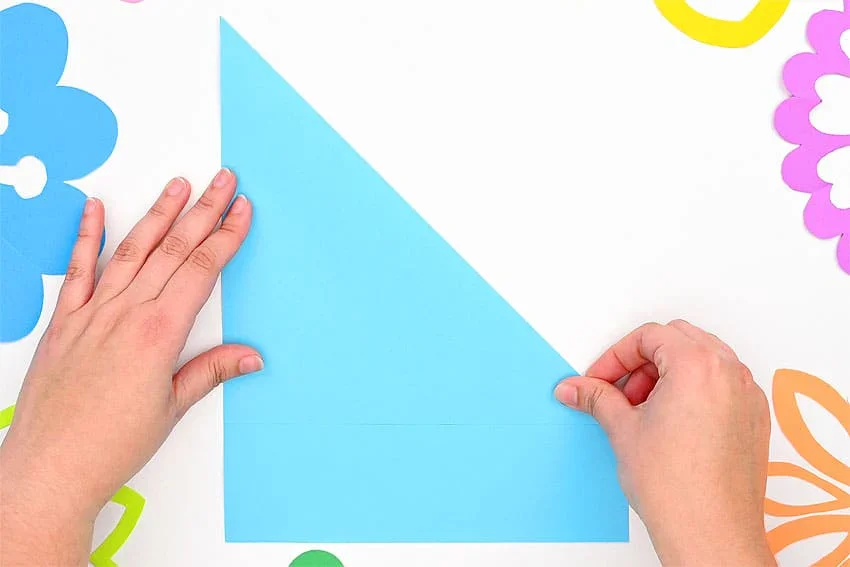
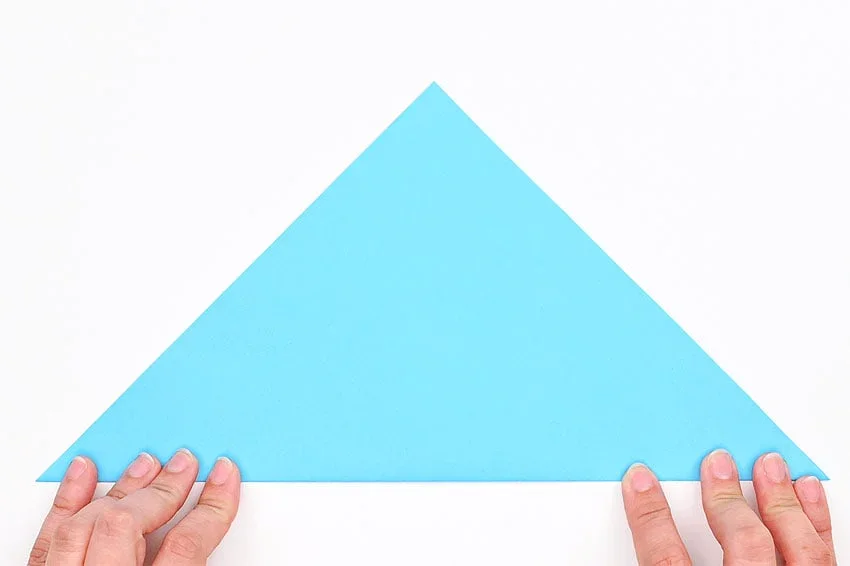
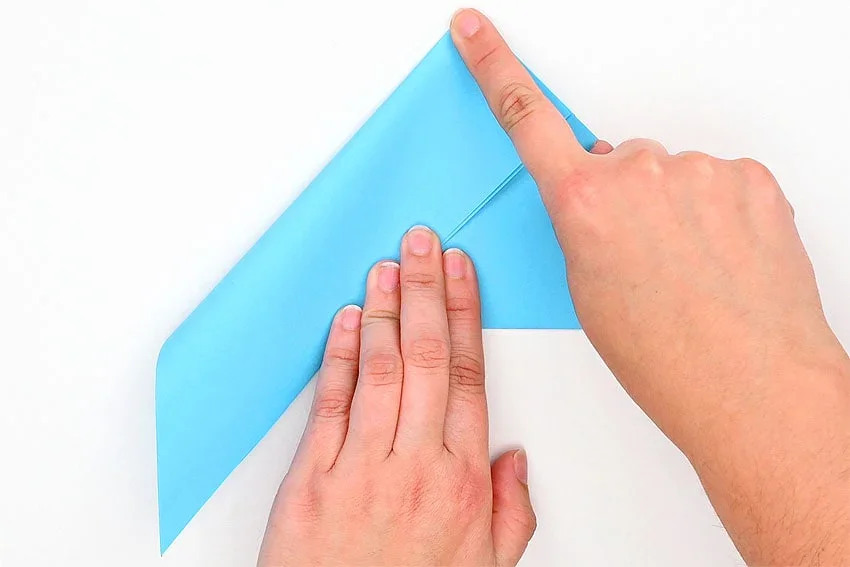
Fold the Paper. Take the top right corner of the paper and fold it down diagonally until the top edge aligns perfectly with the left side of the paper. This creates a triangle shape.
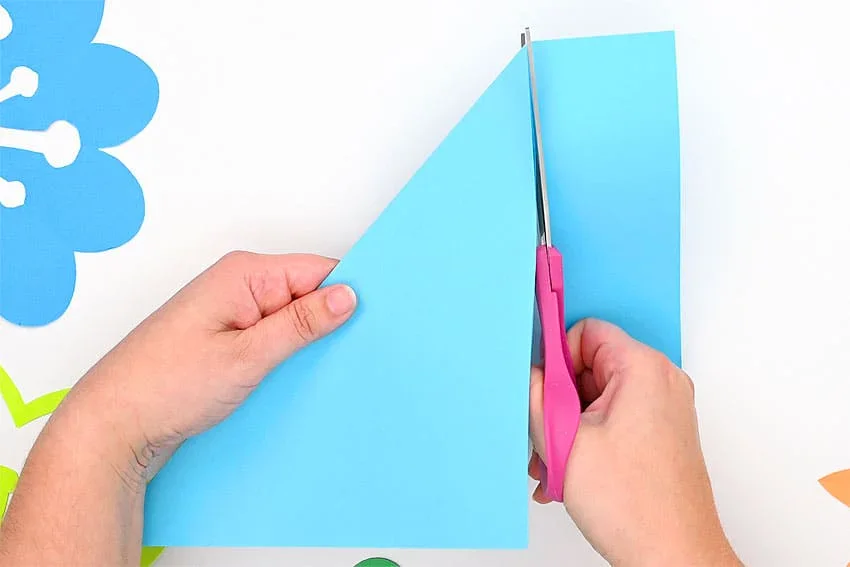
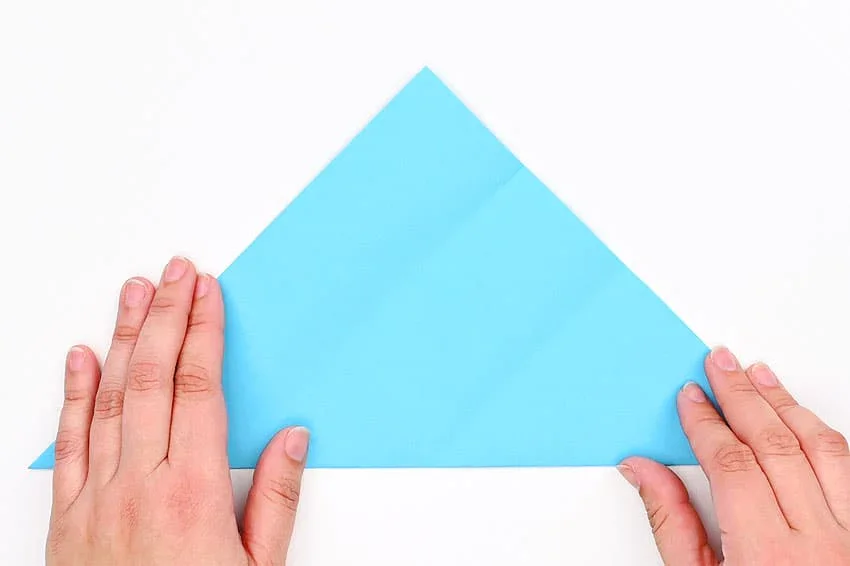
Trim the Paper. Cut off the excess rectangular section at the bottom of the folded triangle. You should now have a perfect square to work with for your flower.
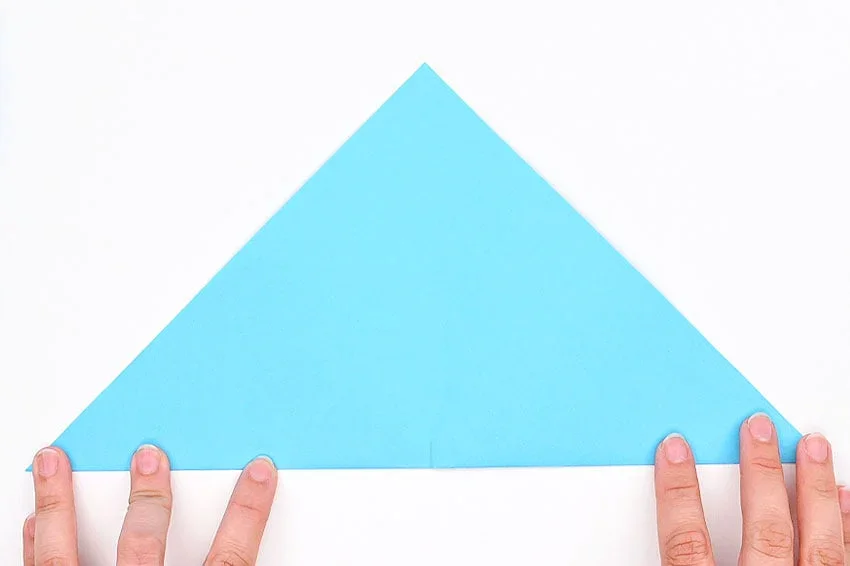
Position the Paper. With the paper still folded in half, rotate the triangle so that the long, folded edge is at the bottom, and the open edges are at the top.
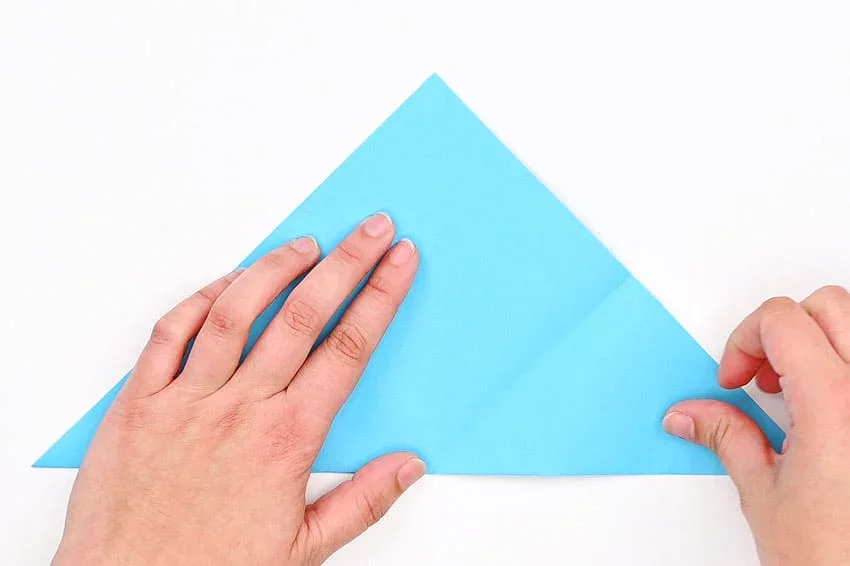
Create a Guide Crease. Take the bottom right corner of the triangle and bring it over to meet the left corner. Lightly press the bottom to form a small crease in the middle. This crease will serve as a guide, so avoid folding the paper completely.
Unfold the Paper. Gently open the paper back up to reveal the small crease you made at the bottom. This will help guide the next folds.
Make Another Guide Crease. Take the right point of the triangle and bring it up to the top point. Lightly press to create a small crease at the top right, but once again, avoid making a full fold. This will be another guide for the upcoming steps.

Unfold the Paper to Triangle. Gently open the paper back up, returning it to the triangle shape. You should now see the two creases marking the center points, which will guide your next folds.
Create Another Guide Crease. Bring the top point of the triangle down to the crease mark you just made. Lightly press to form a small crease at the top point, but don’t complete the fold. This crease will help guide your next steps.
Unfold the Paper Once More. Gently open the paper again. You should now see one crease mark at the bottom middle and two crease marks along the right edge, providing clear guidelines for your next folds.
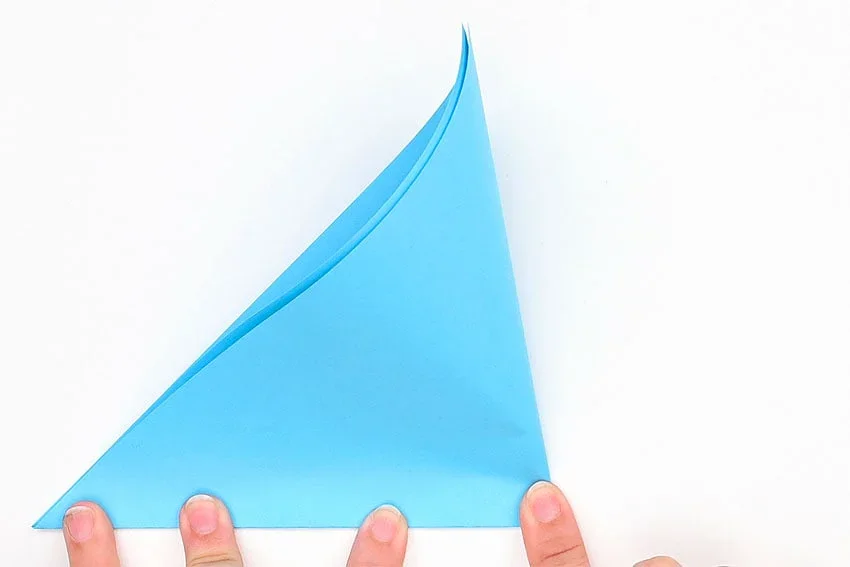
Fold the Bottom Right Corner. Begin by folding the bottom right corner of the triangle upward. Start the fold at the bottom center crease mark, bringing the bottom right edge up to meet the top right crease mark. This will create a triangular shape on the right side.
Press this fold down completely.
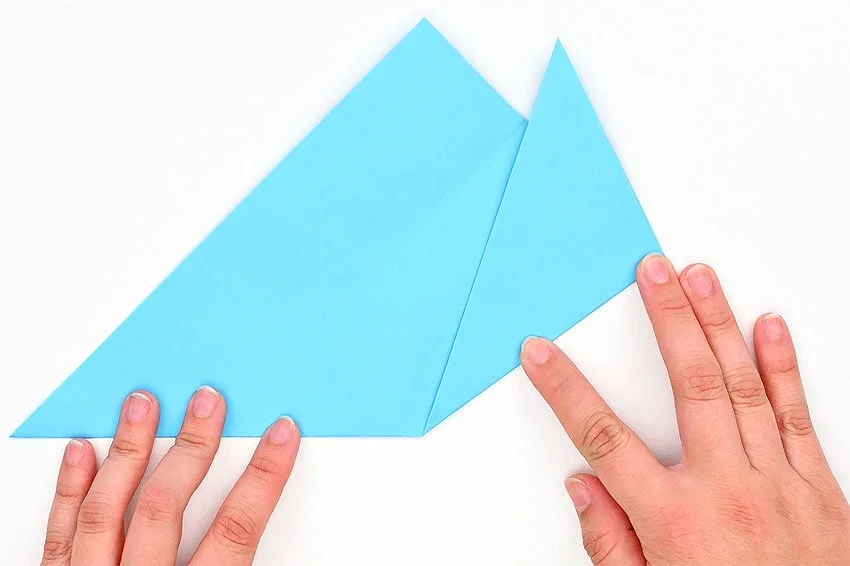
Fold the Bottom Left Corner. Next, fold the bottom left corner upward and to the right so that the bottom edge aligns with the existing bottom fold on the right. This will create a symmetrical triangular shape on both sides.
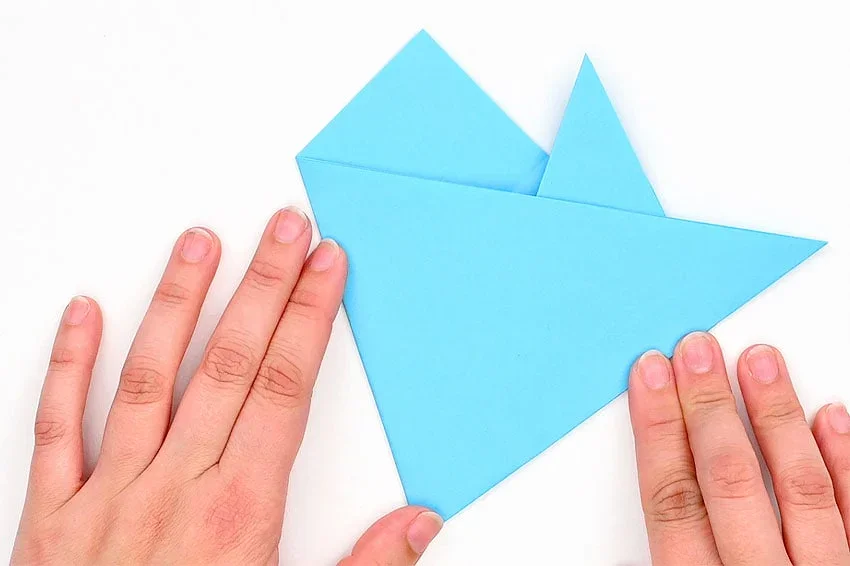
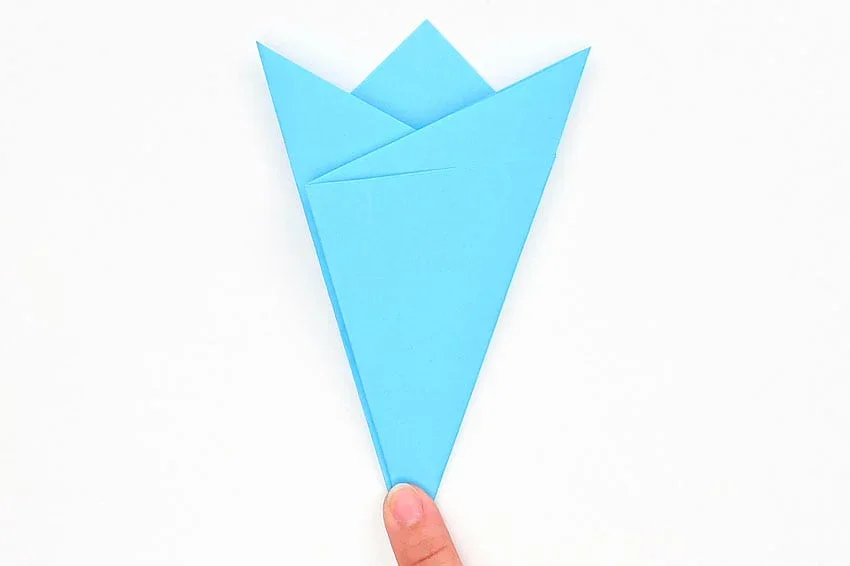
Align the Bottom Right Edge. Now, take the bottom right edge and fold it over to align with the left edge. Press down firmly to secure the fold. You should now have a tall triangle shape with three pointed edges at the top.
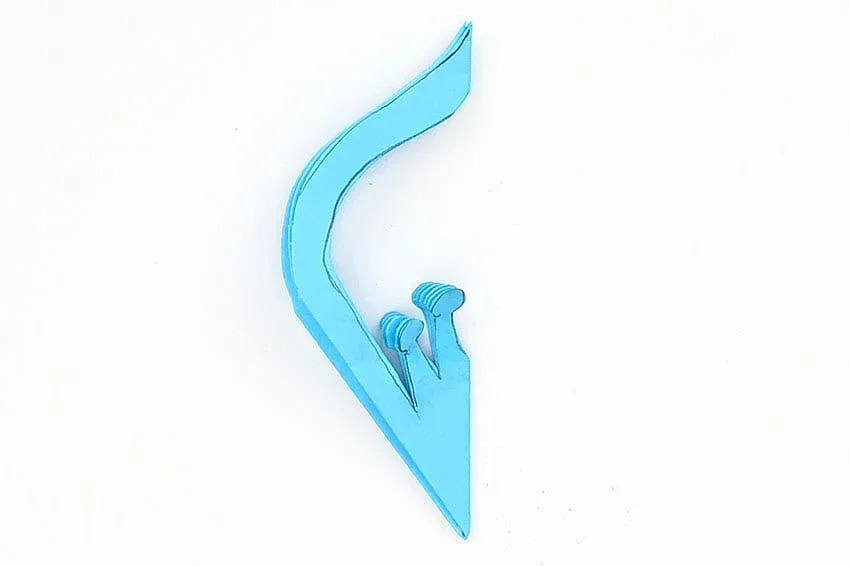
Step 3: Draw your flower design
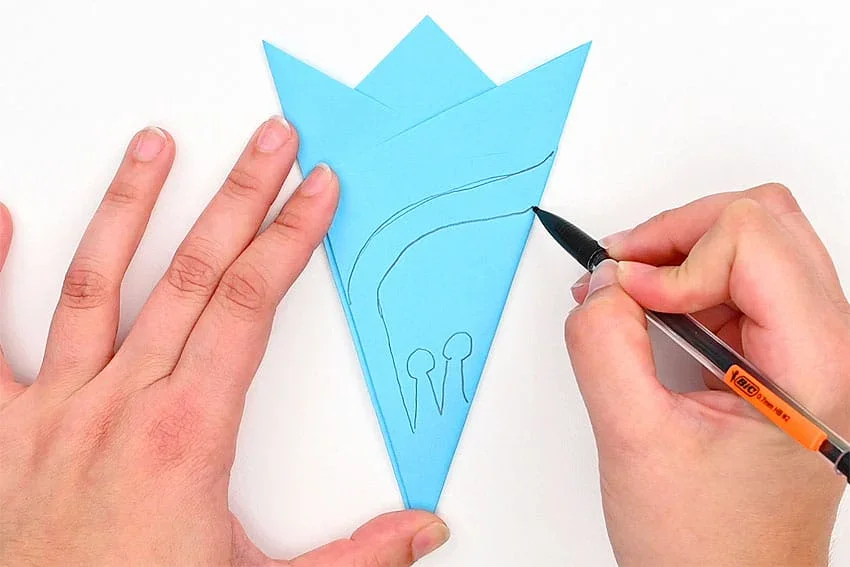
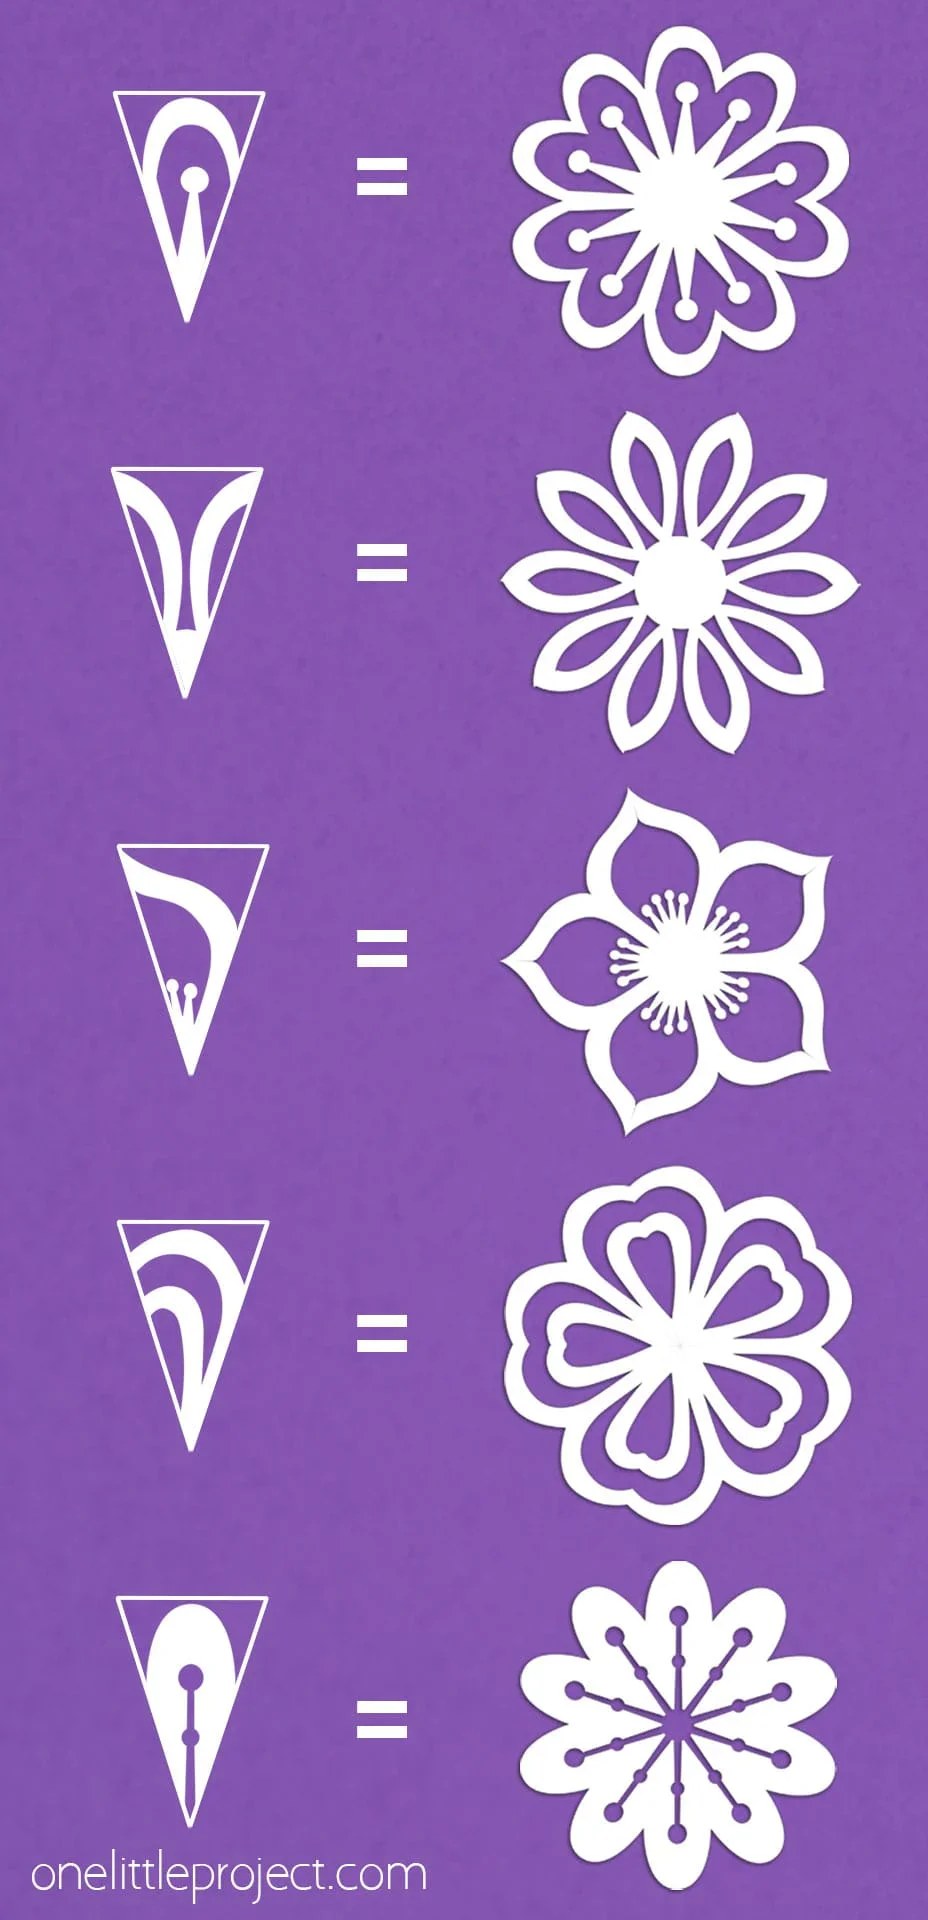
Design Your Flower. Using a pencil or pen, draw your desired flower design on the triangle. You can follow the pattern provided in this tutorial or refer to the templates below for eight additional flower designs to inspire your creativity!
Step 4: Cut out the flower and unfold
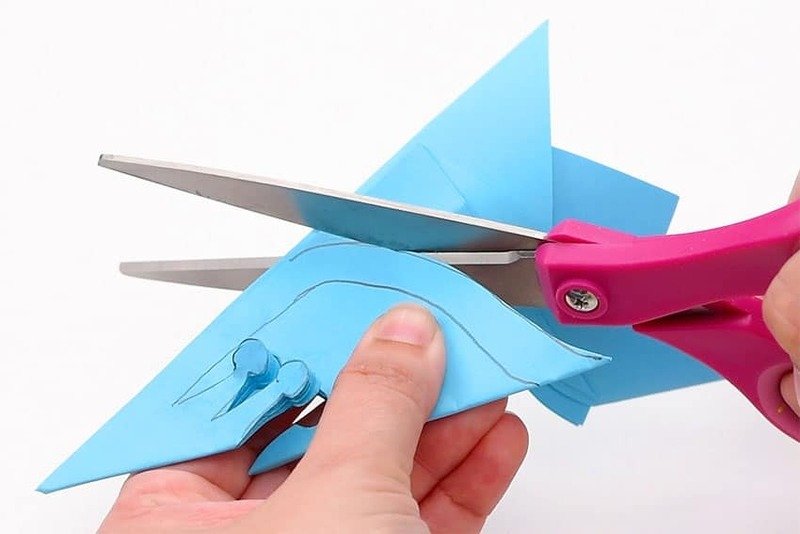
Cut Out the Flower Design. Carefully cut along the outline of your flower design. Take your time to ensure smooth edges and a neat cut, revealing the beautiful flower shape once you’re done.
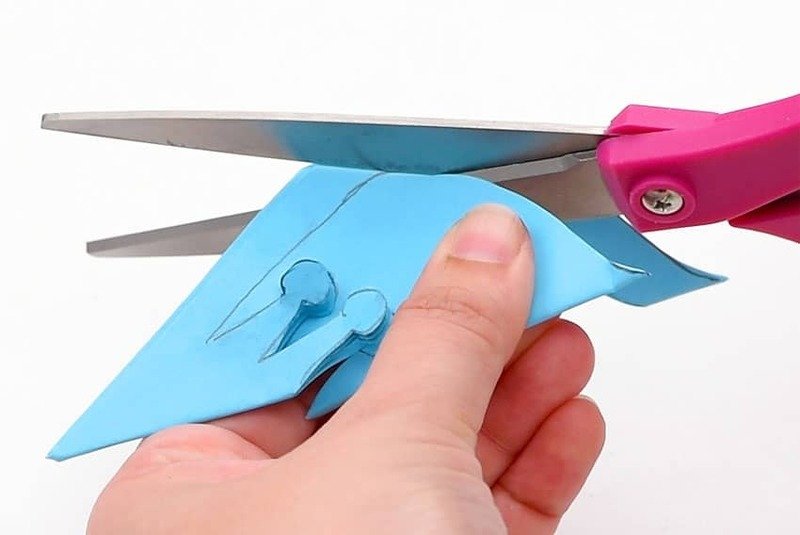
Cut the Inner Lines. Next, carefully cut along the inner lines of your flower design. This will add detail and intricacy to your flower, so take your time to ensure accuracy.
Cut the Inner Lines. Next, carefully cut along the inner lines of your flower design. This will add detail and intricacy to your flower, so take your time to ensure accuracy.

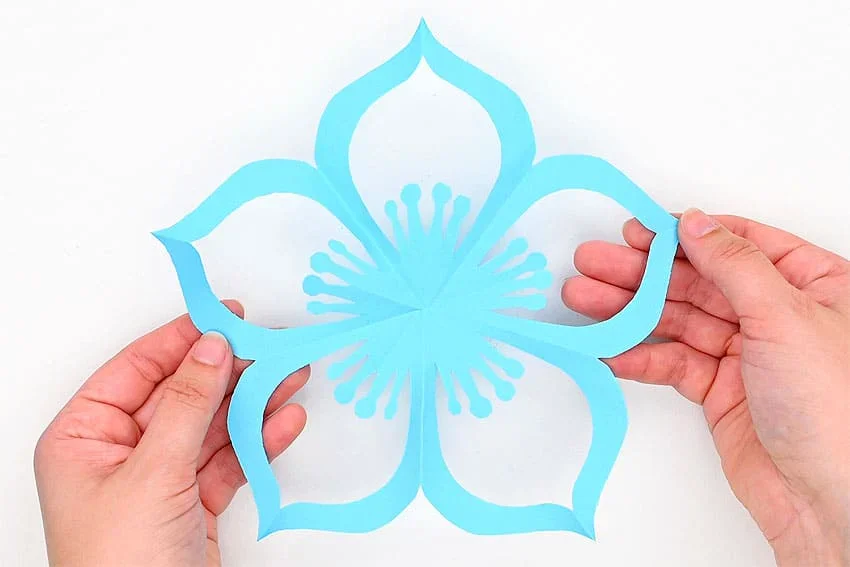
Final Look of Your Paper. After completing your cuts, your paper should resemble a beautifully detailed flower shape, much like a paper snowflake. You’ll see the intricate design you’ve created, ready to be opened up and admired!
Unfold to Reveal Your Flower. Gently unfold the paper to reveal your stunning kirigami flower! Enjoy the intricate design and the beauty of your creation as it blooms before your eyes.
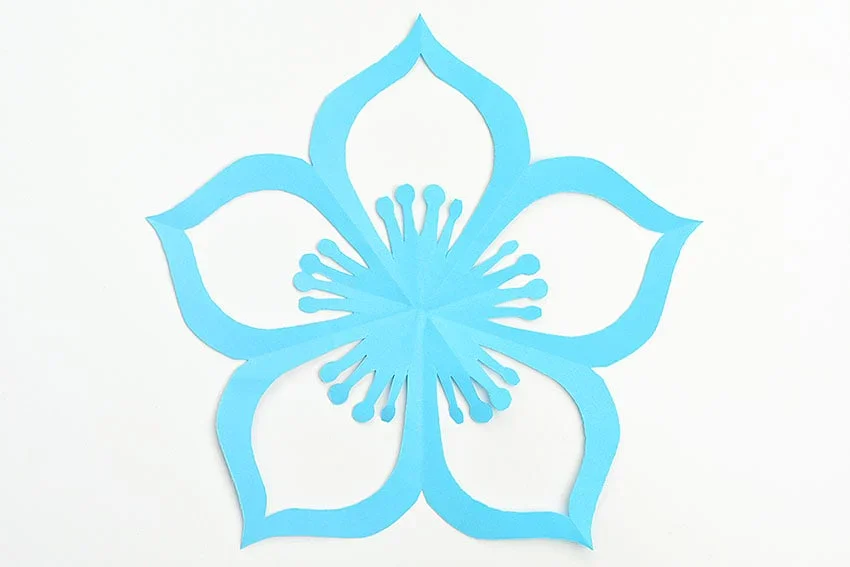
Smooth Out the Folds. Carefully smooth out any creases or folds, and your beautiful paper flower is complete! Display it proudly or use it to add a touch of creativity to your decor.
Helpful Tip
Remove Creases with an Iron. If you want to eliminate any creases from your folded paper flower, you can gently iron it on a low temperature. Place the flower between two pieces of parchment paper to protect the delicate details while you iron. This will help keep your flower looking pristine!
CONCLUSION
Creating paper flowers using this step-by-step guide is a fun and rewarding craft project that anyone can enjoy. By following the simple folding and cutting techniques, you can transform a plain piece of paper into a beautiful, intricate flower. Whether you use them for decorations, gifts, or simply as a creative outlet, these kirigami flowers add a unique touch to any setting. So gather your supplies, unleash your creativity, and enjoy the process of making your very own stunning paper flowers!


