I’m sharing how you can create scrap wood block christmas tree. Here’s what I used to bring this festive idea to life:
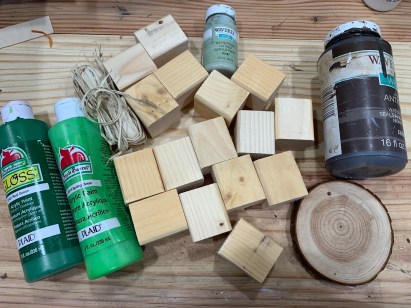
Supplies Needed for the DIY Scrap Wood Block Christmas Tree
- 16 pieces of 2×2 wood blocks – Each piece should be 2 inches long.
- You can cut these yourself using 2×2 boards from Lowe’s (affordable and customizable), or use pre-made wood block toys from Amazon or local stores.
- Different shades of green paint – Either chalk paint or acrylic paint will work perfectly for this project.
- Dark wax, stain, or watered-down brown paint – For aging or adding dimension.
- I used Waverly Antique Wax from Walmart.
- Raffia – For decorative touches.
- Glue options:
- E6000 or wood glue for strong, lasting bonds.
- Hot glue and a glue gun for quicker assembly.
- A 3-inch wood circle – This will serve as the tree base.
- You can also use a square base if preferred.
- Paintbrush – For applying paint and wax.
- Sanding sponge – To smooth edges and add a distressed look.
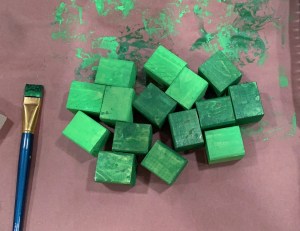
Step 1: Paint the Blocks
Start by painting 15 of the wood blocks in alternating shades of green.
- Choose two different green paint colors for a nice variation.
- Apply an even coat and let the blocks dry completely before moving on to the next step.
This alternating color pattern will give your tree a vibrant, layered look!
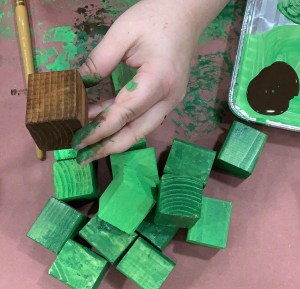
Step 2: Create the Tree Trunk
Take one of the wood blocks and stain it brown using Waverly Antique Wax (or your choice of stain or watered-down brown paint).
- Apply the stain evenly with a brush or cloth, then wipe off any excess.
- Allow it to dry completely.
This block will serve as the tree trunk, adding a natural, rustic touch to your project.
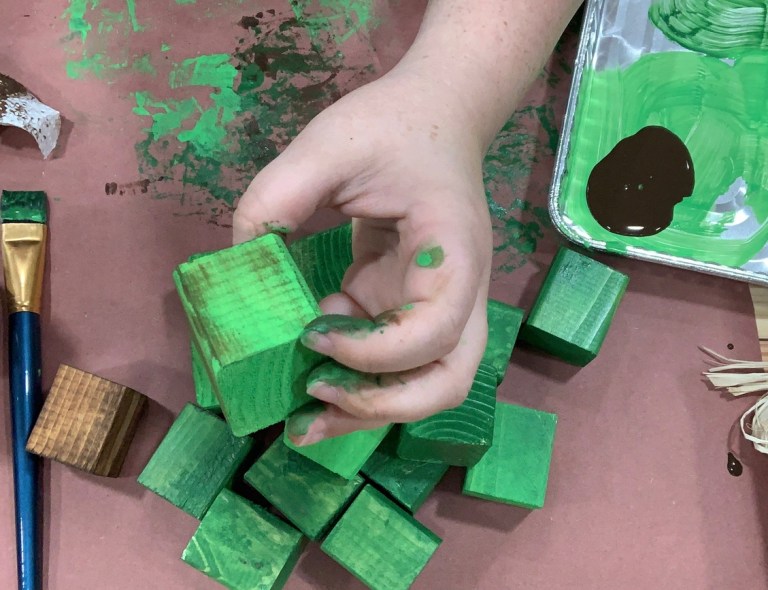
Step 3: Add Dimension and Distress
- Apply Wax for Dimension:
- Lightly brush the Waverly Antique Wax onto each green block.
- This adds depth and a subtle aged effect to the paint.
2. Distress the Blocks:
- Use a sanding sponge to gently sand the edges and surfaces of the blocks.
- Focus on corners and edges to create a weathered, rustic look.
This step gives your tree character and a handmade charm!
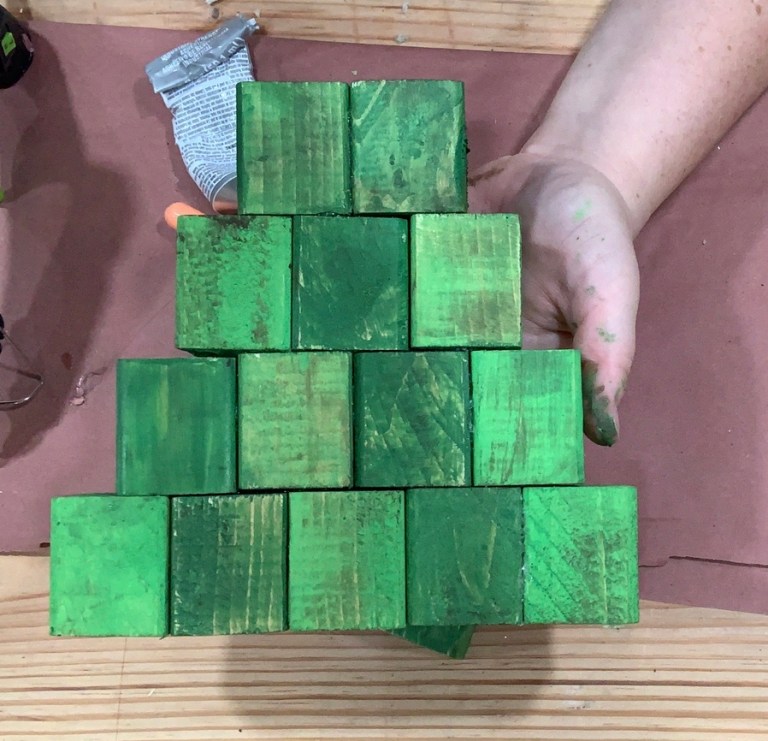
Step 4: Assemble the Tree
- Arrange the Blocks:
- Begin by arranging your blocks in rows:
- Base row: 5 blocks.
- Second row: 4 blocks.
- Continue reducing by one block per row until the top row has a single block.
2. Attach the Rows Together:
- Use E6000 glue for a strong, permanent hold.
- Apply hot glue alongside the E6000 for immediate adhesion while the E6000 sets.
3. Build the Tree:
- Start by gluing the blocks in each row together.
- Once the rows are secure, stack and attach them, alternating the green colors for a layered, textured look.
Let the glue set completely before moving on to the next step to ensure stability.
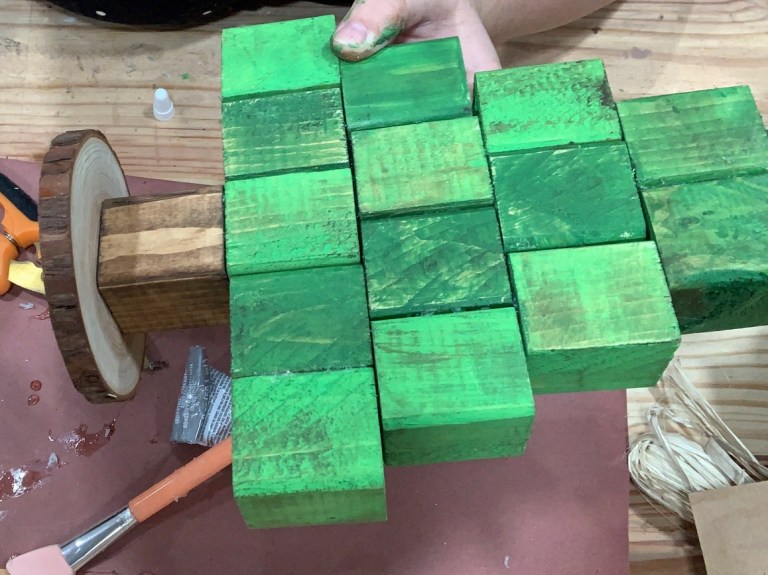
Step 5: Add the Base and Final Touches
Attach the Base
Secure the wood circle to the bottom of the tree using both E6000 glue and hot glue for durability and immediate hold.
Top It Off
- Add a rusty snowflake to the top of the tree as a star or topper.
- Tie a raffia bow below the snowflake for a charming, rustic finish.
Get Creative
- Customize your tree however you like! Some ideas:
- Color Variations: Try painting the blocks white for a snowy, minimalist look.
- Presents: Use extra blocks to create small, painted “gifts” to place around the base.
- Decorations: Add tiny ornaments, twinkling fairy lights, or decorative ribbon for a festive touch.
Let your imagination run wild—the possibilities are truly endless!

I Kept It Simple, But the Creative Possibilities Are Endless!
If you love this DIY Christmas Tree as much as we do, here’s a small favor to ask…
conclusion
This DIY scrap wood block Christmas tree is the perfect way to add a personalized touch to your holiday decor. Whether you keep it simple or get creative with decorations, the possibilities are endless. We hope this project inspires you to bring your own vision to life! If you loved this tree, please share it, pin it for later, or leave a comment with your ideas. We’d love to see how you make it uniquely yours. Happy crafting and Merry Christmas!


